Cranberry Almond Bundt Cake

This post is short and sweet just like this recipe! Isn't it the best when you can utilize the leftovers you have from a meal or a holiday gathering, like this past Thanksgiving and incorporate them into a new dish. It just spices your meals up and allows you to get creative! Well, that is what this recipe and post is all about. I am a huge cranberry fan and I could eat them all the time. Therefore, since I had a large amount cranberries leftover from Thanksgiving, I knew this Cranberry Almond Bundt cake would be the perfect recipe & who doesn't love a beautiful bundt cake!? You MUST check out this recipe and it can also continue to be the perfect dessert for this holiday season! You can find the recipe here!! 

P.S. I subbed whole fat greek yogurt in place of the sour cream to reduce the amount of calories! Its a 1:1 transfer ratio! 

Make sure tag @oliviasobjectsofobsession if you share on social media & follow along on snapchat @oliviajoan21 to see live recipes every Monday! 

Maple-Roasted Hasselback Butternut Squash

Lets just say this is one of the most impressive dishes I've come across and it actually looks much harder than it really is. Oh and with a maple syrup glaze mixture to highlight the beautiful flavors of the butternut squash, this dish will be a reoccurring staple for all of your future thanksgiving meals or week night dinners! This recipe was inspired by Chez LaRae and the recipe can be found here

The best part about this recipe, is that it doesn't require much assistance. Throw it in the oven, pour the glaze on here and there & after 45-55 minutes, its done and ready to serve! 

Make sure to share the love on social media and tag me @oliviasobjectsofobsession 

Butternut Squash + Spinach Ricotta Lasagne

Its mid week and I am in need of a major pick me up or something to get excited about, and this latest recipe including three types of cheese, butternut squash and spinach is the perfect thing. I am so happy I found this recipe from the site, Julia's Album, and even more excited that it turned out this great! This recipe is vegetarian and the perfect thing for these upcoming cold winter days. It is creamy, decadent and flavorful. 

I typically don't eat much dairy, but lately I have been dreaming of everything with butternut squash and because I have been so busy with my last semester of graduate school, this recipe was the perfect choice, because it is actually quite easy to create and makes for the perfect leftover. The reason why this particular lasagna is easy to make, is that it uses already premade pureed butternut squash. Therefore, no need to worry about cutting, scraping and baking the butternut squash in the oven, just mix it together with the required amount of ricotta cheese and you're set! 

I do want to make a point, that when boiling your lasagna noodles, make sure that you add some olive oil to the boiling water, to ensure that the noodles don't stick together. This can happen very easily and typically the noodles will tear into small pieces, which you don't want for a lasagna dish! 

Secondly, I altered this recipe just slightly with the spinach, and instead of leaving the spinach leaves whole, I pureed the sautéed spinach leaves together with the ricotta to combine them together. This made a huge difference and really brought all of the flavors together well. 

This recipe is one you will want to try and when you do, make sure to tag me on Instagram or leave a comment below!! 

Ingredients: 

Butternut Squash Filling: 

  • 2 cups butternut squash puree (about half of squash)
  • 1 cup ricotta cheese
  • 1/2 cup milk (or more, if needed)
  • 1/4 + 1/8 teaspoon salt
  • 1/4 teaspoon nutmeg

Spinach Filling: 

  • 1 cup cooked spinach (8 oz uncooked)
  • 1 cup ricotta cheese
  • 1 cup mozzarella cheese
  • 2 garlic cloves, minced
  • 1/4 teaspoon salt
  • pepper, to taste

Other Ingredients: 

  • 10 oz lasagna noodles, cooked (for gluten free, use Tinkyada brown rice lasagna noodles)
  • 1 and 1/2 cups mozzarella cheese (or more)
  • 1/2 cup Parmesan cheese (on top)
  • Italian seasoning
  • Paprika
  • Basil

Instructions

  1. Preheat oven to 375 F.
  2. For this filling, you will need to have pre-cooked butternut squash puree. Using food processor, combine 2 cups of butternut squash puree with Ricotta cheese, milk, salt and nutmeg. Add more milk if needed (to make the butternut squash filling very creamy). Mix very well, taste and add more salt, if needed.
  3. Sauté the spinach leaves until wilted. Combine spinach, Ricotta cheese, mozzarella, garlic, salt and pepper. Mix, taste, and add more salt and pepper, if needed. (I pureed all of these ingredients together in a food processor). 
  4. Bring a very large pot of water to boil, and cook lasagna noodles according to package instructions. Add 1 Tbsp of olive oil to the water. Rinse in cold water, drain. Using knife, trim noodles to fit your baking dish (if necessary). 
  5. Prepare a baking dish - I used a casserole dish 11 inches x 8.5 inches x 3 inches deep. Grease the lasagna dish lightly with olive oil spray. Spread 1/3 of butternut squash filling on the bottom of the dish. Sprinkle lightly with mozzarella cheese. Top with cooked lasagna noodles without overlapping (I used 3 noodles).
  6. Spread half of spinach filling over the noodles. Top lightly with Mozzarella cheese. Top with cooked noodles.
  7. Spread another layer (1/3) of butternut squash mixture, then sprinkle lightly with Mozzarella cheese. Top with cooked noodles.
  8. Spread the remaining half of spinach filling over the noodles. Top lightly with Mozzarella cheese. Top with the final layer of cooked noodles.
  9. Spread a generous amount of butternut squash filling (the remaining 1/3) over this final layer of noodles, sprinkle with grated Parmesan and remaining mozzarella cheese (about 1/2 cup of mozzarella). Generously sprinkle the cheese with Italian seasoning, paprika, basil. 
  10. Cover the baking dish with foil and bake for 30 min. Remove foil and bake additional 10 minutes.


Halloween Marshmallow Pops

Happy Halloween!! 

I just had the most wonderful weekend, spent in Chicago, celebrating Halloween with some awesome people & friends!

I am back in home & so excited, because I found the cutest recipe to continue celebrating Halloween. Today I am making Halloween Marshmallow Broomstick pops! The best part about these pops, is that they are easy, convenient and can be made any way you want, you just need to get creative! 

I love celebrating all holidays and getting into the spirit, and these marshmallow pops are such a great way to do just that. They are incredibly versatile, you can change up the decorations or colors of the sprinkles to suit the specific holiday you are celebrating. When I was young, I would always be in the kitchen baking cookies, frosting and decorating desserts and hanging up holiday decor to get my family and I into the spirit! 

For this recipe, I made the pops completely free of dairy, therefore they are vegan, so everyone can enjoy. The marshmallows I used are Dandies, all natural vanilla marshmallows and the chocolate is dairy free as well. I used two types of chocolate, the first was a gnash made of melted coconut oil, maple syrup and cocoa powder and the second was melted diary free chocolate chips. 

Once you have dipped the marshmallows into the chocolate mixtures, put the sprinkles on while it is still melted, so they stick and stay on. Then put the pops into the refrigerator for at least 20 minutes to harden. 

I can't wait to share these with you & am excited for you all to try for yourselves. Come say hi on Instagram and tag me @oliviasobjectsofobsession 

Ingredients: 

2 Tbsp of cocoa powder
1/4 cup of melted coconut oil
1/4 c of maple syrup
Sprinkles
1/4 cup chopped pecans

1 cup of diary free chocolate chips
1-2 bags of marshmallow (V)
cake pop sticks

Directions: 

1. Take 1-2 bags of marshmallows and insert the sticks into them
2.Melt the chocolate chips on 30 second intervals, until it is thoroughly melted and creamy. 
3. For the second chocolate mixture, melt the coconut oil, and add the cocoa powder and maple syrup to it and mix together thoroughly. 
4. Dip the marshmallow sticks into either chocolate mixture
5. Roll the wet chocolate into the sprinkles, pecans or any topping of your choice

Zucchini Bread

Today is going to be a good day, because I successfully made one of the best zucchini breads ever. Well, it was the only time I've made zucchini bread, but it turned out perfectly! I found the recipe from Domestically Blissful, and it couldn't be any easier to make. There's under 10 ingredients and most of those ingredients are all thrown together and combined into one bowl! Talk about an easy clean up!! 

First, the most time consuming thing you will have to do is grate the zucchinis. I only used two whole zucchini and that was more than enough for the required two cups for this recipe. Make sure that you are grating the zucchini and not spiraling or chopping it, because you want it to mix easily into the batter. 

Once you've finished grating the zucchini, mix the sour cream, sugar and three eggs in a bowl until creamy. You will slowly add in all of the remaining ingredients, starting with the zucchini first, then flour, etc. Make sure all of the ingredients are combined very well and then... you're done! What? That's it? Yes, like I said, this is one of the easiest recipes ever and incredible tasty too! 

Transfer your batter from your mixing bowl to a bread loaf pan, which has either been lined with parchment paper or well greased. Throw into the oven at 325 degree for an hour. I left my zucchini bread in the oven for slightly over an hour to make sure it was baked completely through. 

If you know me, I love trying new things and taking on new challenges, so I I couldn't believe how amazing this bread was after trying it, with all of that zucchini throughout it. This bread is chewy, moist, dense and incredibly flavorful. Oh and look and the beautiful toasted brown color to it! Its definitely a perfect item for Fall. 

Again, you know the drill, share some love on social media with me if you make it and don't forget to tag me @oliviasobjectsofobsession

Triple Chocolate Banana Bread (V + GF)

Recently, I've been on a baking kick, looking for the best, most delectable recipes, while still being conscious of the sugar and ingredients added into them. This past week, I came across this vegan & gluten-free Triple Chocolate Banana Bread Recipe from the website Dear Kitchen and knew this would be the perfect thing to share with you all. Especially with the upcoming holiday season.  

This banana bread was so moist, because of the ripened bananas added to it, which also gave the banana bread some its sweetness as well. But, the best part about this banana bread is that it only uses natural sweetener, like maple syrup to sweeten it up. The gnash topping encapsulates this delicious treat and bumps up the flavor and sweetness as well. I adapted this recipe slightly and added a bit of maple syrup to the gnash and sprinkled with toasted hazelnuts opposed to blueberries. But, if you want to be creative, most anything can be added to the top: coconut flakes, blueberries, raspberries, nuts, etc. 

I love seeing the pictures and recipes you post, so make sure to tag your social media posts with #tripleo and @oliviasobjectsofobsession 

Ingredients: 

  1. 2 cups (500 ml) oat milk
  2. 2 tsp apple cider vinegar
  3. 3 tbsp maple syrup
  4. 1/4 cup (60 ml) coconut oil
  5. 3 ripe bananas, mashed
  6. 1 cup all purpose flour
  7. 2/3 cup (60 g) cocoa powder
  8. 1 tsp baking soda
  9. 2 tsp baking powder
  10. 1/2 tsp salt
  11. 4 tsp cinnamon
  12. 100 g dark chocolate chips 

Ganache: 

  1. 100 g dark chocolate
  2. 1/4 cup (60 ml) coconut oil

Directions: 

  1. Preheat the oven to 350°F (175°C). Line a bread rectangular baking dish (34x12 cm, 2 litres) with baking paper.
  2. Mix together oat milk and vinegar and leave for a few minutes. In a larger bowl whisk together maple syrup and coconut oil. Add the milk and vinegar mixture and mashed bananas. Whisk to combine.
  3. Sift together the flour, cocoa powder, salt, baking soda, baking powder and cinnamon. Slowly add to the wet ingredients while whisking on low speed or with hand. Fold in the coconut chips and transfer to baking dish. Bake for 1 hour.
  4. Leave it to cool completely. On a double boiler melt together the chocolate and coconut oil. Pour over the bread and leave to cool down and harden.


    Baked Sweet Potato + Almond Butter + Banana + Chia Seeds

    I know what you're thinking, sweet potato with bananas and almond butter? Before you think any further, stop and give it a try!! I found this recipe from the amazing site Ambitious Kitchen and this recipe is seriously to die for. I would have never thought about combining these ingredients together, but the creaminess of the almond butter blends and melts perfectly into the hot sweet potato and the banana adds that perfect hint of sweetness while the chia seeds add the perfect crunch! 

    I have had a crazy last couple of weeks and today was no exception, so I was looking for something incredible easy and healthy to eat and take on the go with me to school. This recipe was the perfect thing and is jam-packed with nutrients and with all its vitamins and fiber, the sweet potato keeps you feeling full for hours. To read more about the amazing health benefits of sweet potatoes read here

    Side Note: sweet potatoes produce collagen which helps aid in maintaining the elasticity of the skin, giving you that youthful looking appearance. 

    The best part about this recipe is that it is relatively inexpensive, quick and requires only four ingredients, which most likely are already within your pantry or kitchen! So don't waste anymore time, and give these baked sweet potatoes a try! 

    Make sure to like us on Instagram @oliviasobjectsofobsession and Facebook, here. Also, share some love and tag myself and @ambitiouskitchen when posting a picture!! 


    Fall Fashion Favorites

    Thick knits, high necks, wraps & scarves is everything happening this Fall 2016 season, and also a few things I can never get enough of. 


    High Neck Sweaters

    IMG_8246.jpg

    Wearing: High neck thick knit sweater, olive green ripped cropped jeans

    Both of these items can be found at PRIMP Boutique

    When I heard that high neck dresses & sweaters (or turtle necks) as they were once called, were making a comeback, I was a but skeptical, but since trying them on, I haven't been able to stop purchasing them & sure enough they are now to be seen everywhere. 


    Thick Wool Blend-Wrap

    Wearing: Black & White Wool-Blend Wrap, black high neck sleeveless dress, UO Black slip-on sneakers

    These clothing items can be found at PRIMP Boutique 

    I love this black and white wool wrap, with its exaggerated size and versatility. Its the perfect item to transition from Fall into Winter, over something like this simple high neck black dress to a long sleeve shirt, jeans & boots in the Winter months. 


    Duel Suede + Knit Zip-up Vest

    Wearing: Cream Duel Suede + Knit Vest, Cropped black jeans, UO Slip-on black sneakers

    The vest can be found at PRIMP Boutique 

    One of my favorite ways to style an outfit is to throw over a statement piece like this vest. This vest is all about the subtle cream color, making it a perfect transitional piece in between seasons. I absolutely love the two different materials used from front to back and the comfortability of this piece. 


    Blanket Scarves

    Wearing: thick wrap flannel blanket scarf

    This item can be found most places, or here

    We all know that scarves are not new to fashion, but this extra large flannel blanket scarf is the perfect accent piece for your upcoming Fall wardrobe this season. The best part about it, it can be worn multiple ways to ensure your outfits never look the same. 


    Happy Fall! 

    The best part about all of these items is that they are affordable and locally sold. This Fall shoot was done in collaboration with the amazing PRIMP Boutique.  Make sure to check them out at their multiple locations around Minnesota. 


    Butternut Squash & Quinoa Salad + Pumpkin Seeds

    Theres no doubt that I've been on a pumpkin kick lately and this salad is just another item to add to the list. But, this salad gets even better as it is packed with incredible nutrients and super foods such as butternut squash, quinoa & pumpkin seeds, and it is gluten free & guilt free! Click to see the recipe details here or below

    There are so many ways in which you can incorporate pumpkin seeds into dishes as well as butternut squash and quinoa. They are such versatile foods that can be used within a side dish or for this instance the main course. I have been eating this light and filling salad all week & its the perfect thing to tide over my hunger and keep me feeling full for hours. Lastly, since most of the items within this dish are savory, the hints of sweetness from the dried cranberries are the perfect thing to liven this salad up. 

    I also am obsessed with how colorful this dish is and it will make the perfect item to bring to your upcoming Fall get togethers or a Thanksgiving side dish as well. This dish takes no longer than 30 minutes total and that is mainly due to the required time for the quinoa to cook. 

    I can't wait for all of you to enjoy & when you do, because I know you won't be able to resist, share and spread some love with me on Instagram @oliviasobjectsofobsession or on my Facebook page, here

    Ingredients: 

    1. 3 cups butternut squash, cubed
    2. 1 cup uncooked quinoa
    3. 2 cups water
    4. 1/3 cup dried cranberries
    5. 1 red onion (or whatever your preference) 
    6. 3 Tbsp roasted pumpkin seeds
    7. Salt and pepper
      Vinegarette Dressing: 
    8. 1/2 cup olive oil 
    9. 1/4 cup balsamic vinegar 
    10. 1 tsp honey
    11. 1 tsp dijon mustard
    12. 1 tsp minced garlic 

    Directions: 

    1. Preheat the oven to 400 degrees
    2. In a large bowl, place the cubed butternut squash. Season with olive oil and salt and pepper and place into the oven until soft. (20-25 minutes). 
    3. While squash is roasting, place the quinoa on the stovetop for 15 minutes to cook, until water has absorbed. Bring to a boil and then reduce down to a simmer. 
    4. Once squash and quinoa have finished cooking, let the quinoa and butternut squash cool completely and combine squash, quinoa, dried cranberries, red onion, pumpkin seeds and vinaigrette with salt and pepper. 
    5. Chill in fridge. 
    6. Enjoy! 

    Top 5 Fall Pumpkin Seed Recipes

    Since I've been in the mood for everything Pumpkin lately and was cooking up a storm in the kitchen with all recipes involving pumpkin seeds, I wanted to do a quick post about my Top 5 pumpkin seed recipes. They are so versatile and can be used in so many various ways, I searched and narrowed down my top 5 picks and wanted to share them with you all! 
     

    1. Seasoned & Roasted Pumpkin Seeds: I love the whole idea of carving your own pumpkin and using the seeds inside, seasoning and roasting them yourself! Personally, I love seasoning the seeds with either cinnamon and sugar or something more zesty like onion and garlic powder. I found some great options here for roasting your own pumpkin seeds.  
    2. Pumpkin Seed Granola - Of course, since I just made a Pumpkin Maple Pecan Granola for Motivation Monday, this is at the top of my list! It is  not only incredible easy to make and the perfect snack, it also just takes like Fall. Check out my recent post for the recipe, here.

    3. Butternut Squash & Quinoa Salad + Pumpkin Seeds - Like I said, I am definitely drooling         over all things pumpkin or pumpkin seeds and this is another fantastic recipe! It is extremely healthy with super food quinoa, filled with protein, essential amino acids and its gluten free as well as with bits of sweet and savory throughout. You can find the recipe, here

    4. Pumpkin Seed Pesto - Ok, now I am just trying to find a way to incorporate pumpkin seeds into anything, but isn't this a great spin on a pesto? I think it sounds amazing and can't wait to try! I found the recipe here, and the best part, its healthy and its vegan! 

    5. Almond Pumpkin Seed Butter - Last, but definitely not least, this pumpkin seed butter with honey and cinnamon sounds absolutely amazing and I can't wait to eat it with all of the upcoming Fall cookies, scones, toast, and just everything! I found the recipe here, and hope you guys love it as much as I do! 

    There you go, five different ways to utilize pumpkin seeds this Fall! Make sure to tag me on Instagram and share some love @oliviasobjectsofobsession 

    Skin Care Favorites Fall 2016

    Its finally Fall and for this beauty post, I am focusing on my recent skin care obsessions that I have been using lately and highly recommend for Fall as the air will be getting colder and drier, and it is important to keep your skin hydrated and taken care of during the winter months.

    1. Dead Sea Mud Mask - The first skin care product that I am obsessed with is this Dead Sea Mud Mask from Stella & Grace.  I have now used it a few times and have been thrilled with the outcome every time. The mask is very rich and moisturizing and since you only need to leave it on for 5 minutes, its incredibly convenient as well. This mask leaves your skin feeling refreshed, incredibly soft and reduces pore appearance and redness. Also, it is made with all natural ingredients and helps detoxify impurities from the skin. I highly recommend. Make sure to buy this product and use code: TRIPLEO20 and receive 20% off your purchase. 

    2.  Ponds Cold Cream Cleanser - Move over make-up remover wipes, this is the best thing you'll find to help with that hard to take off makeup. It removes all of your makeup while moisturizing simultaneously and when you're done, wipe off with a damp rag. Its cheap and easily and you can find it here

    3. Rituals Shower Scrub - There aren't enough good things that I can say about all of the Ritual products in general. From the high quality packaging and ingredients to the scents used, this body and facial scrub both gently remove the dead skin on your face and body leaving you with a radiant glow and hydrating feeling. Check out the product here and the whole site in general. I have been using it for years now and always love the outcome. 

    4. TULA - Recently, I have been using this Hydrating Day & Night Cream from TULA and I am obsessed. The best part about this cream, is that its very concentrated and made from high quality ingredients and especially is cruelty free. I have sensitive skin and this hydrating cream is lightweight enough and has probiotics in it to ensure any skin feels nourished. I am loving it. Check out the products here

    5. Simple Face Wash - If you're like me, you love to find a deal, especially when it comes to beauty products. This Simple Face Wash is a perfect and inexpensive face wash to use. Its lightweight, foamy and doesn't leave your skin feeling oily or dry after using it. Its sold at most drug stores and you can also find it here

    6.  Anti-Wrinkle + Energizing Eye Masks - Did you have a long night last night, feeling a little sleepy and can't wake up or have some dark under eye circles or puffiness? Well, I've found the answer to all of these issues. These Grace & Stella under eye masks are so incredible, I wish I could wear them around all day...but that would be silly, right? These cute, little gold strips also reduce the appearance of under eye circles and are made with collagen and minerals to bring back the elasticity of skin and youthful appearance. I am seriously obsessed with this product and you MUST try them. Visit the website here & use my code TRIPLEO20 and receive 20% off your purchase.  

    Pumpkin Maple Pecan Granola (GF)

    Since its officially Fall, I have seriously been craving anything to do with Pumpkin. Pumpkin spice, pumpkin seeds, pumpkin pie, pumpkin patches...pretty much anything that involves pumpkins! Therefore, this week for our Motivation Monday recipe, I have decided to focus on an easy, homemade Pumpkin Maple Pecan granola. It not only has roasted pumpkin seeds, but also pumpkin puree in it. 

    This recipe is so easy, it takes only about 30 minutes and 25 of those are in the oven! It also only uses a handful of ingredients and since its homemade it isn't overloaded with sweetness and extra sugary ingredients. It tastes like Fall on a spoon and a burst of flavors in your mouth. Its crunchy, not too sweet, light, pumpkin-ey, nutty and all around amazing! I found this incredible recipe here, so make sure to check it out, on how to make. 
     

    Make sure to note, that even if you do not believe the granola is done in the oven, remember that it continues to crisp when it is cooling.  

    This granola is the perfect thing to put on your yogurt or to bring to work with you as a snack and since it is filled with healthy fats, proteins and fiber, it will keep you feeling full and satisfied throughout the day. 

    If you do end up making this amazing granola, and how could you not, make sure to tag me on Instagram @oliviasobjectsofobsession and @minimalistbaker where I found the recipe!! 

    Happy Fall! 

    Pacific North West + Canada Travel Diary

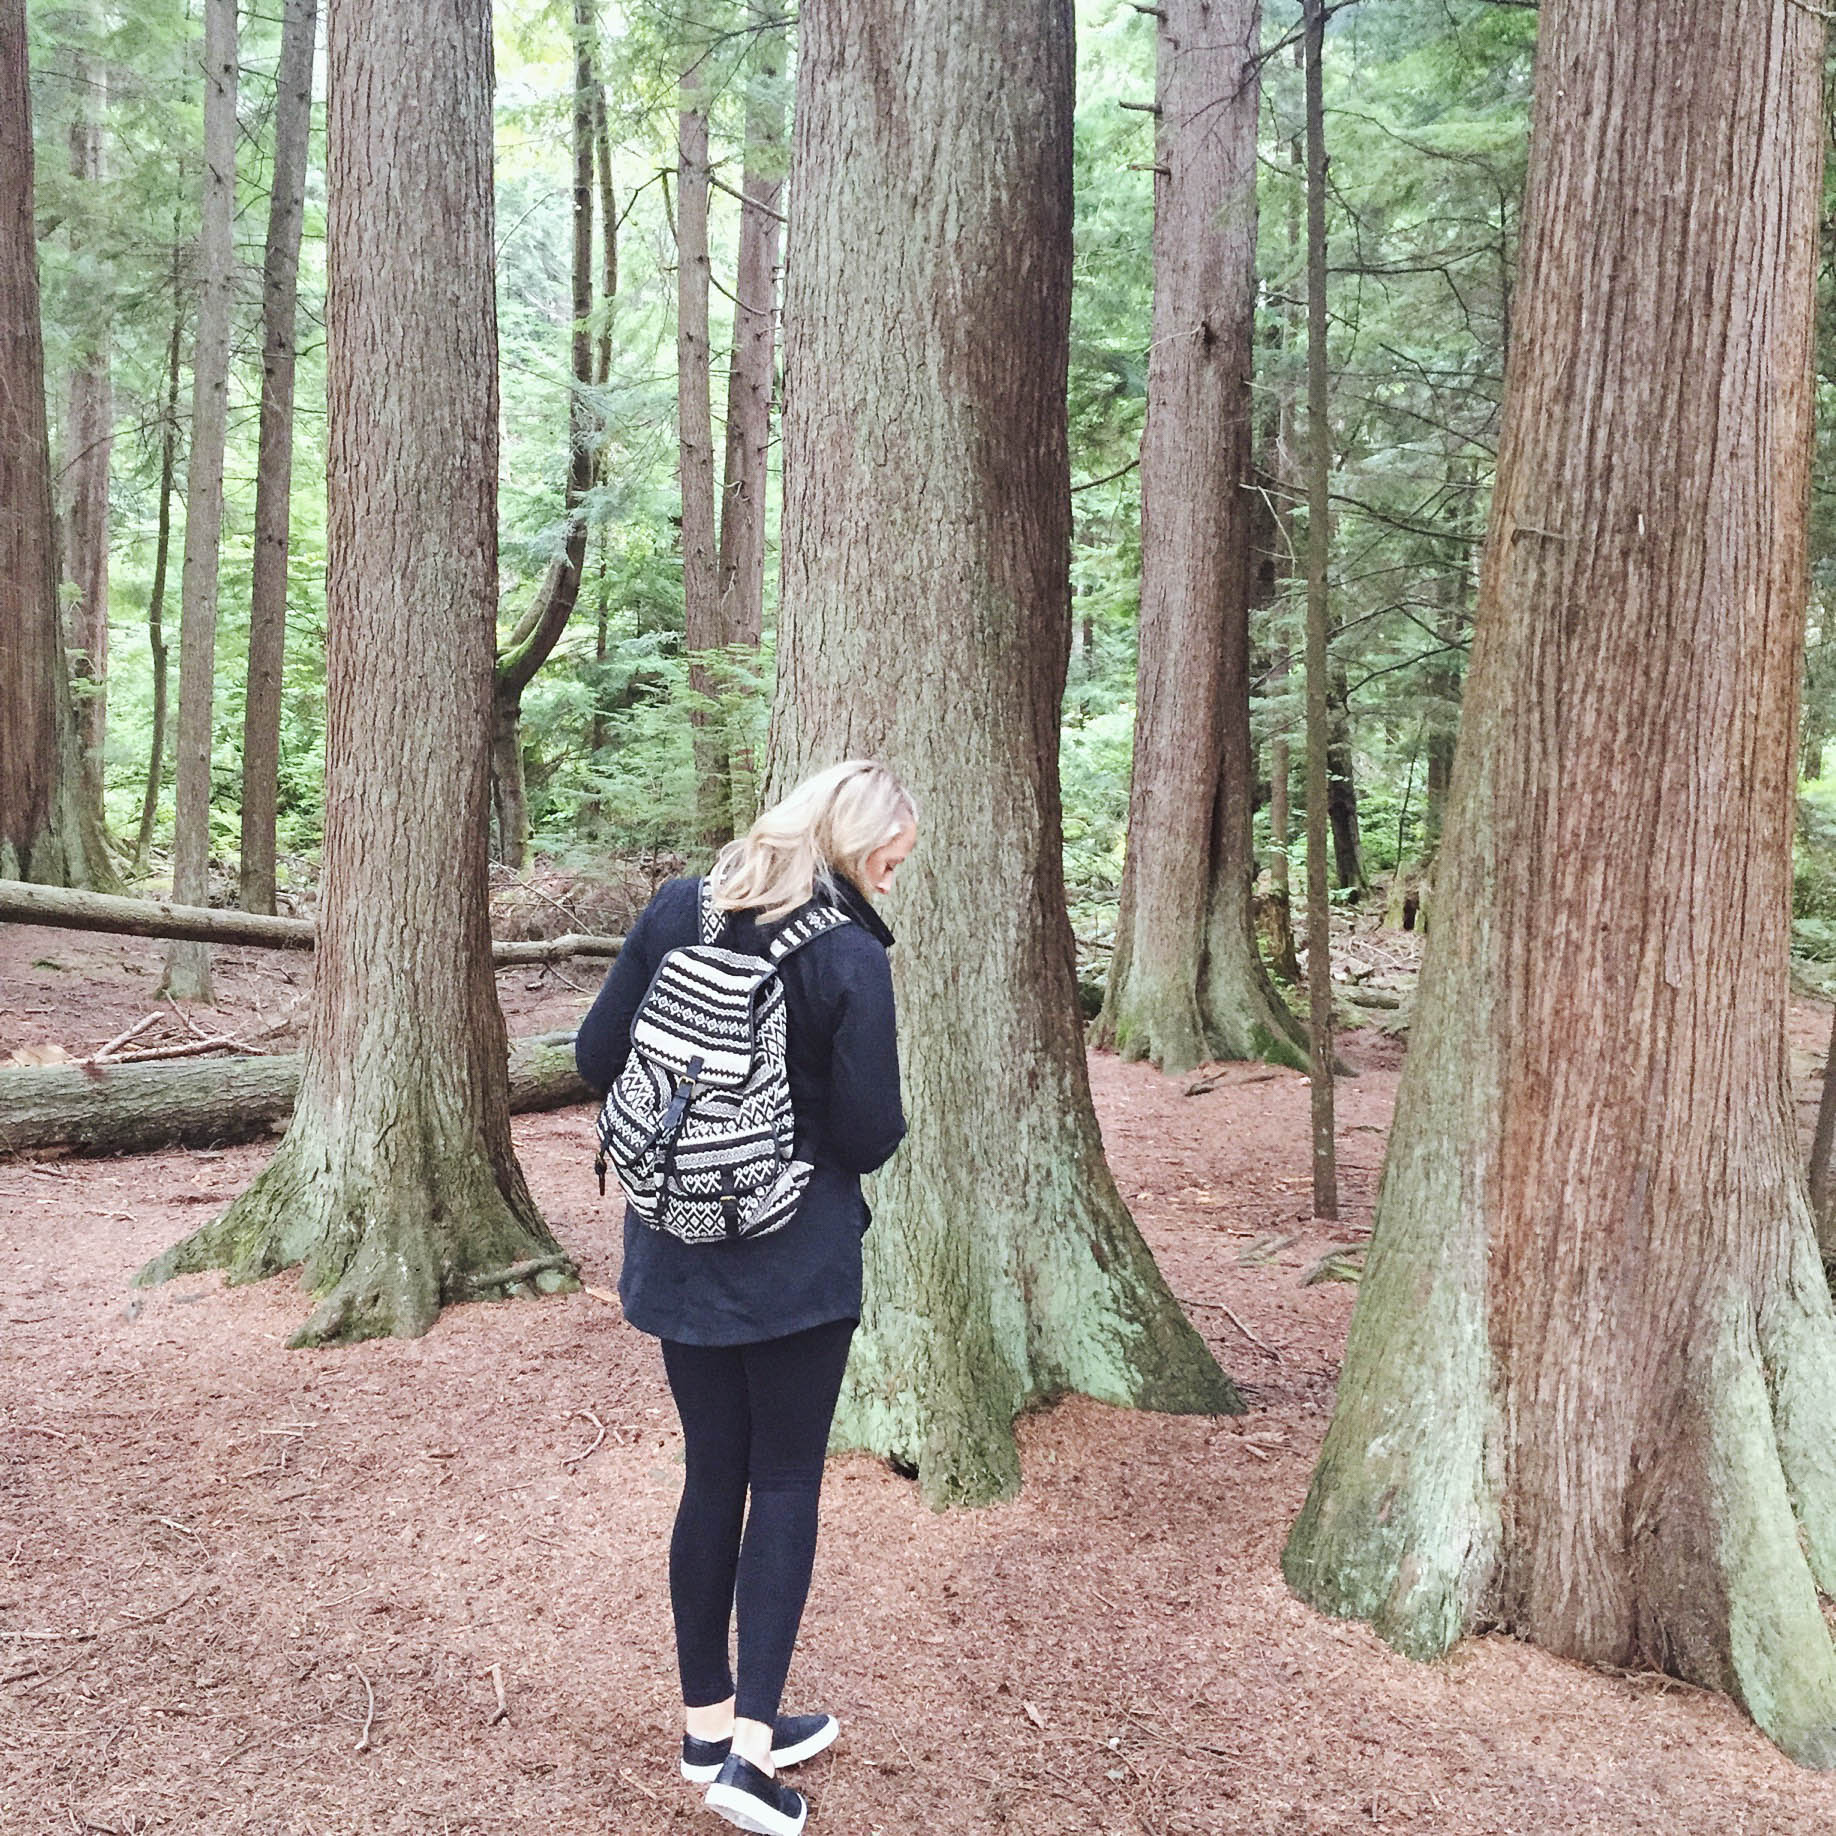
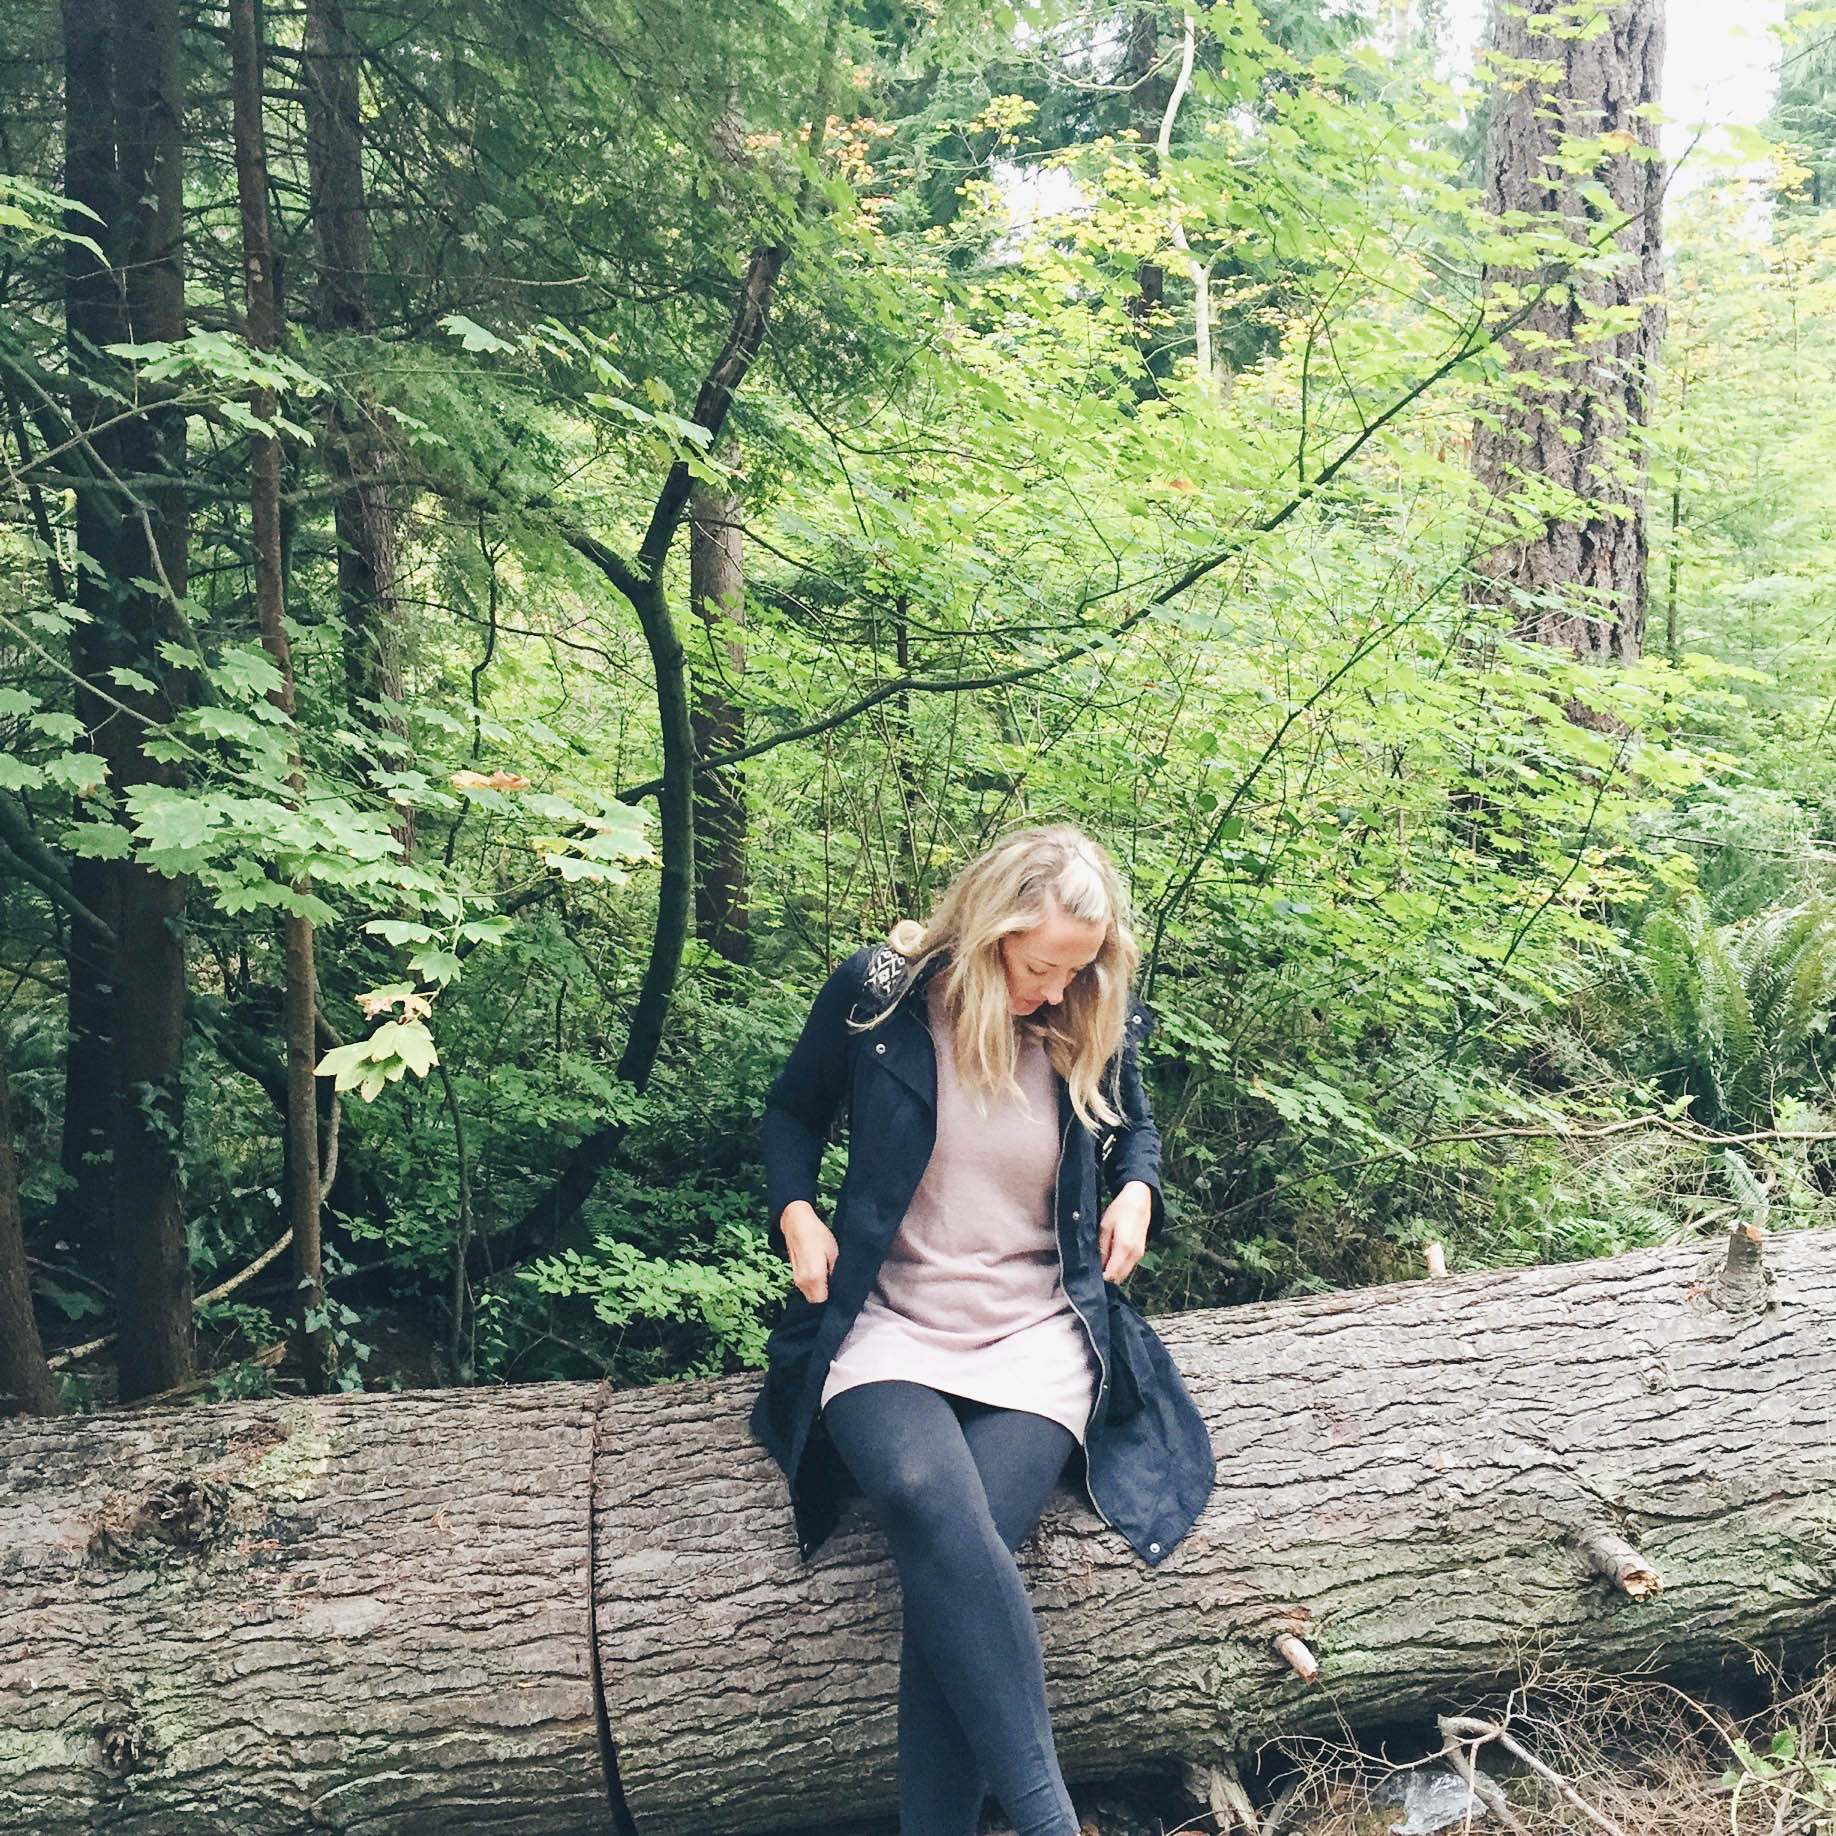
    It has been a whirlwind of a summer, with school, weddings, parties, etc, I was eager for the start of Fall. You know that peaceful feeling that comes over you when summer is coming to a close and you're looking forward to winding down and excited to throw on that comfy sweater and leggings and have a relaxing weekend... well that is exactly how I was feeling and this trip to the Pacific Northwest & Canada was the perfect answer. Sometimes a trip with no agenda is the way to go and I think there is no place better than this area to just put your to do list aside and get lost and explore. 

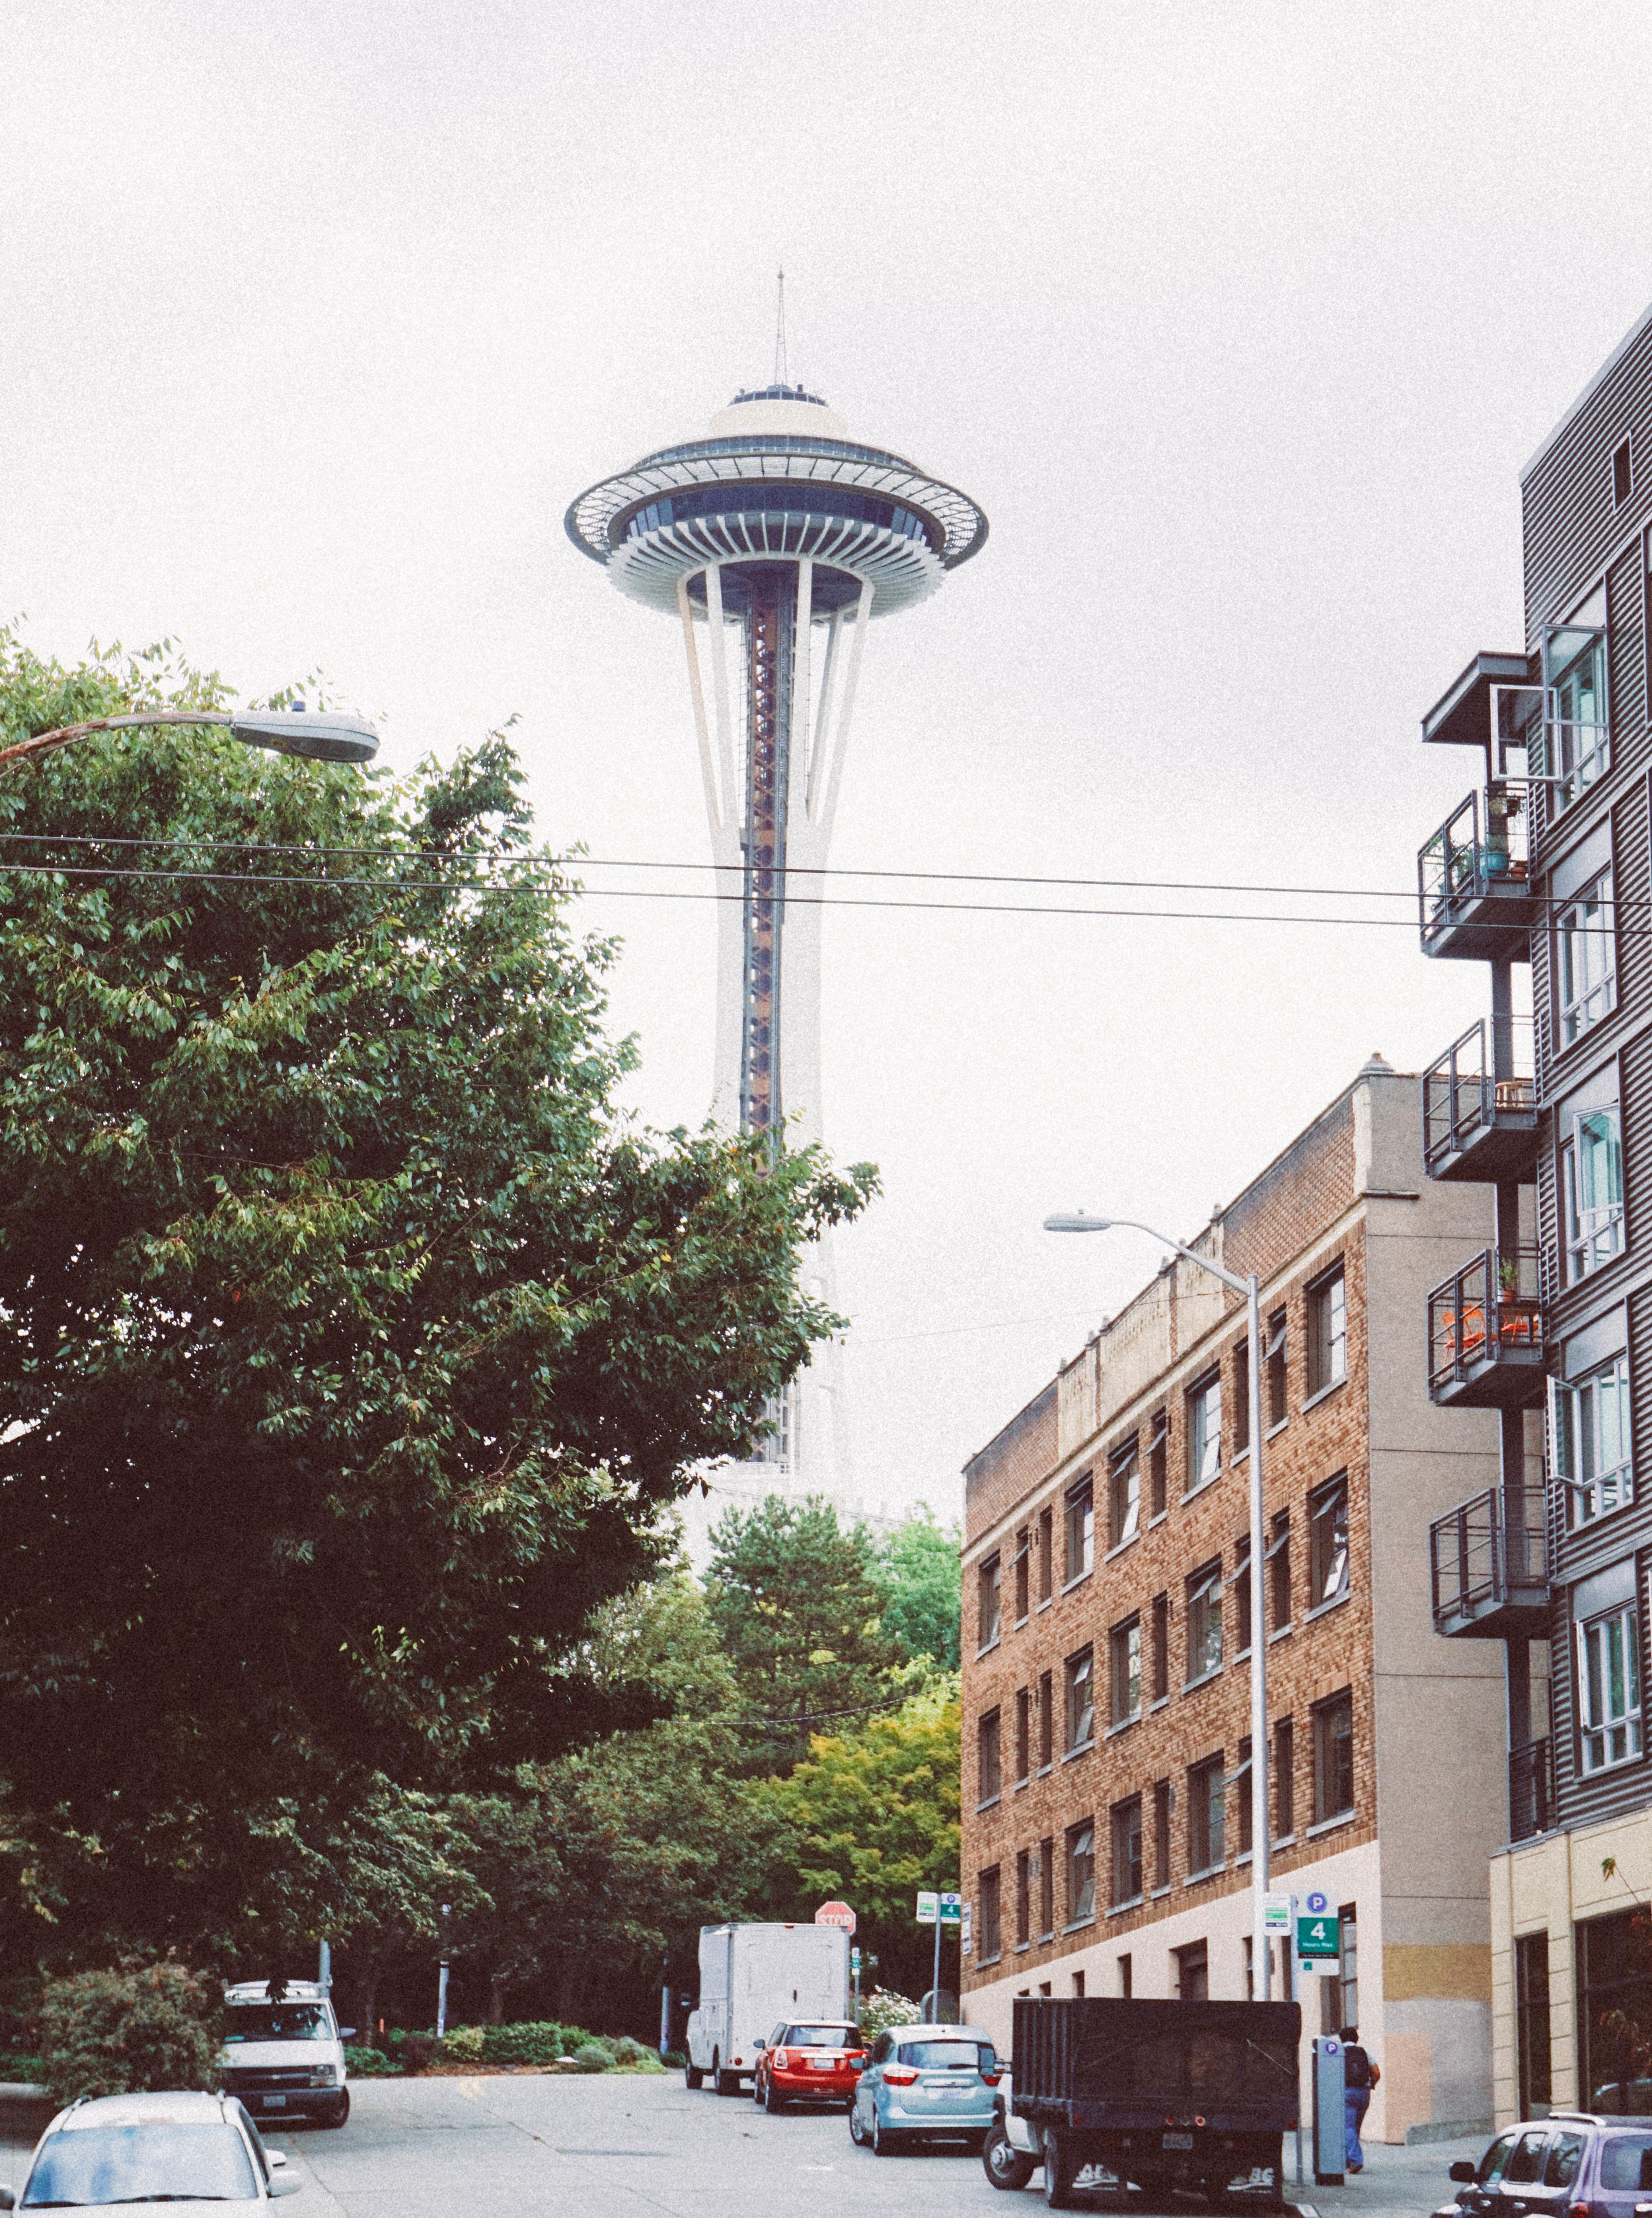
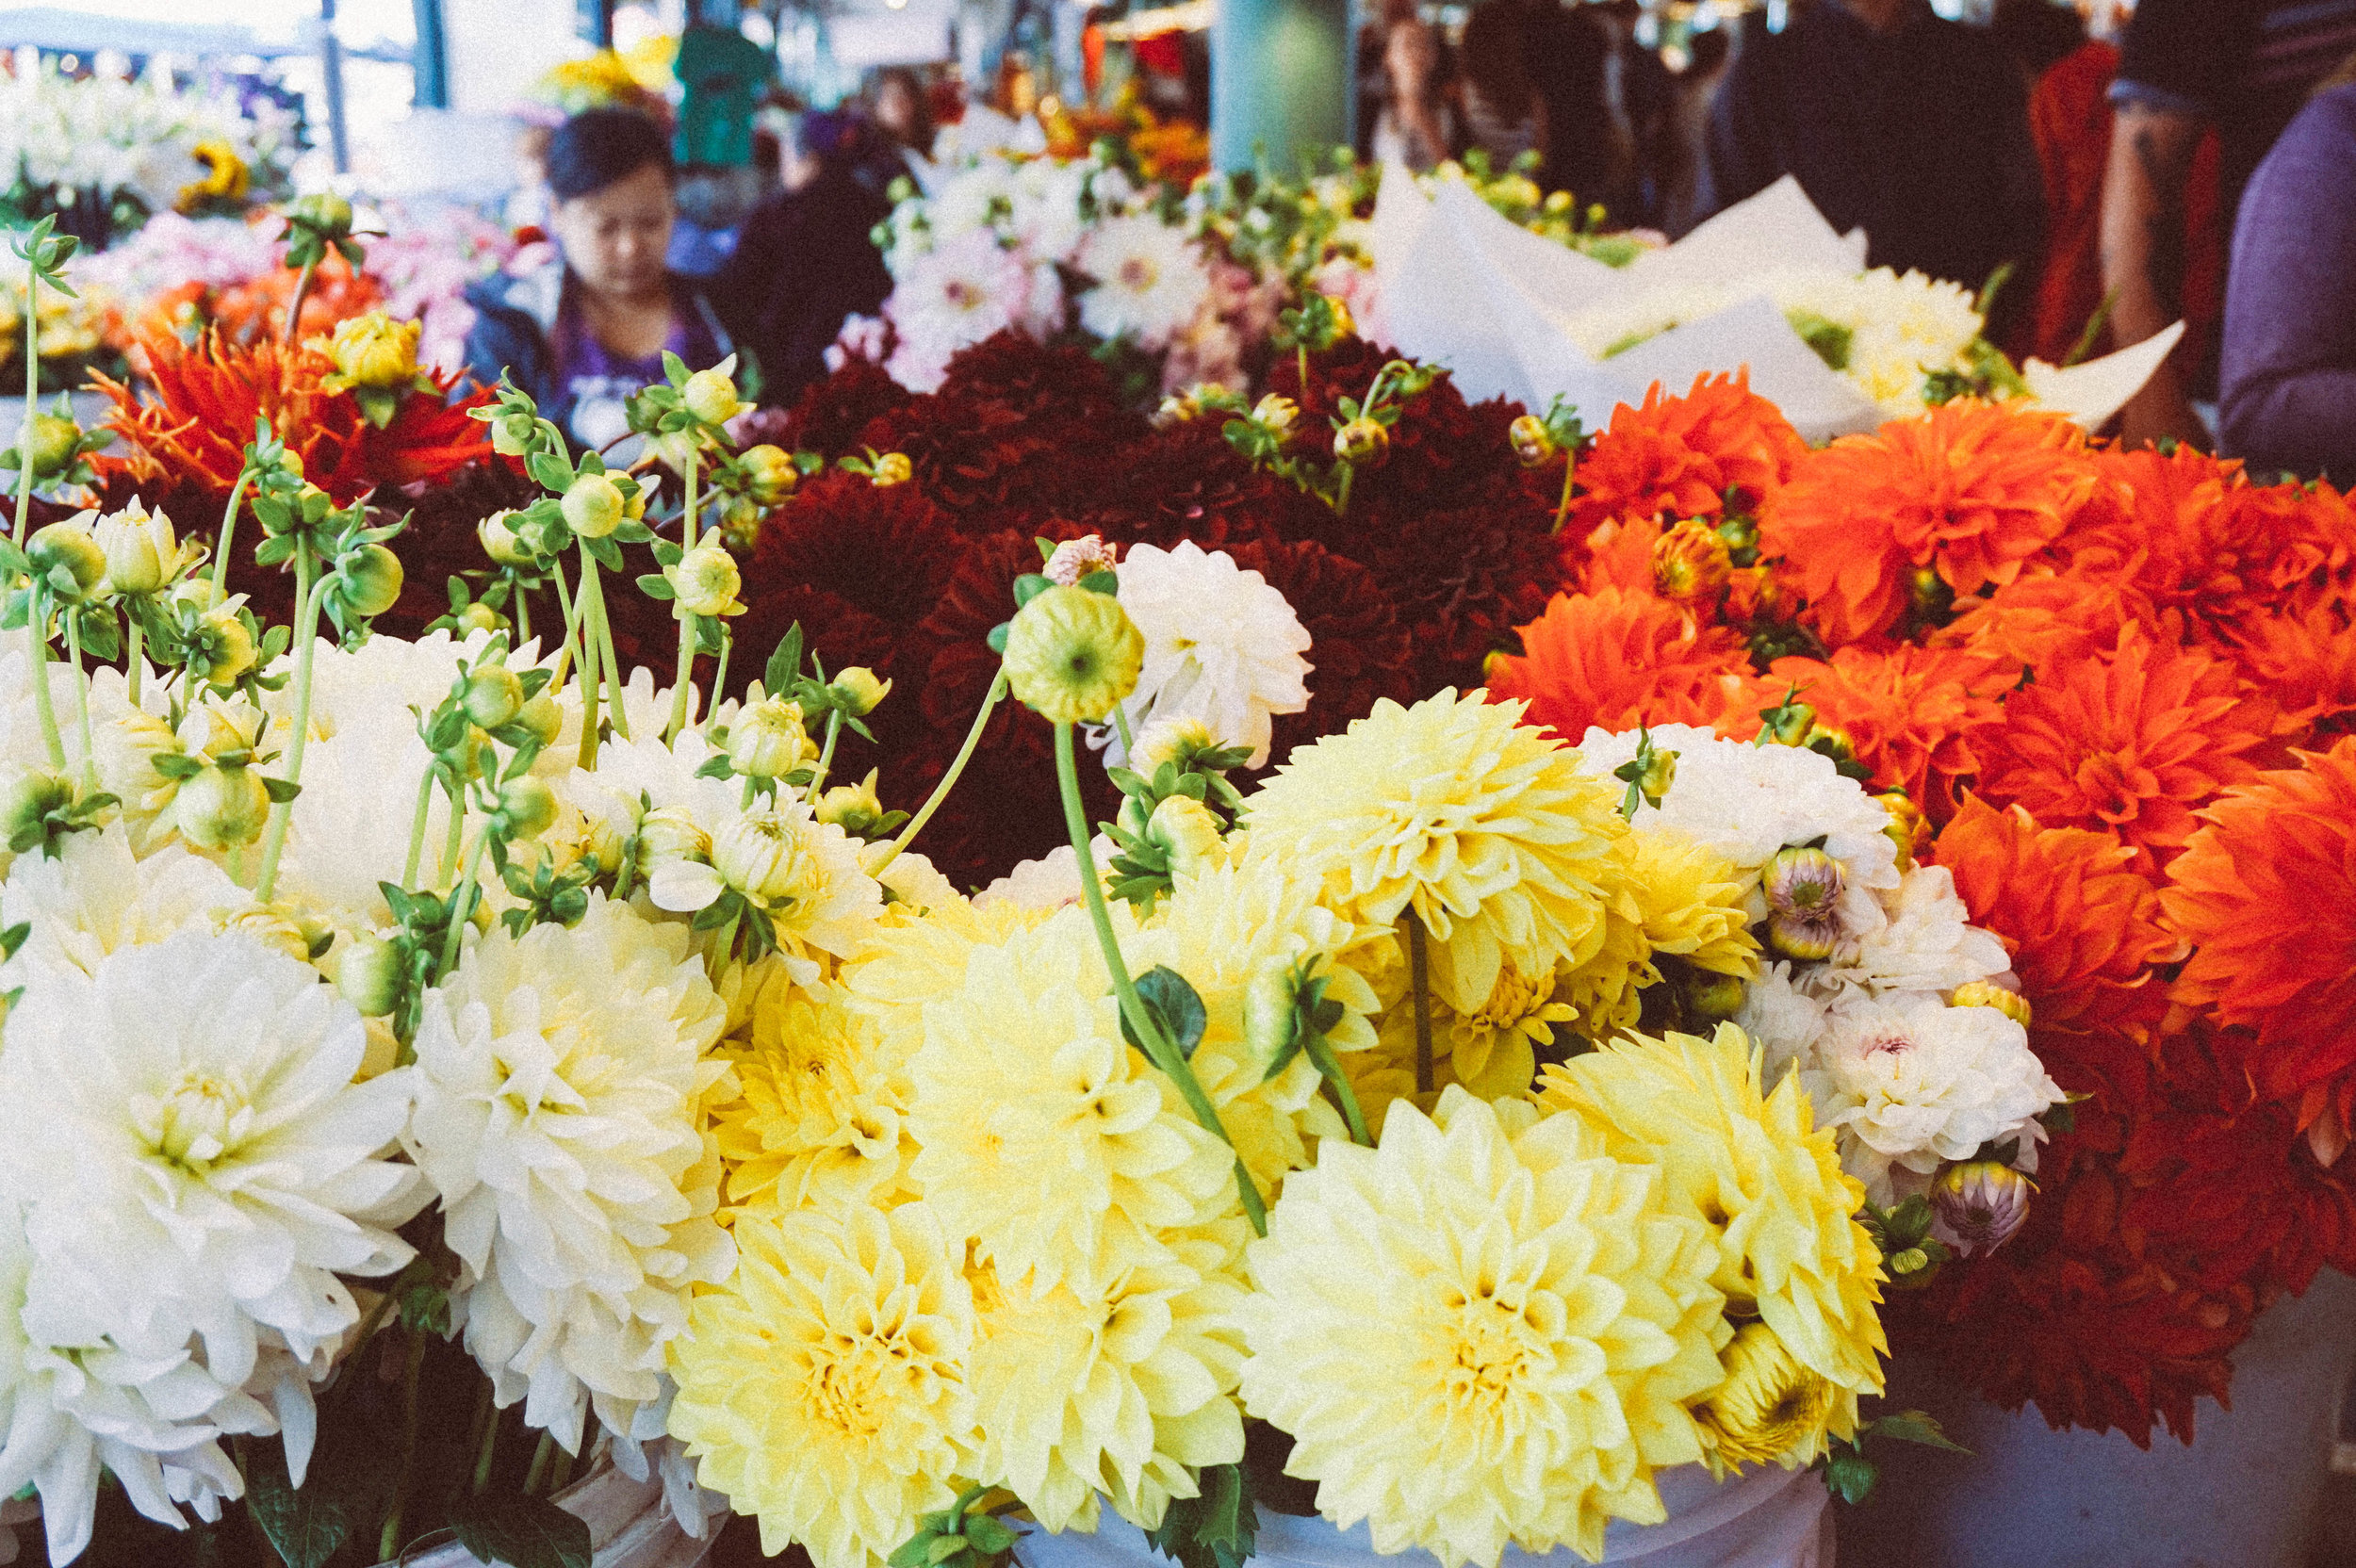
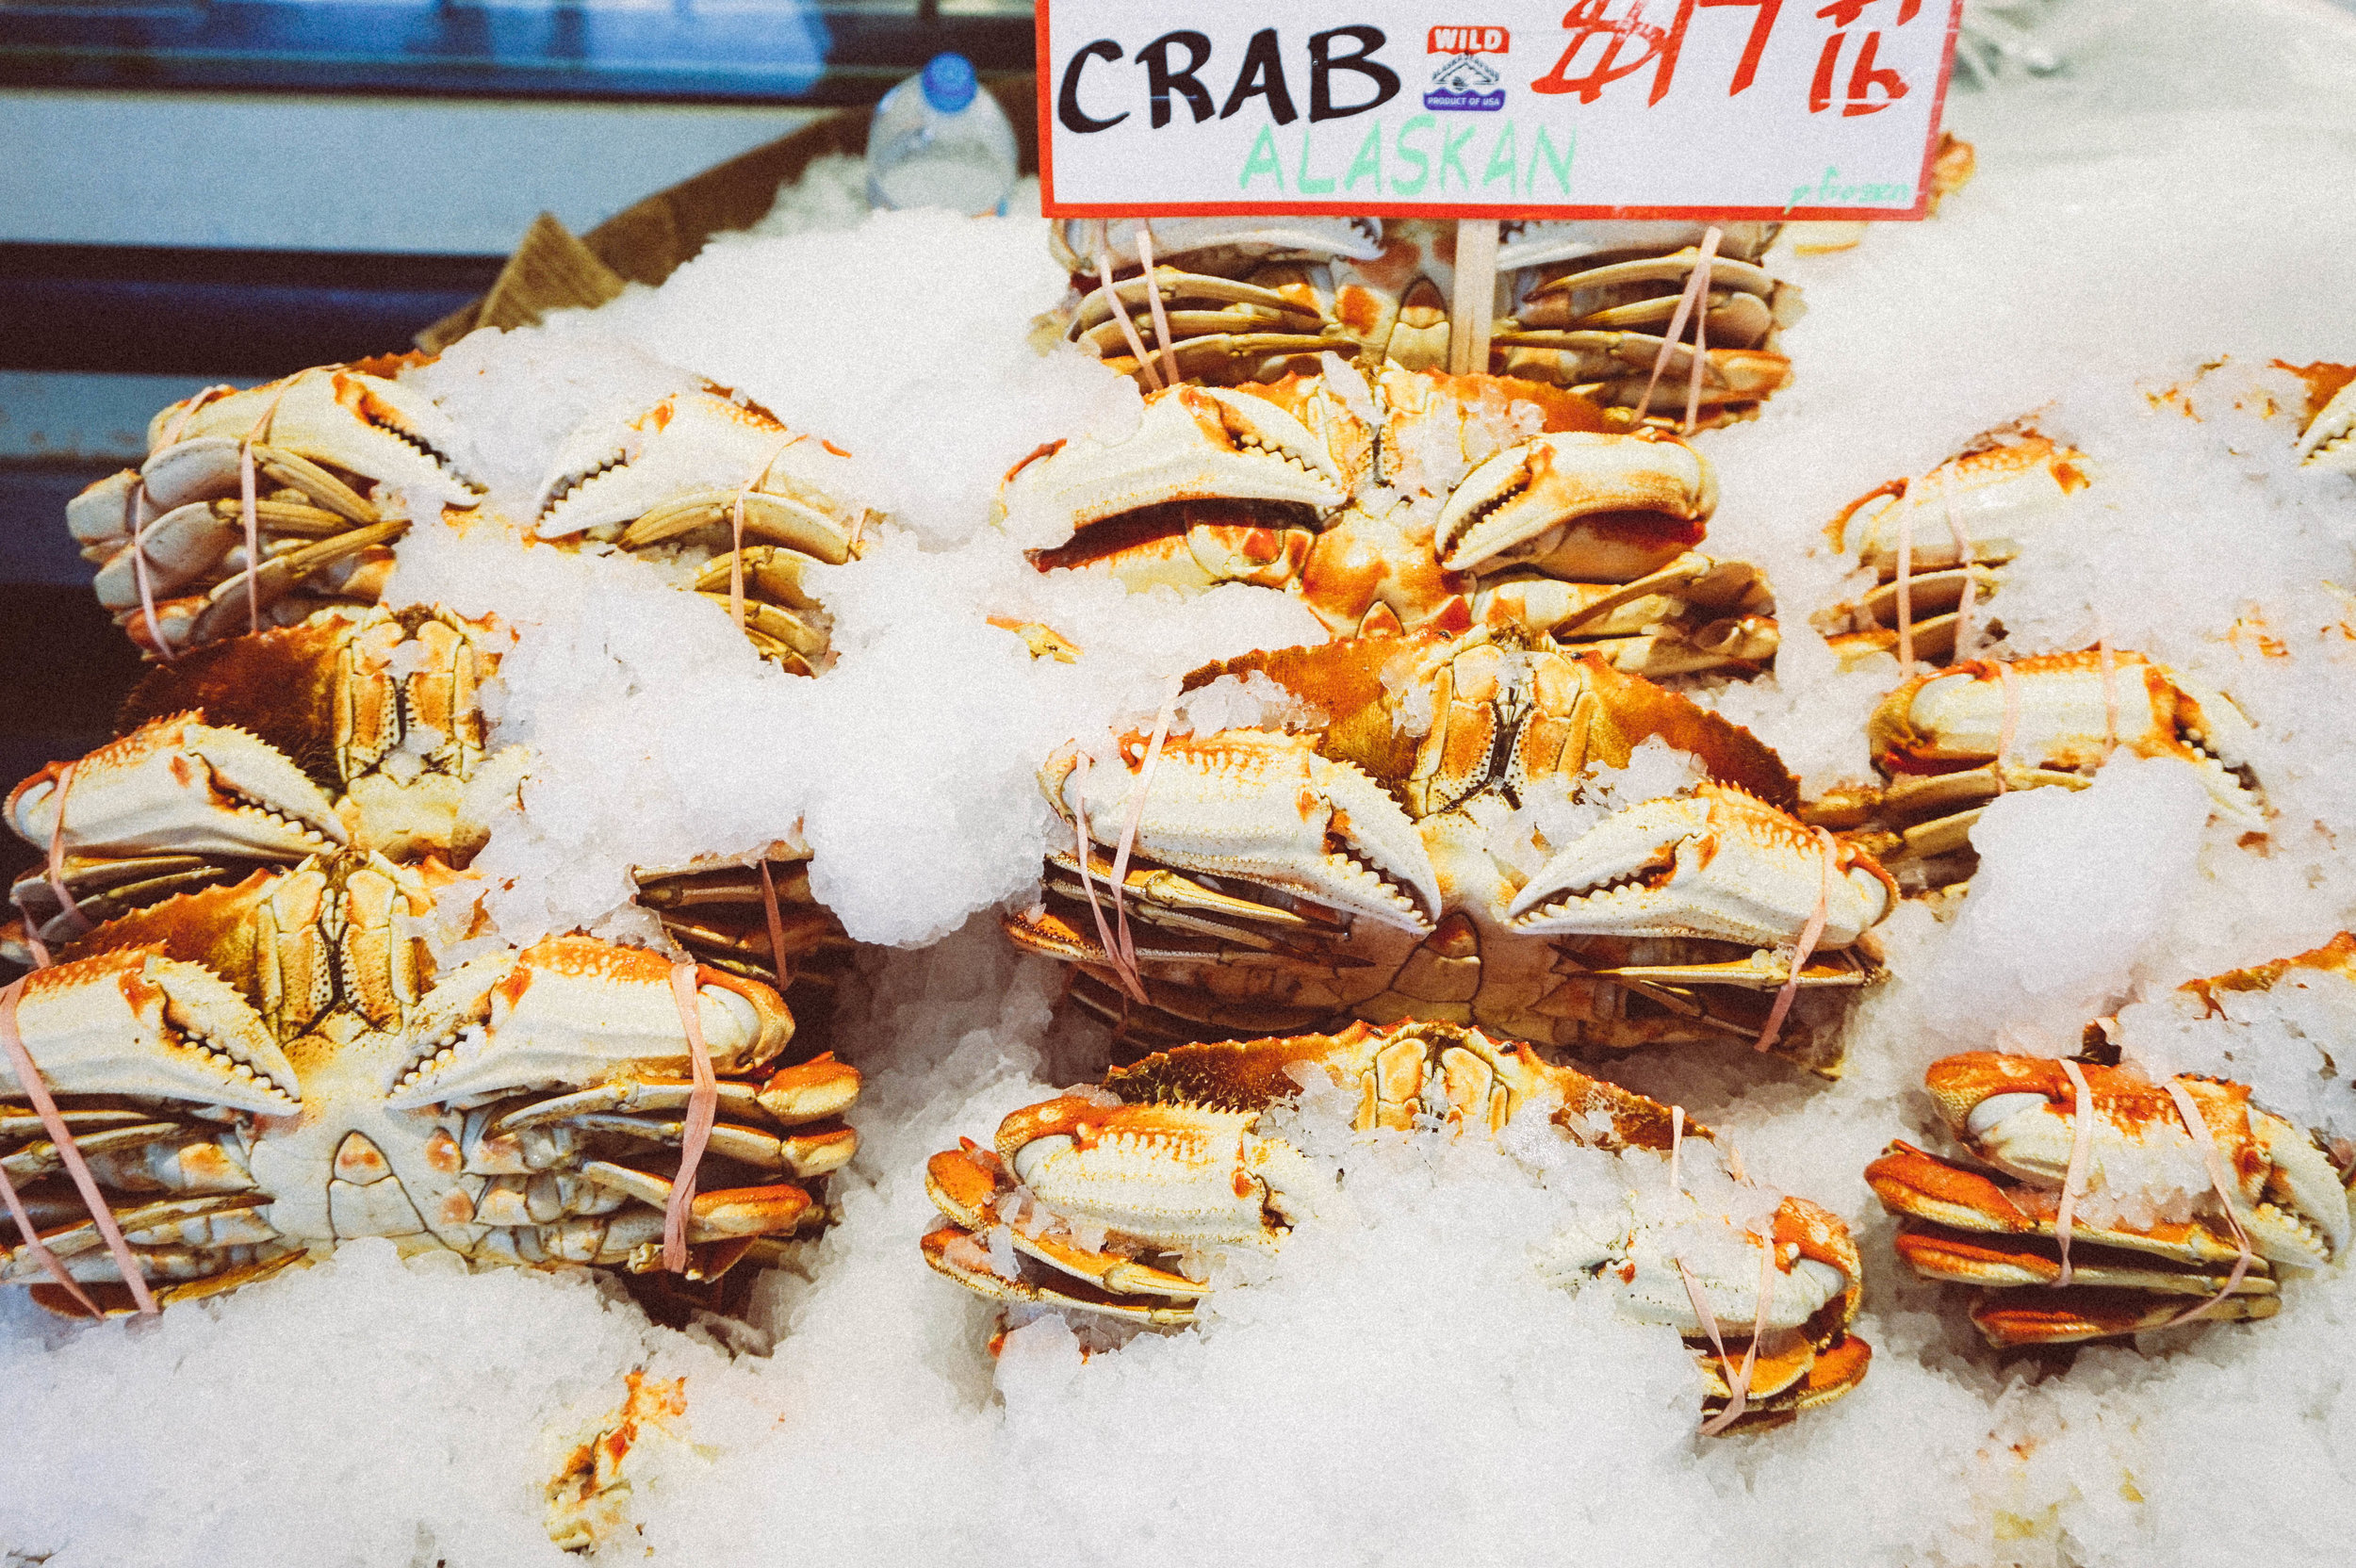
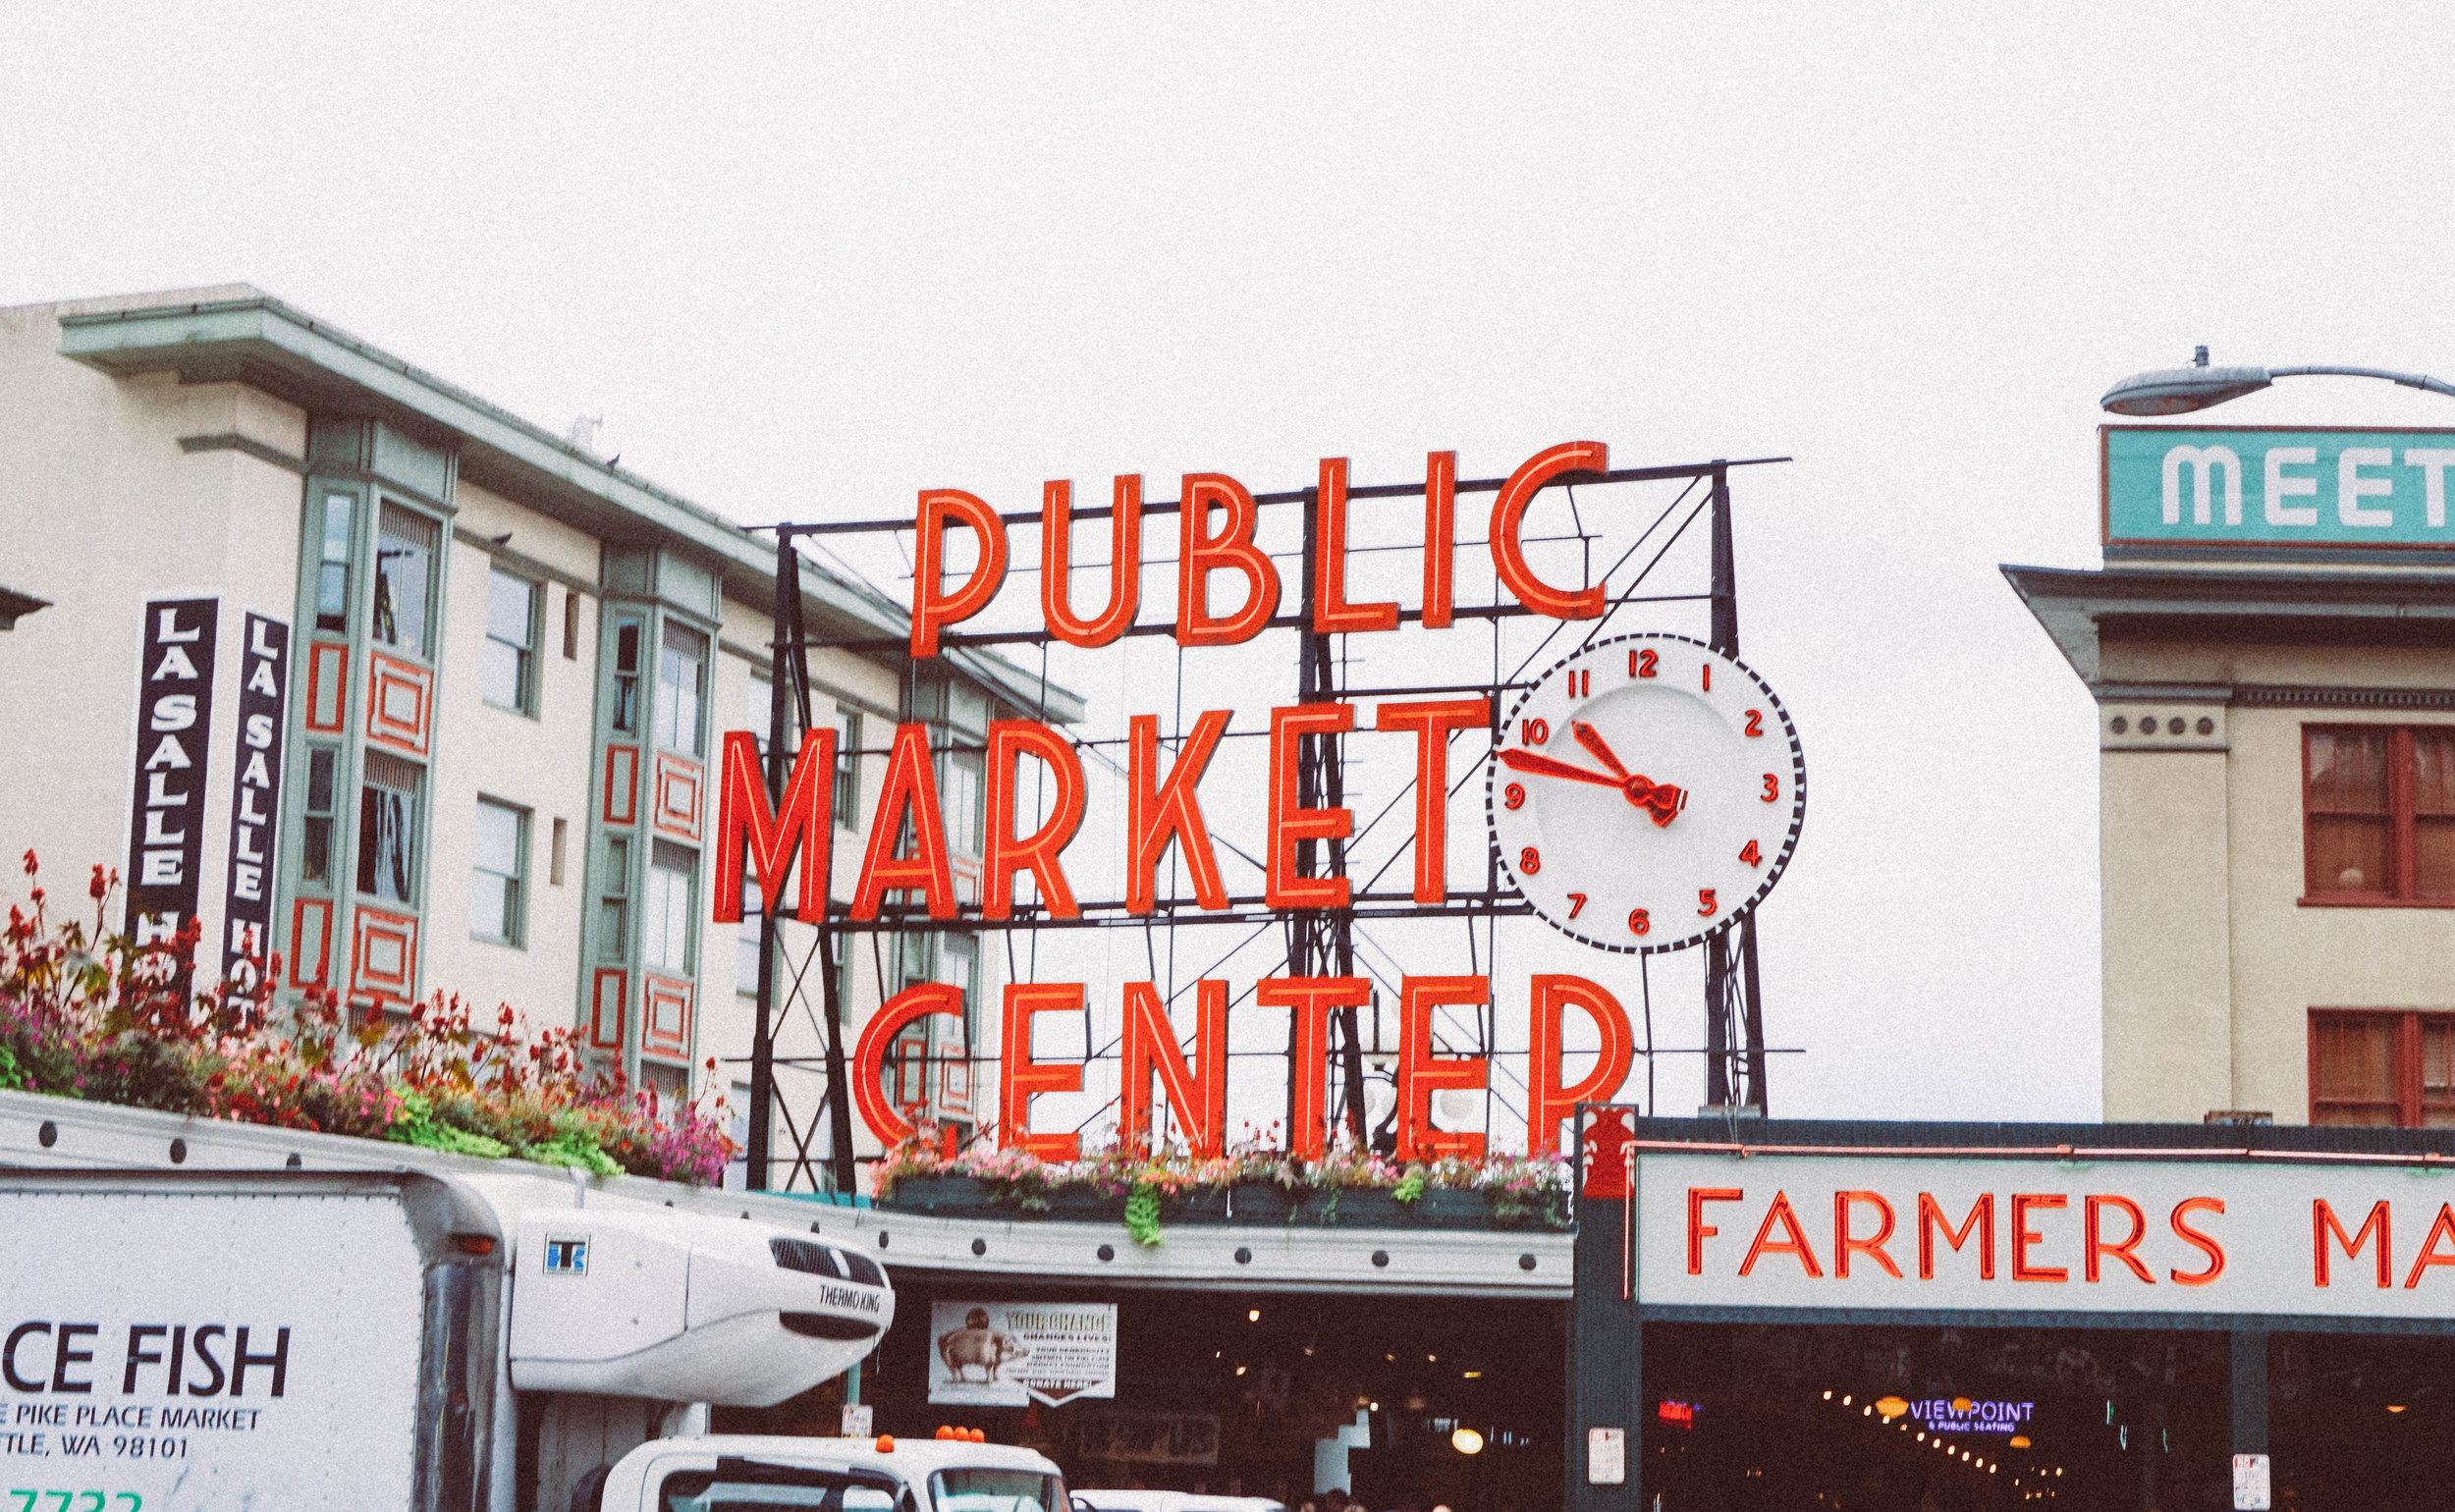
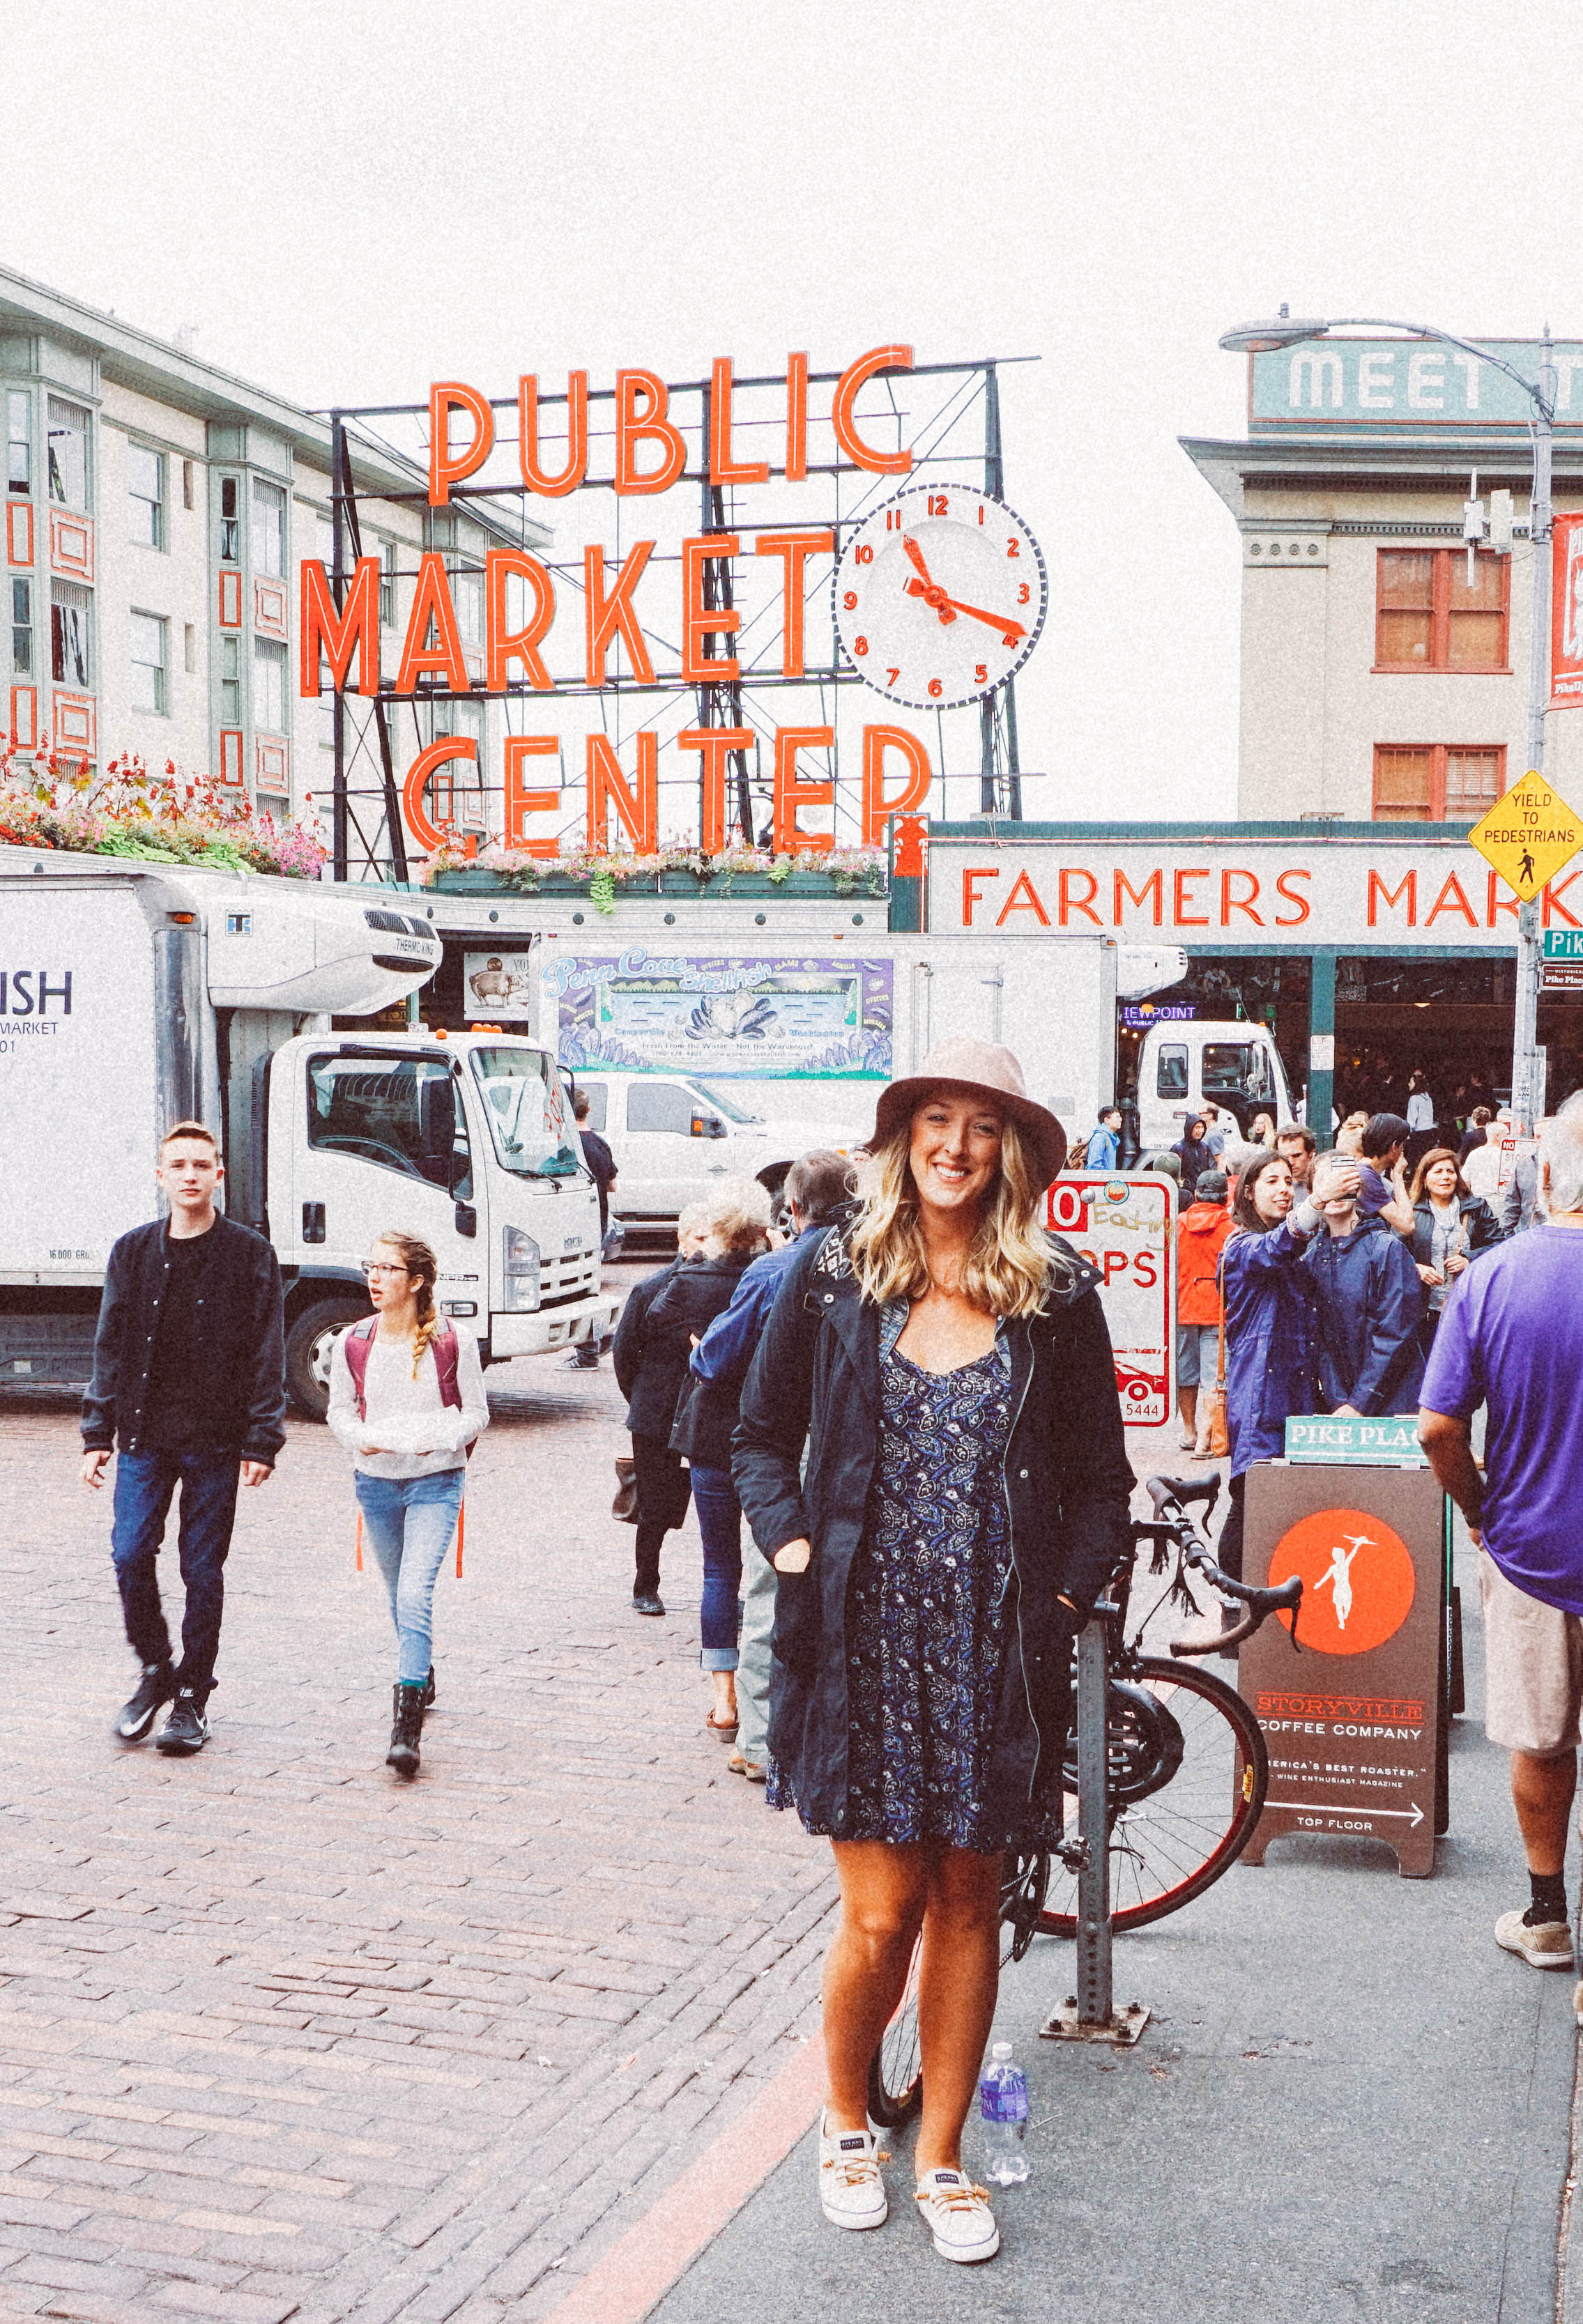
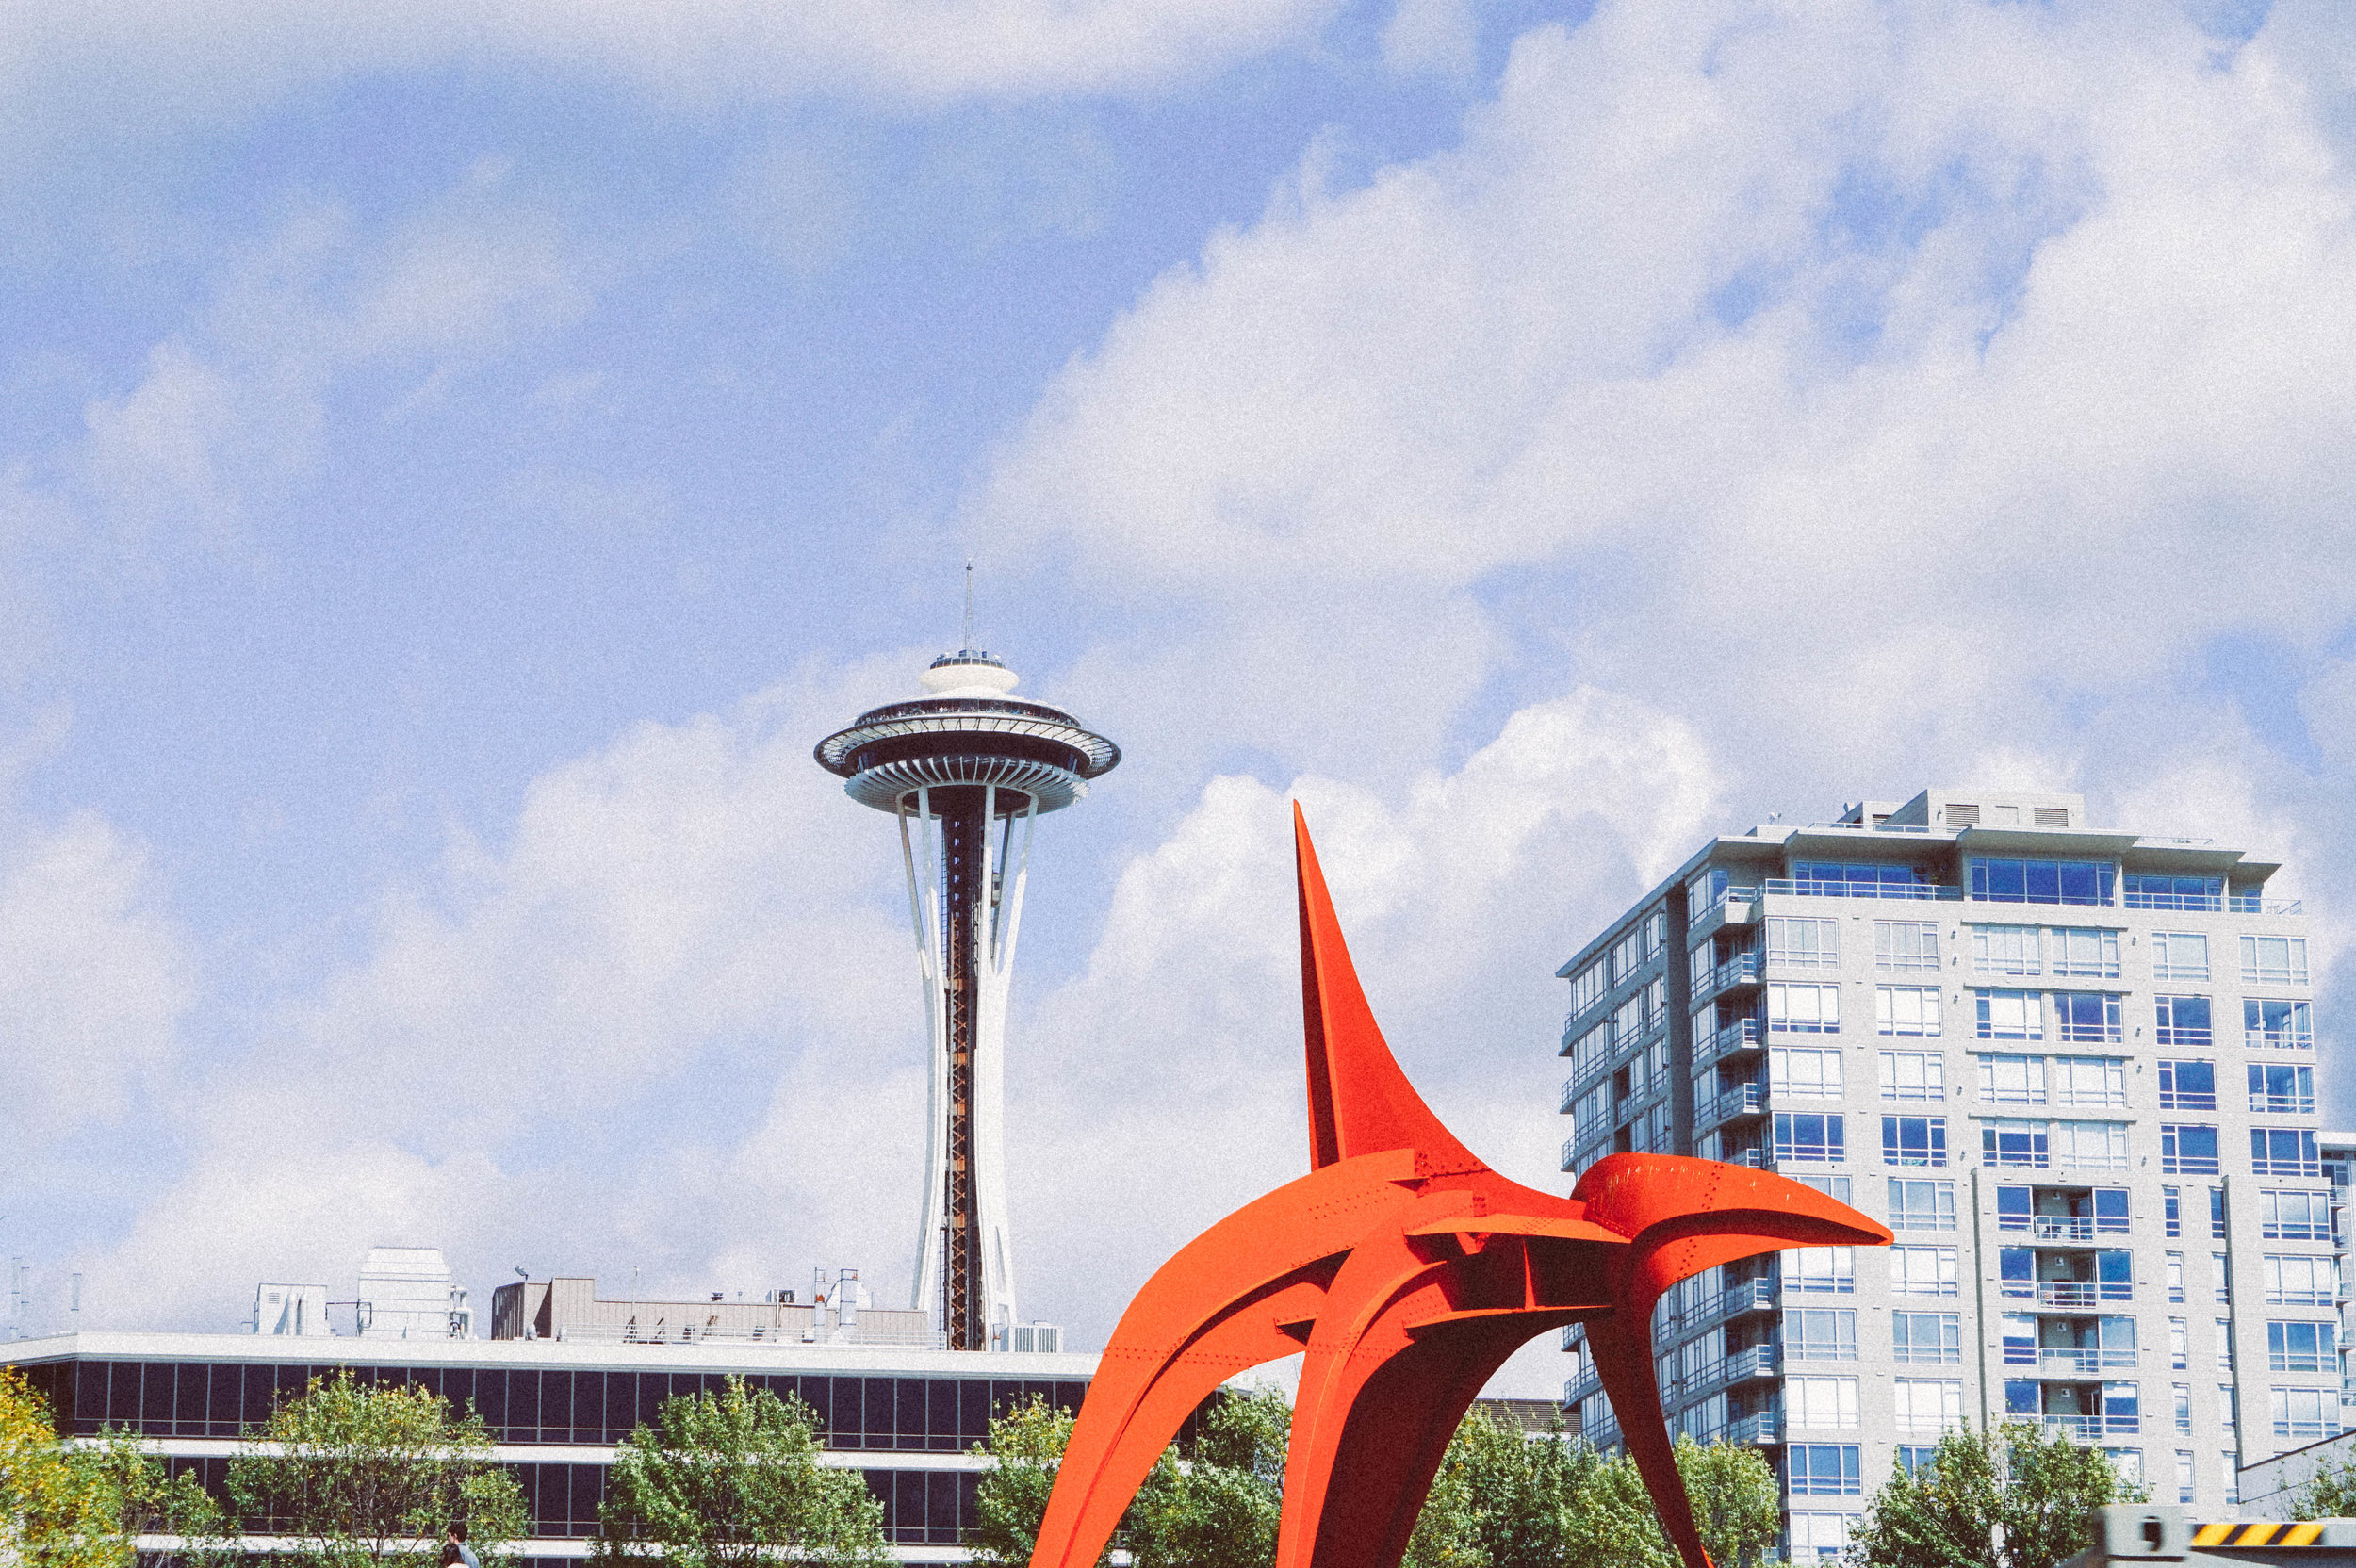
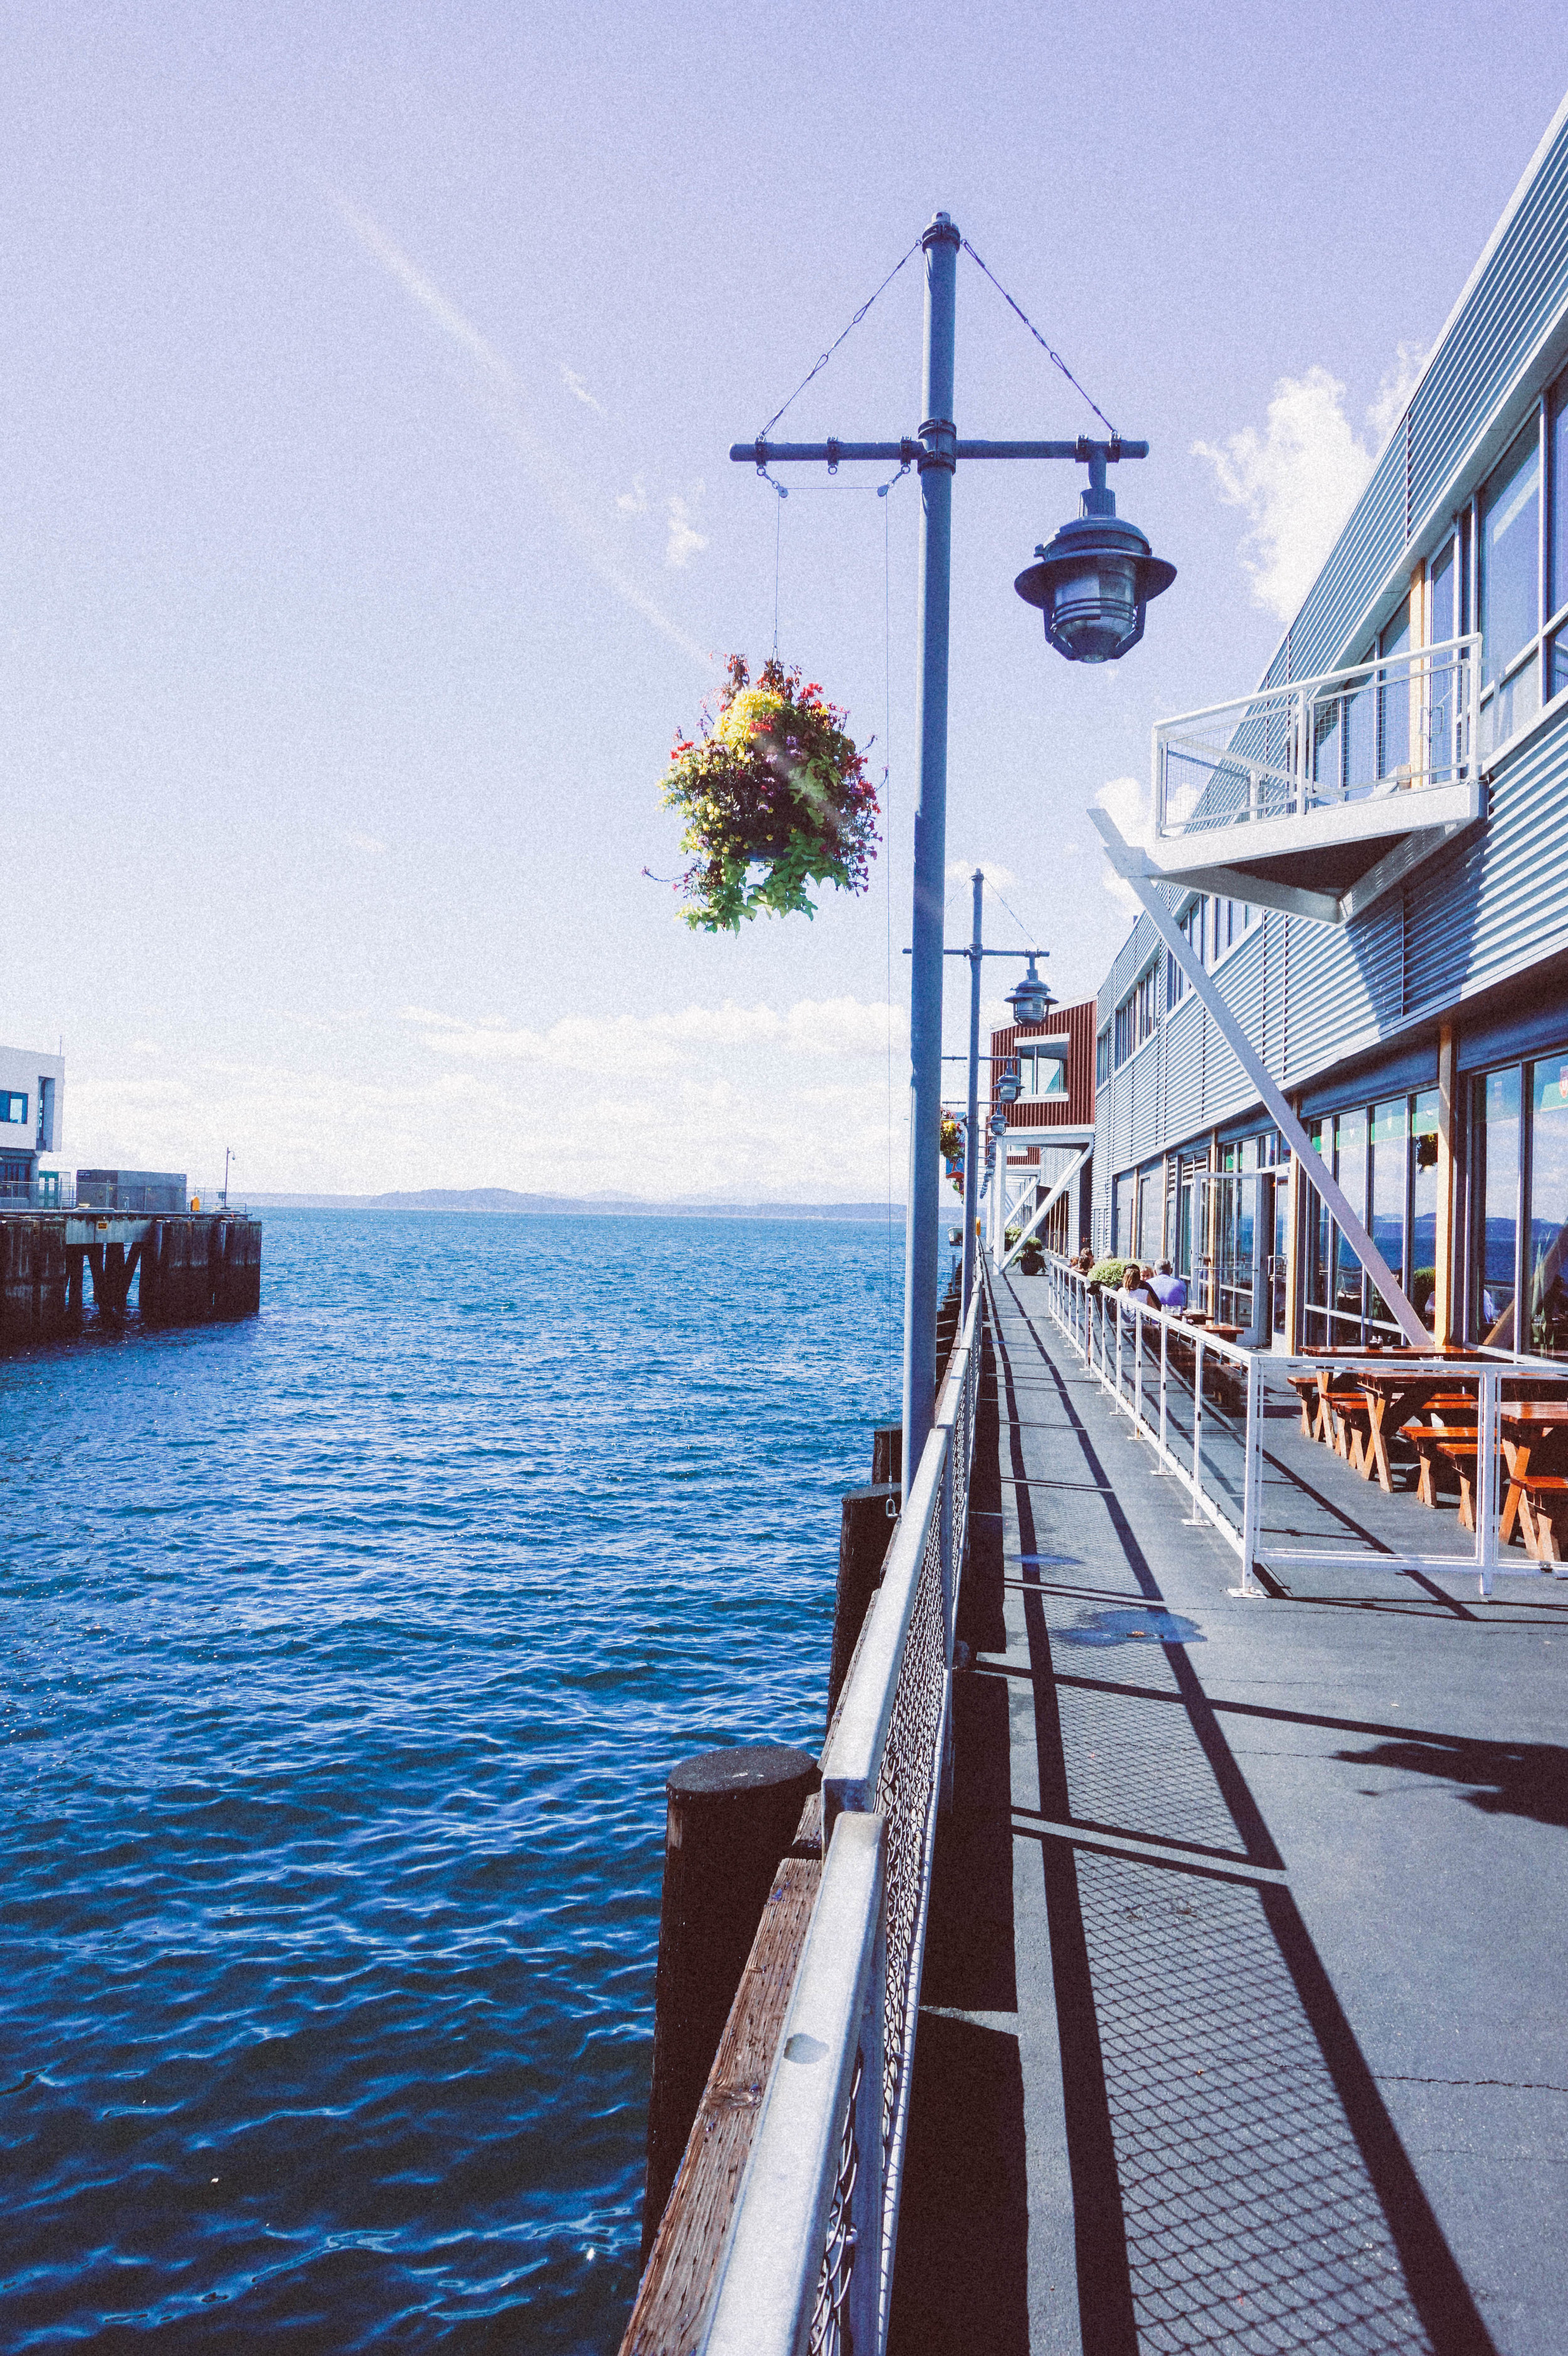
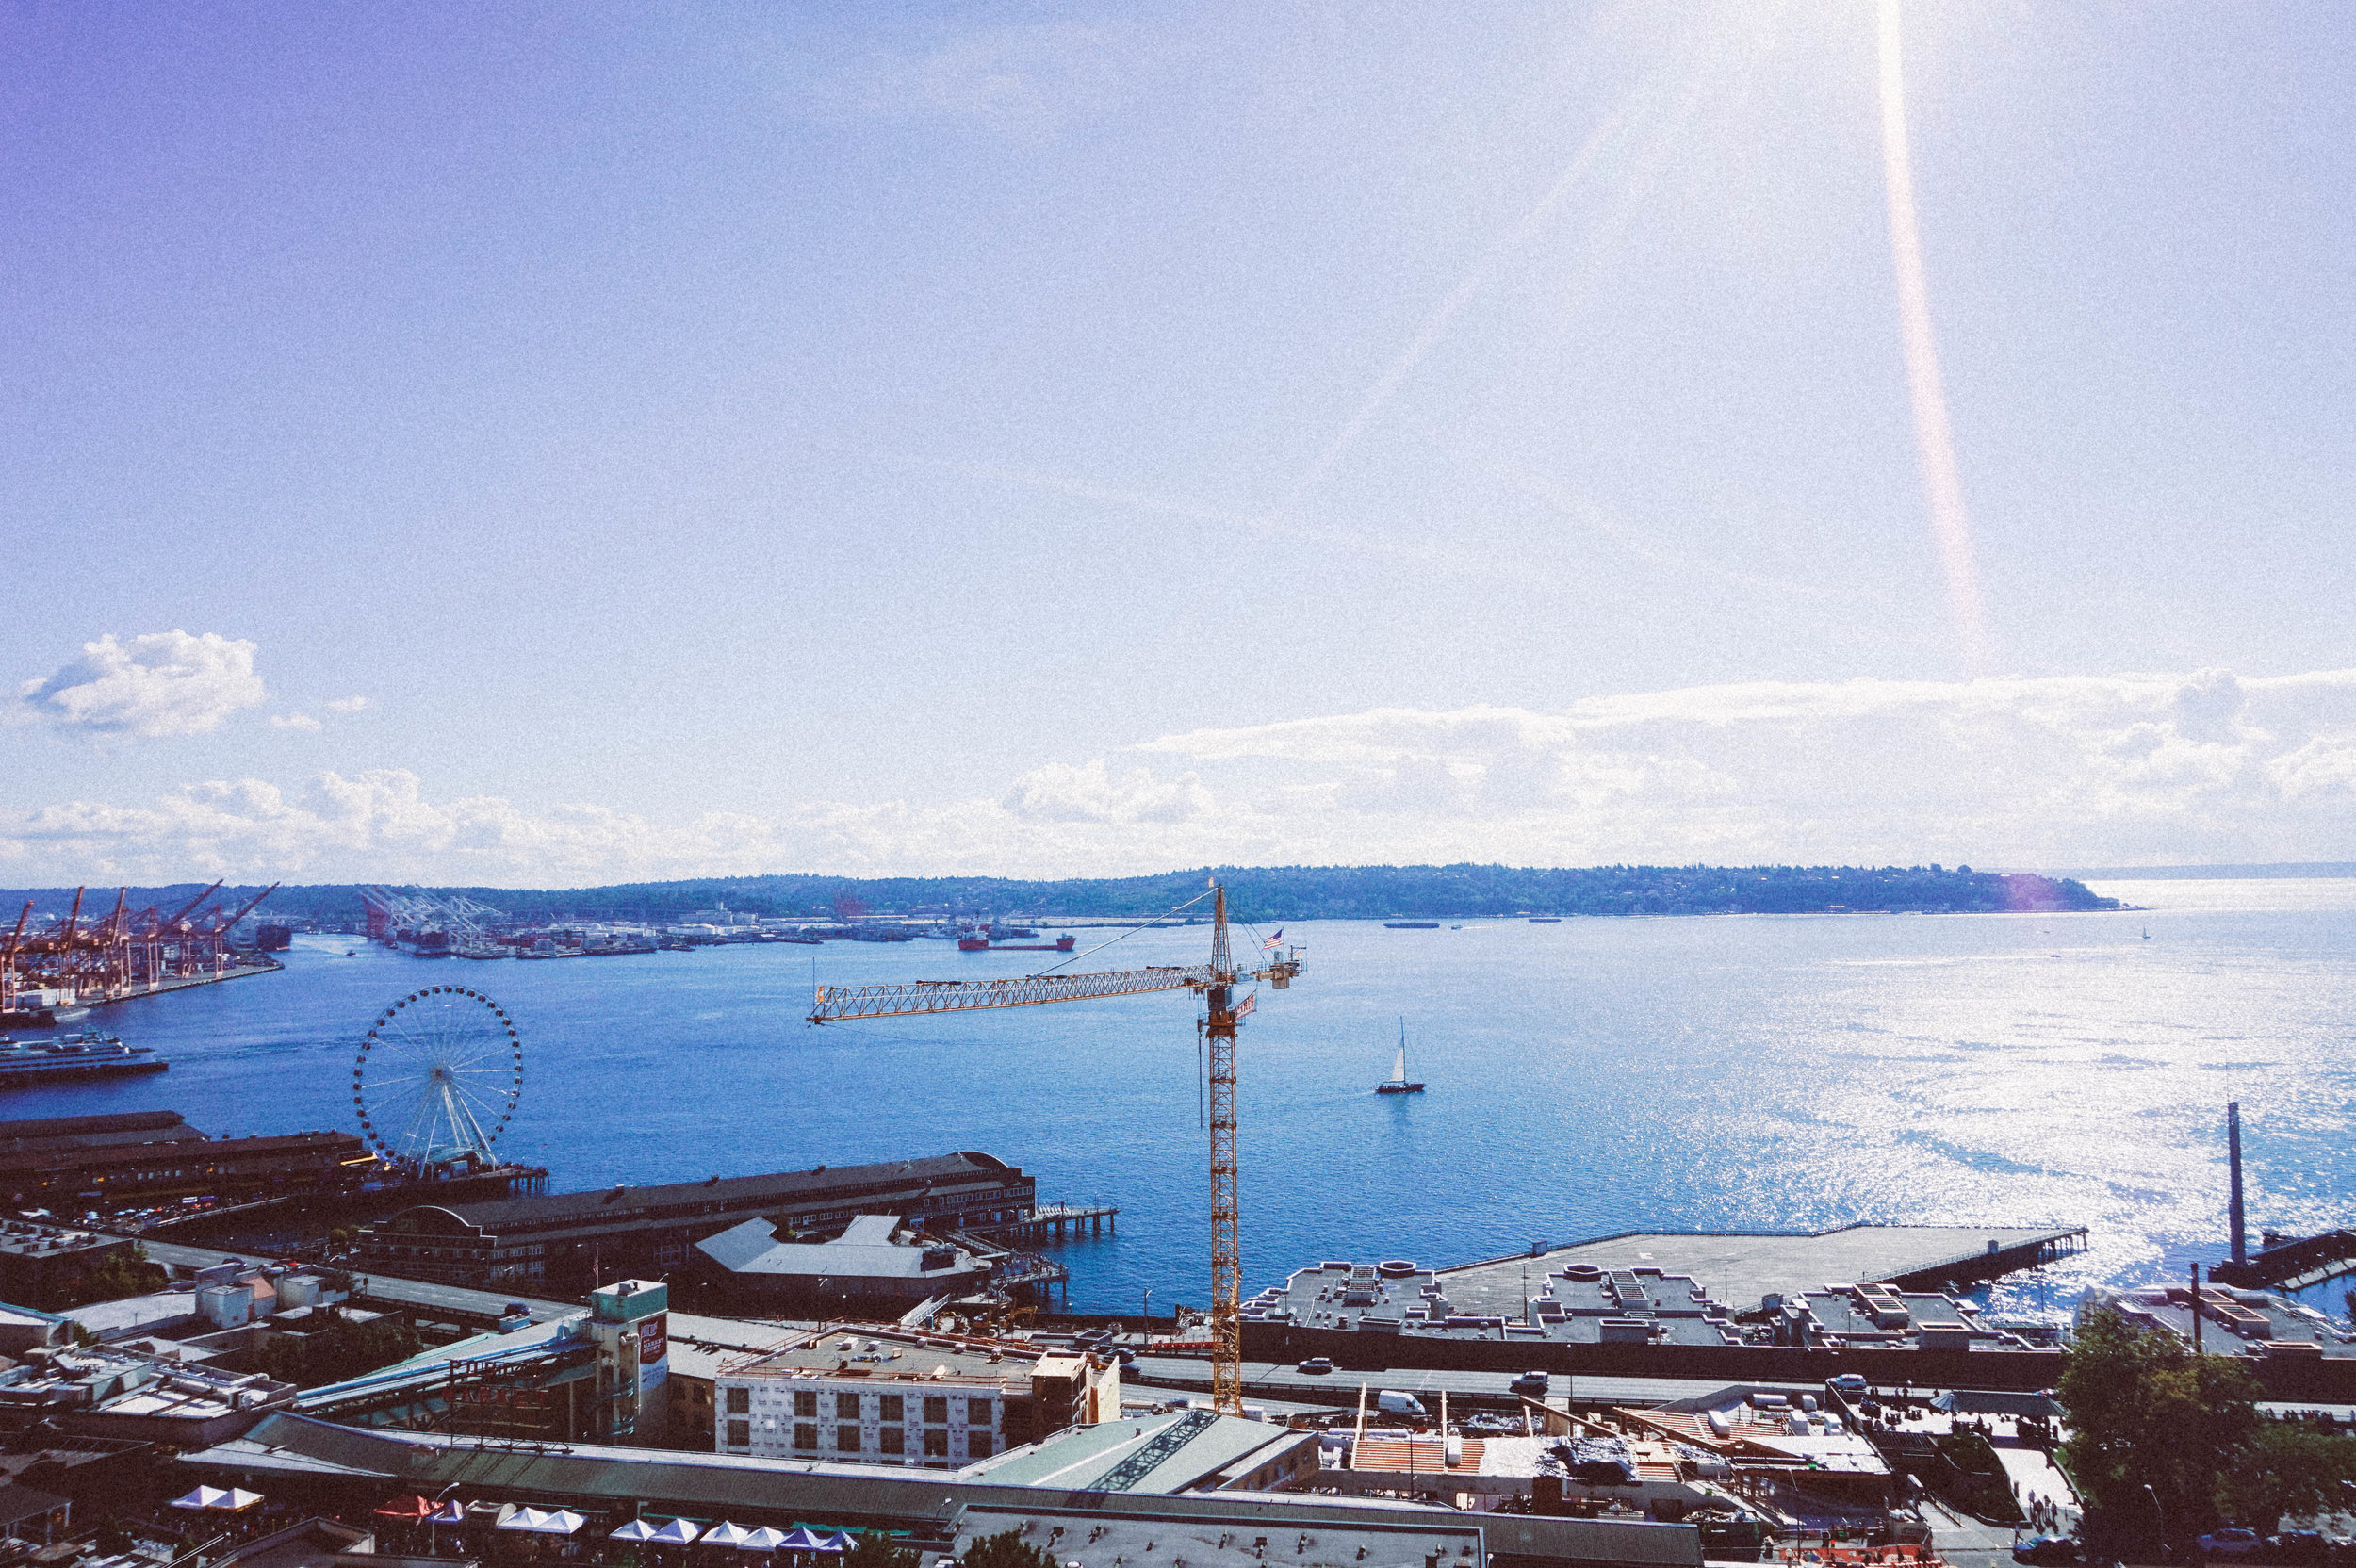
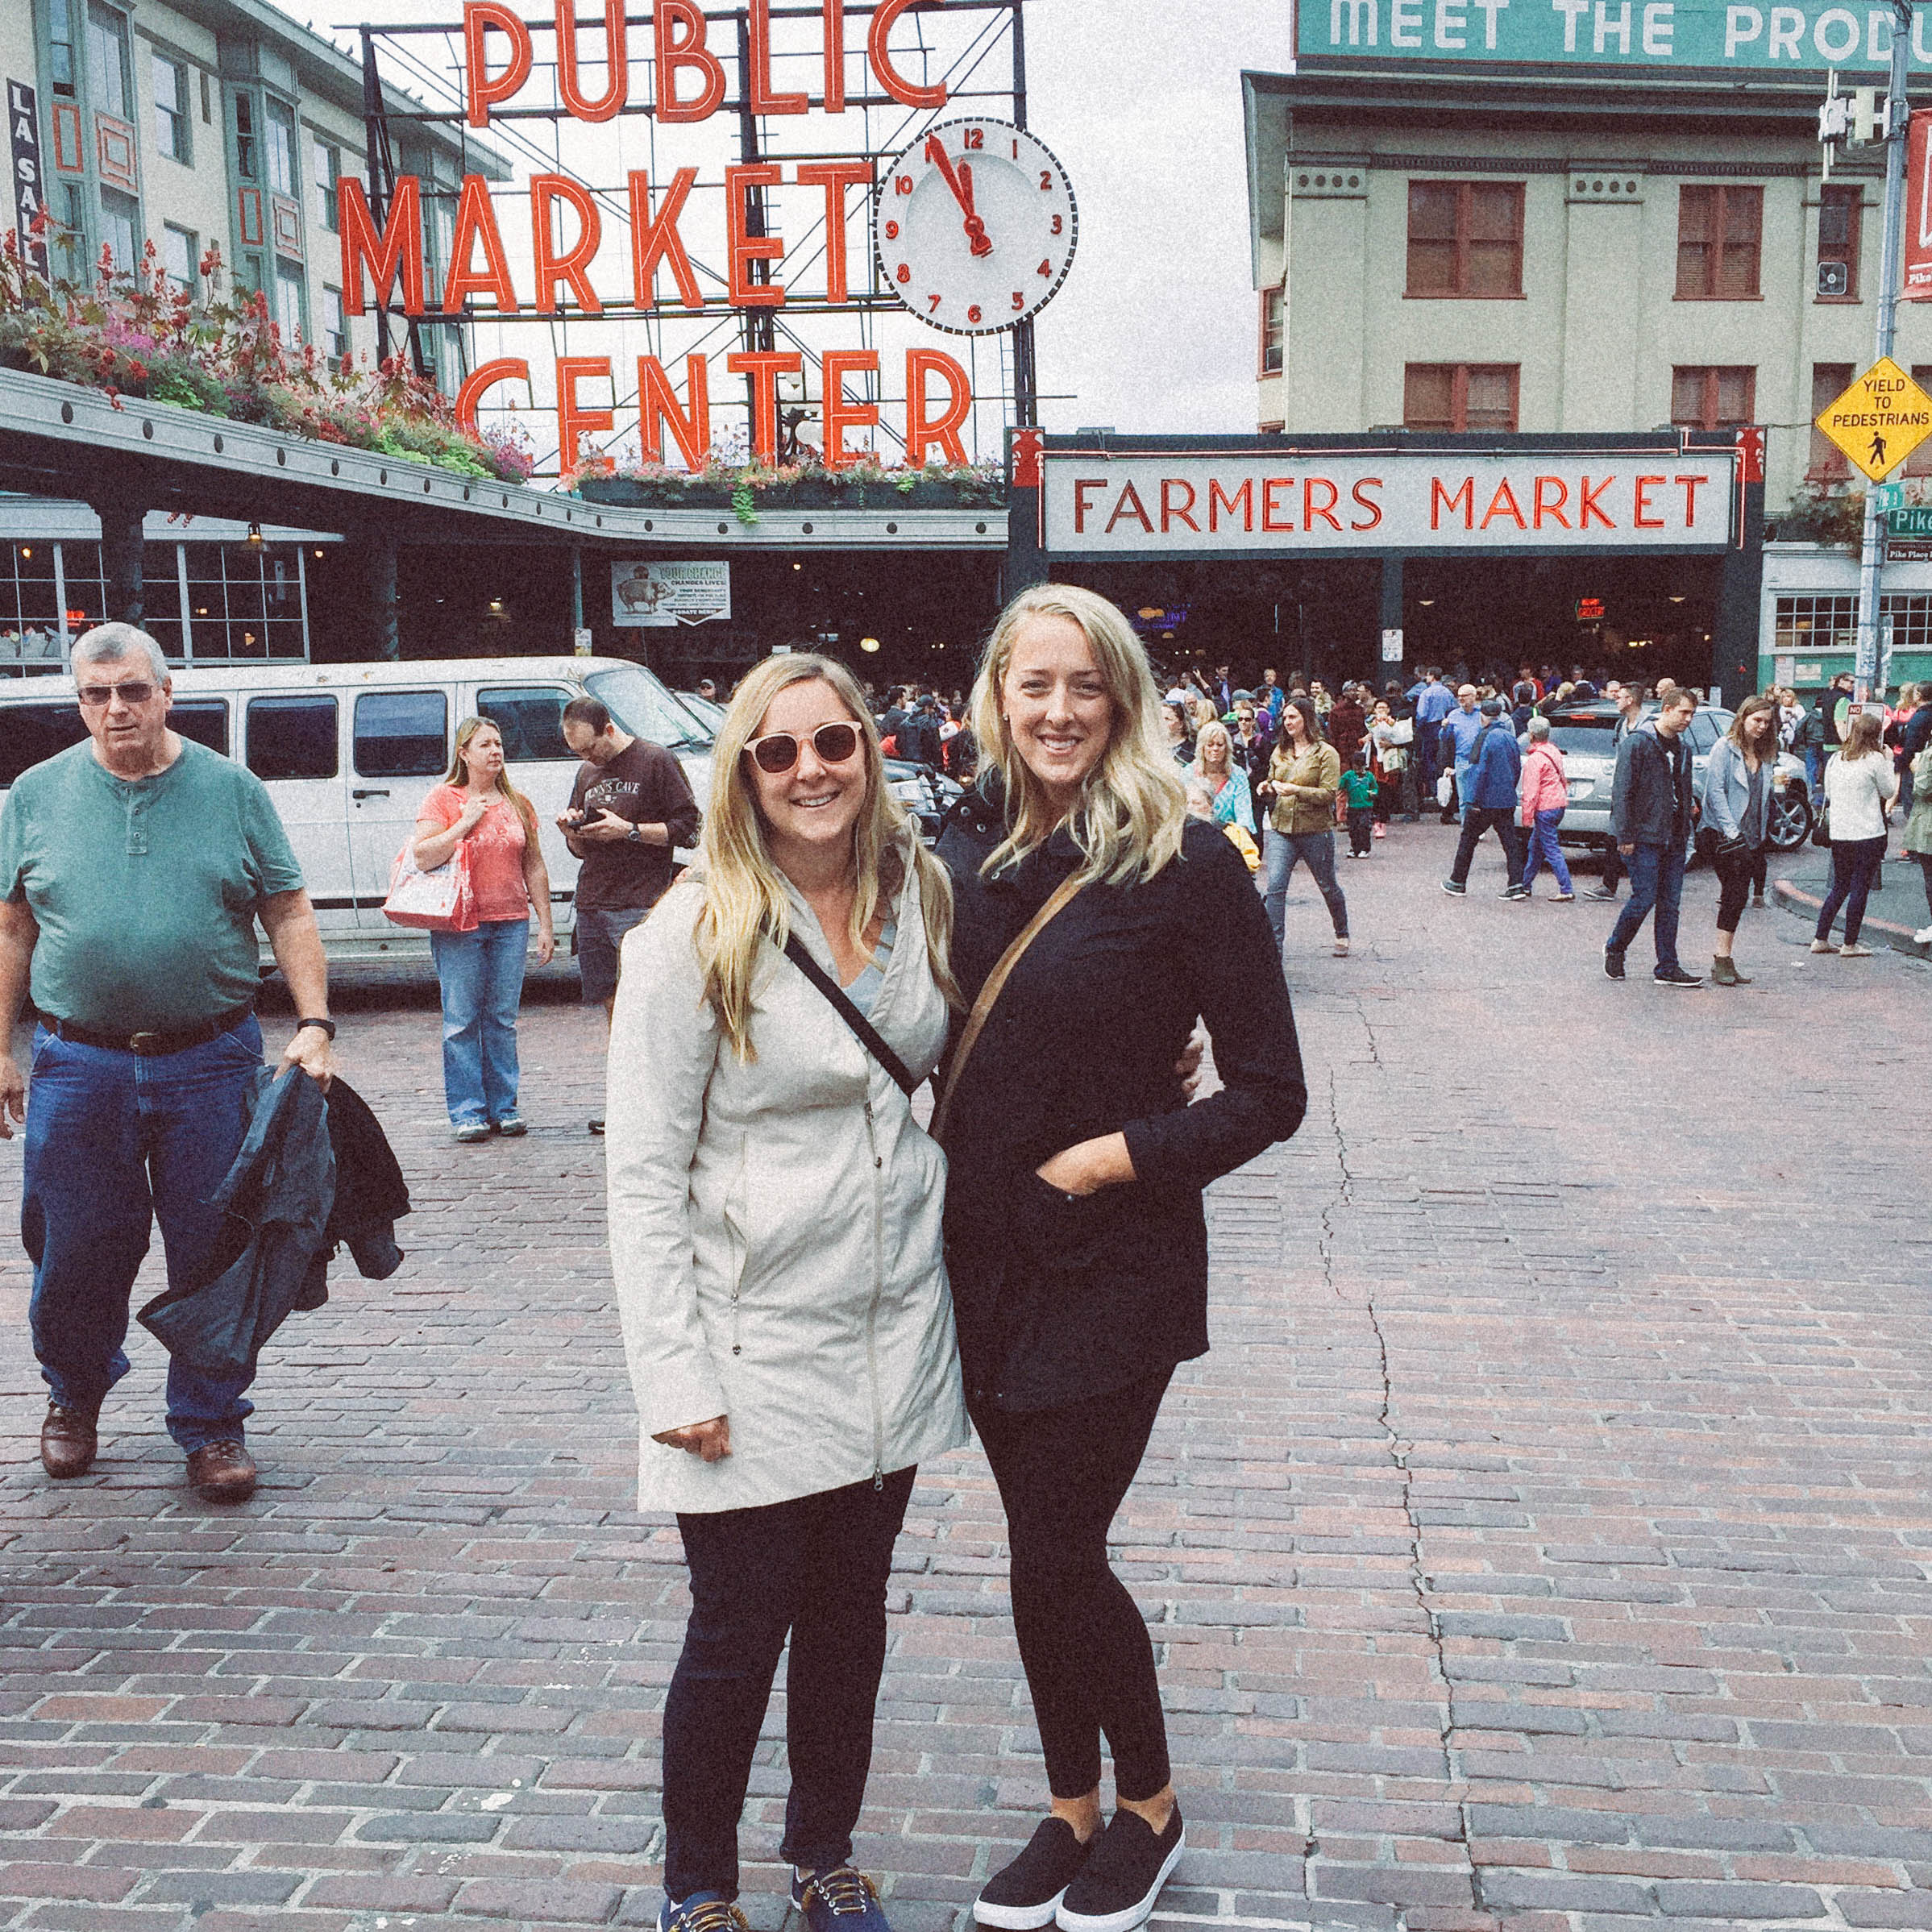
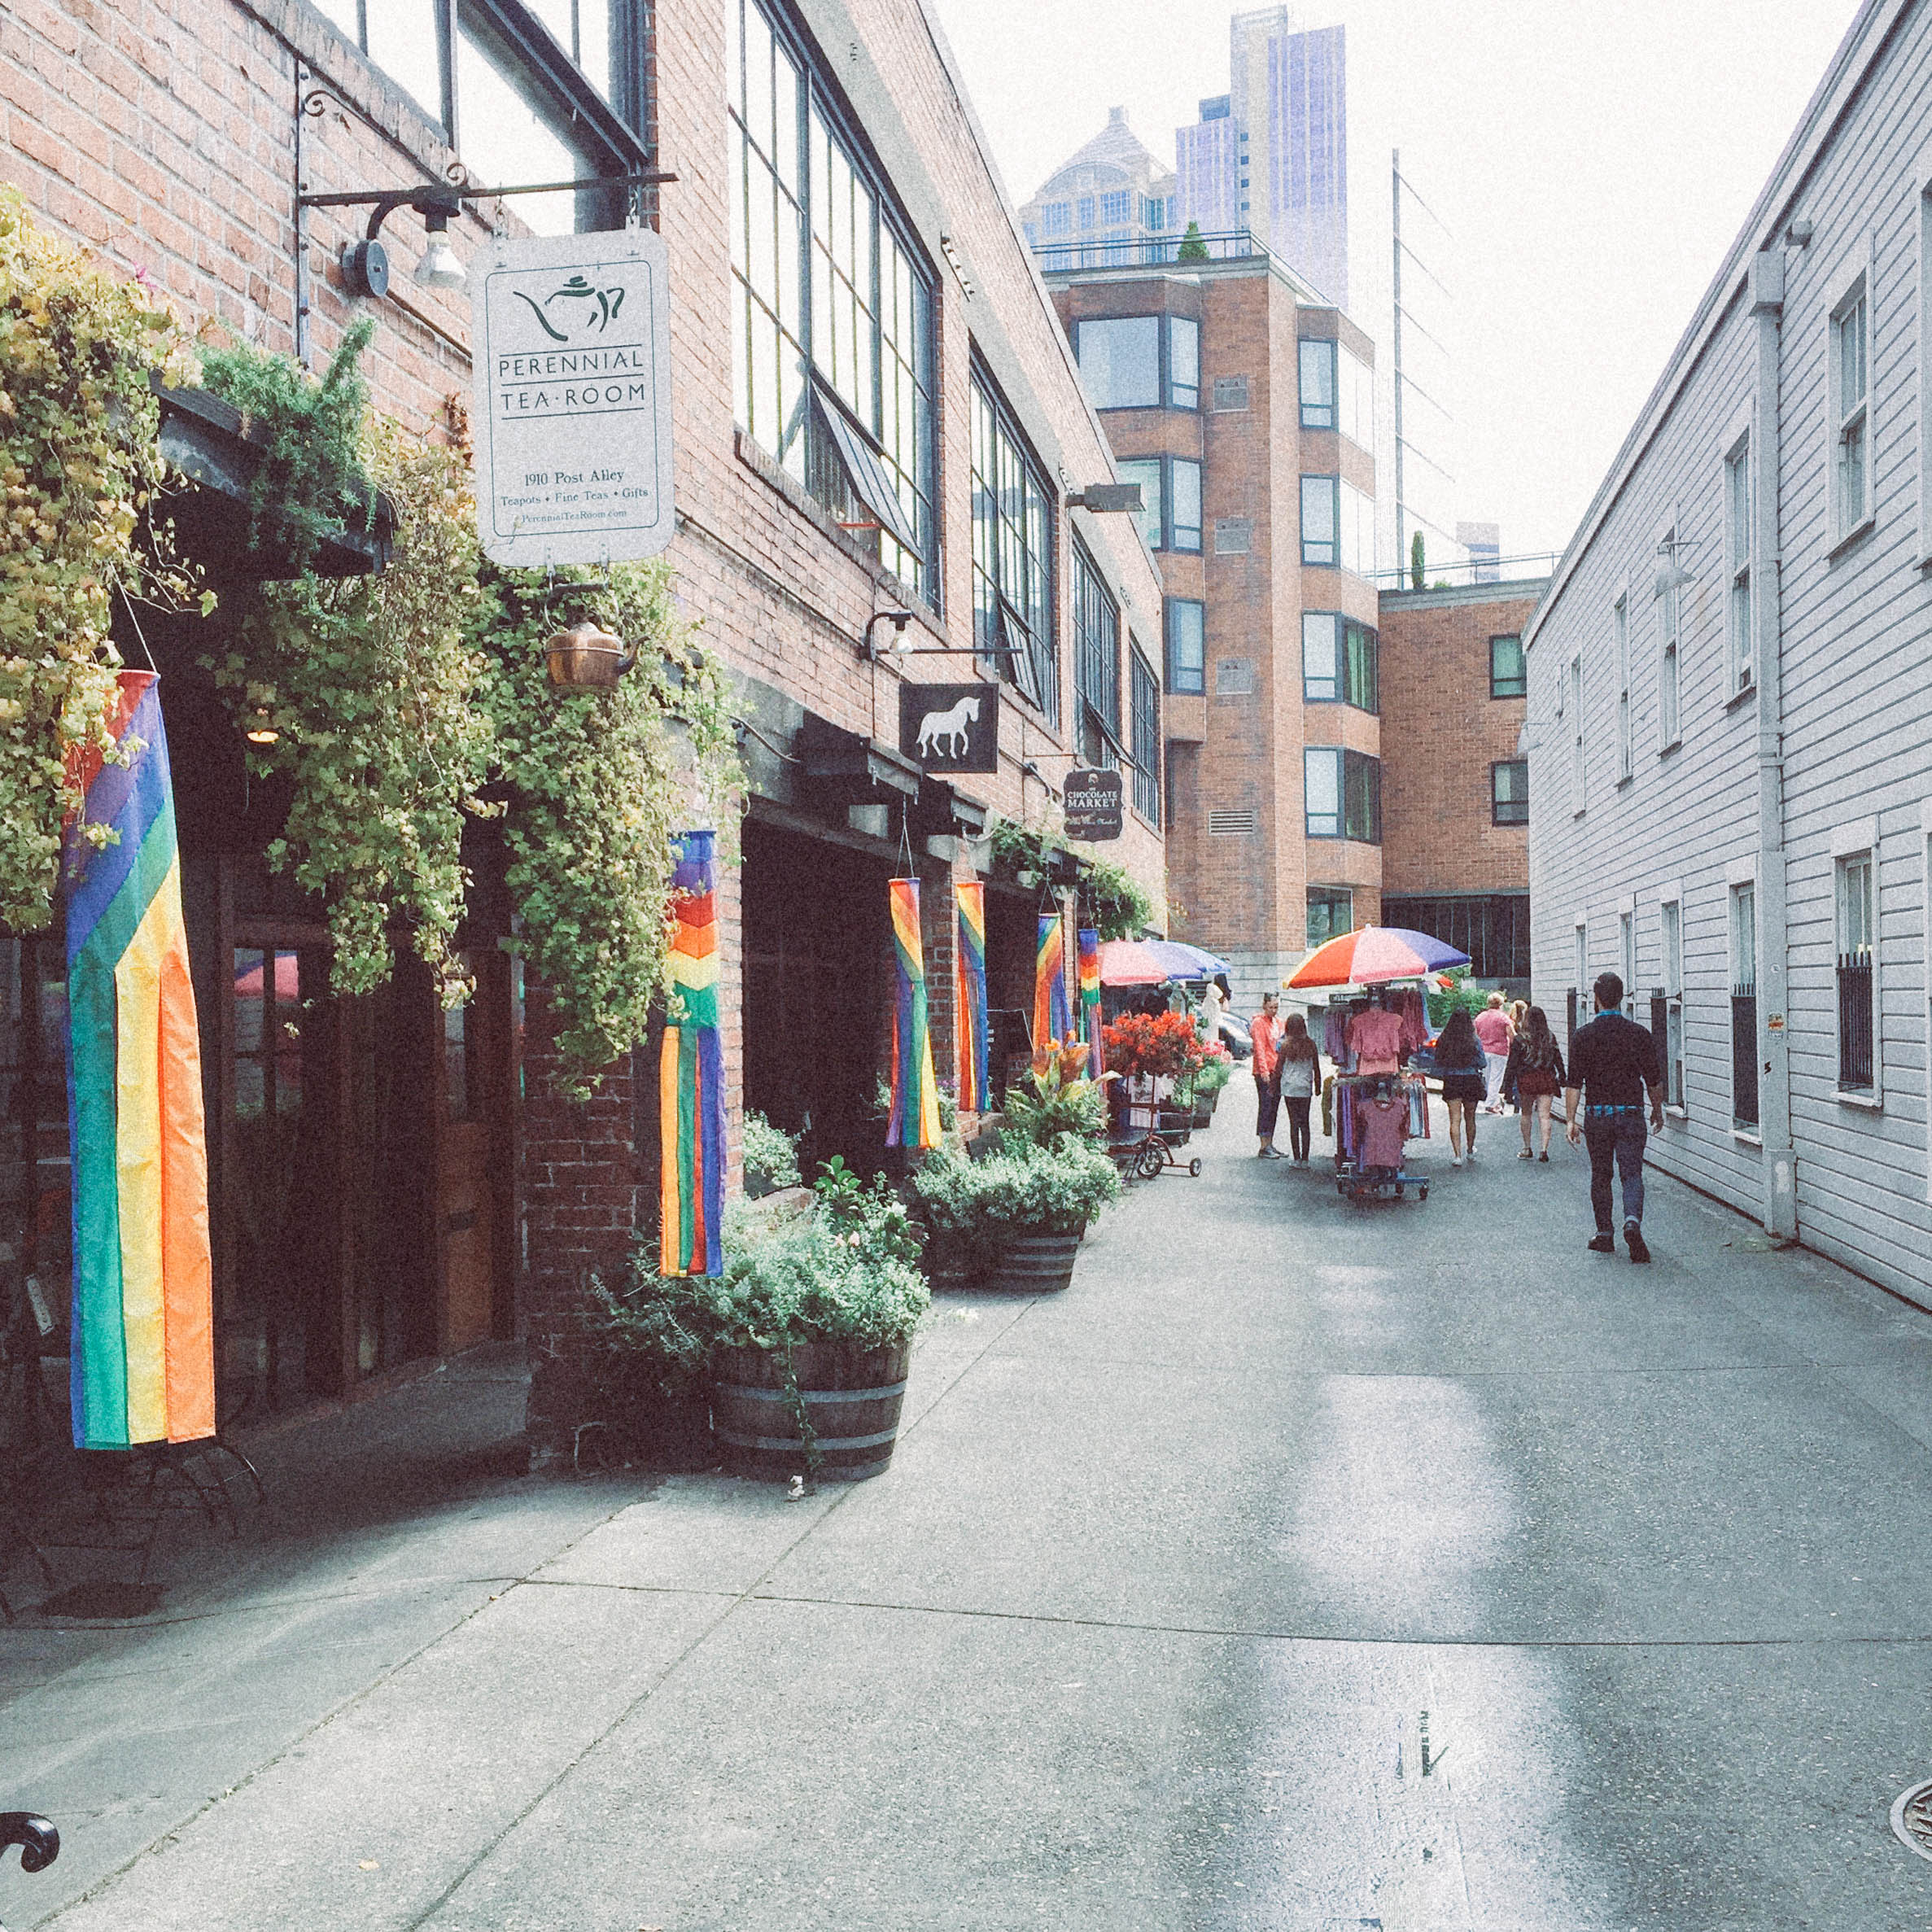
    Arriving in Seattle, I was overcome with excitement and beauty. The harbor bordering downtown Seattle made it a perfect city to be outside, walk around and enjoy the views of the shipping port, West Seattle and boats passing by. Spending quality time with my sister also made it that much more enjoyable and relaxing. We wandered around the city exploring all the eclectic neighborhoods Seattle has to offer such as the Queen Ann neighborhood with its hilly streets, the Ballard neighbored with its quaint eateries and shops lined with trees and lights and the Capitol Hill district where my favorite cafe by far is located (see below). Of course, you must visit Pike Place Market and spend a few hours site seeing and people watching. 

    Must visit cafe - Seattle: Oddfellows Cafe + Bar 
    Must Visit Restaurant - Seattle: How to Cook a Wolf

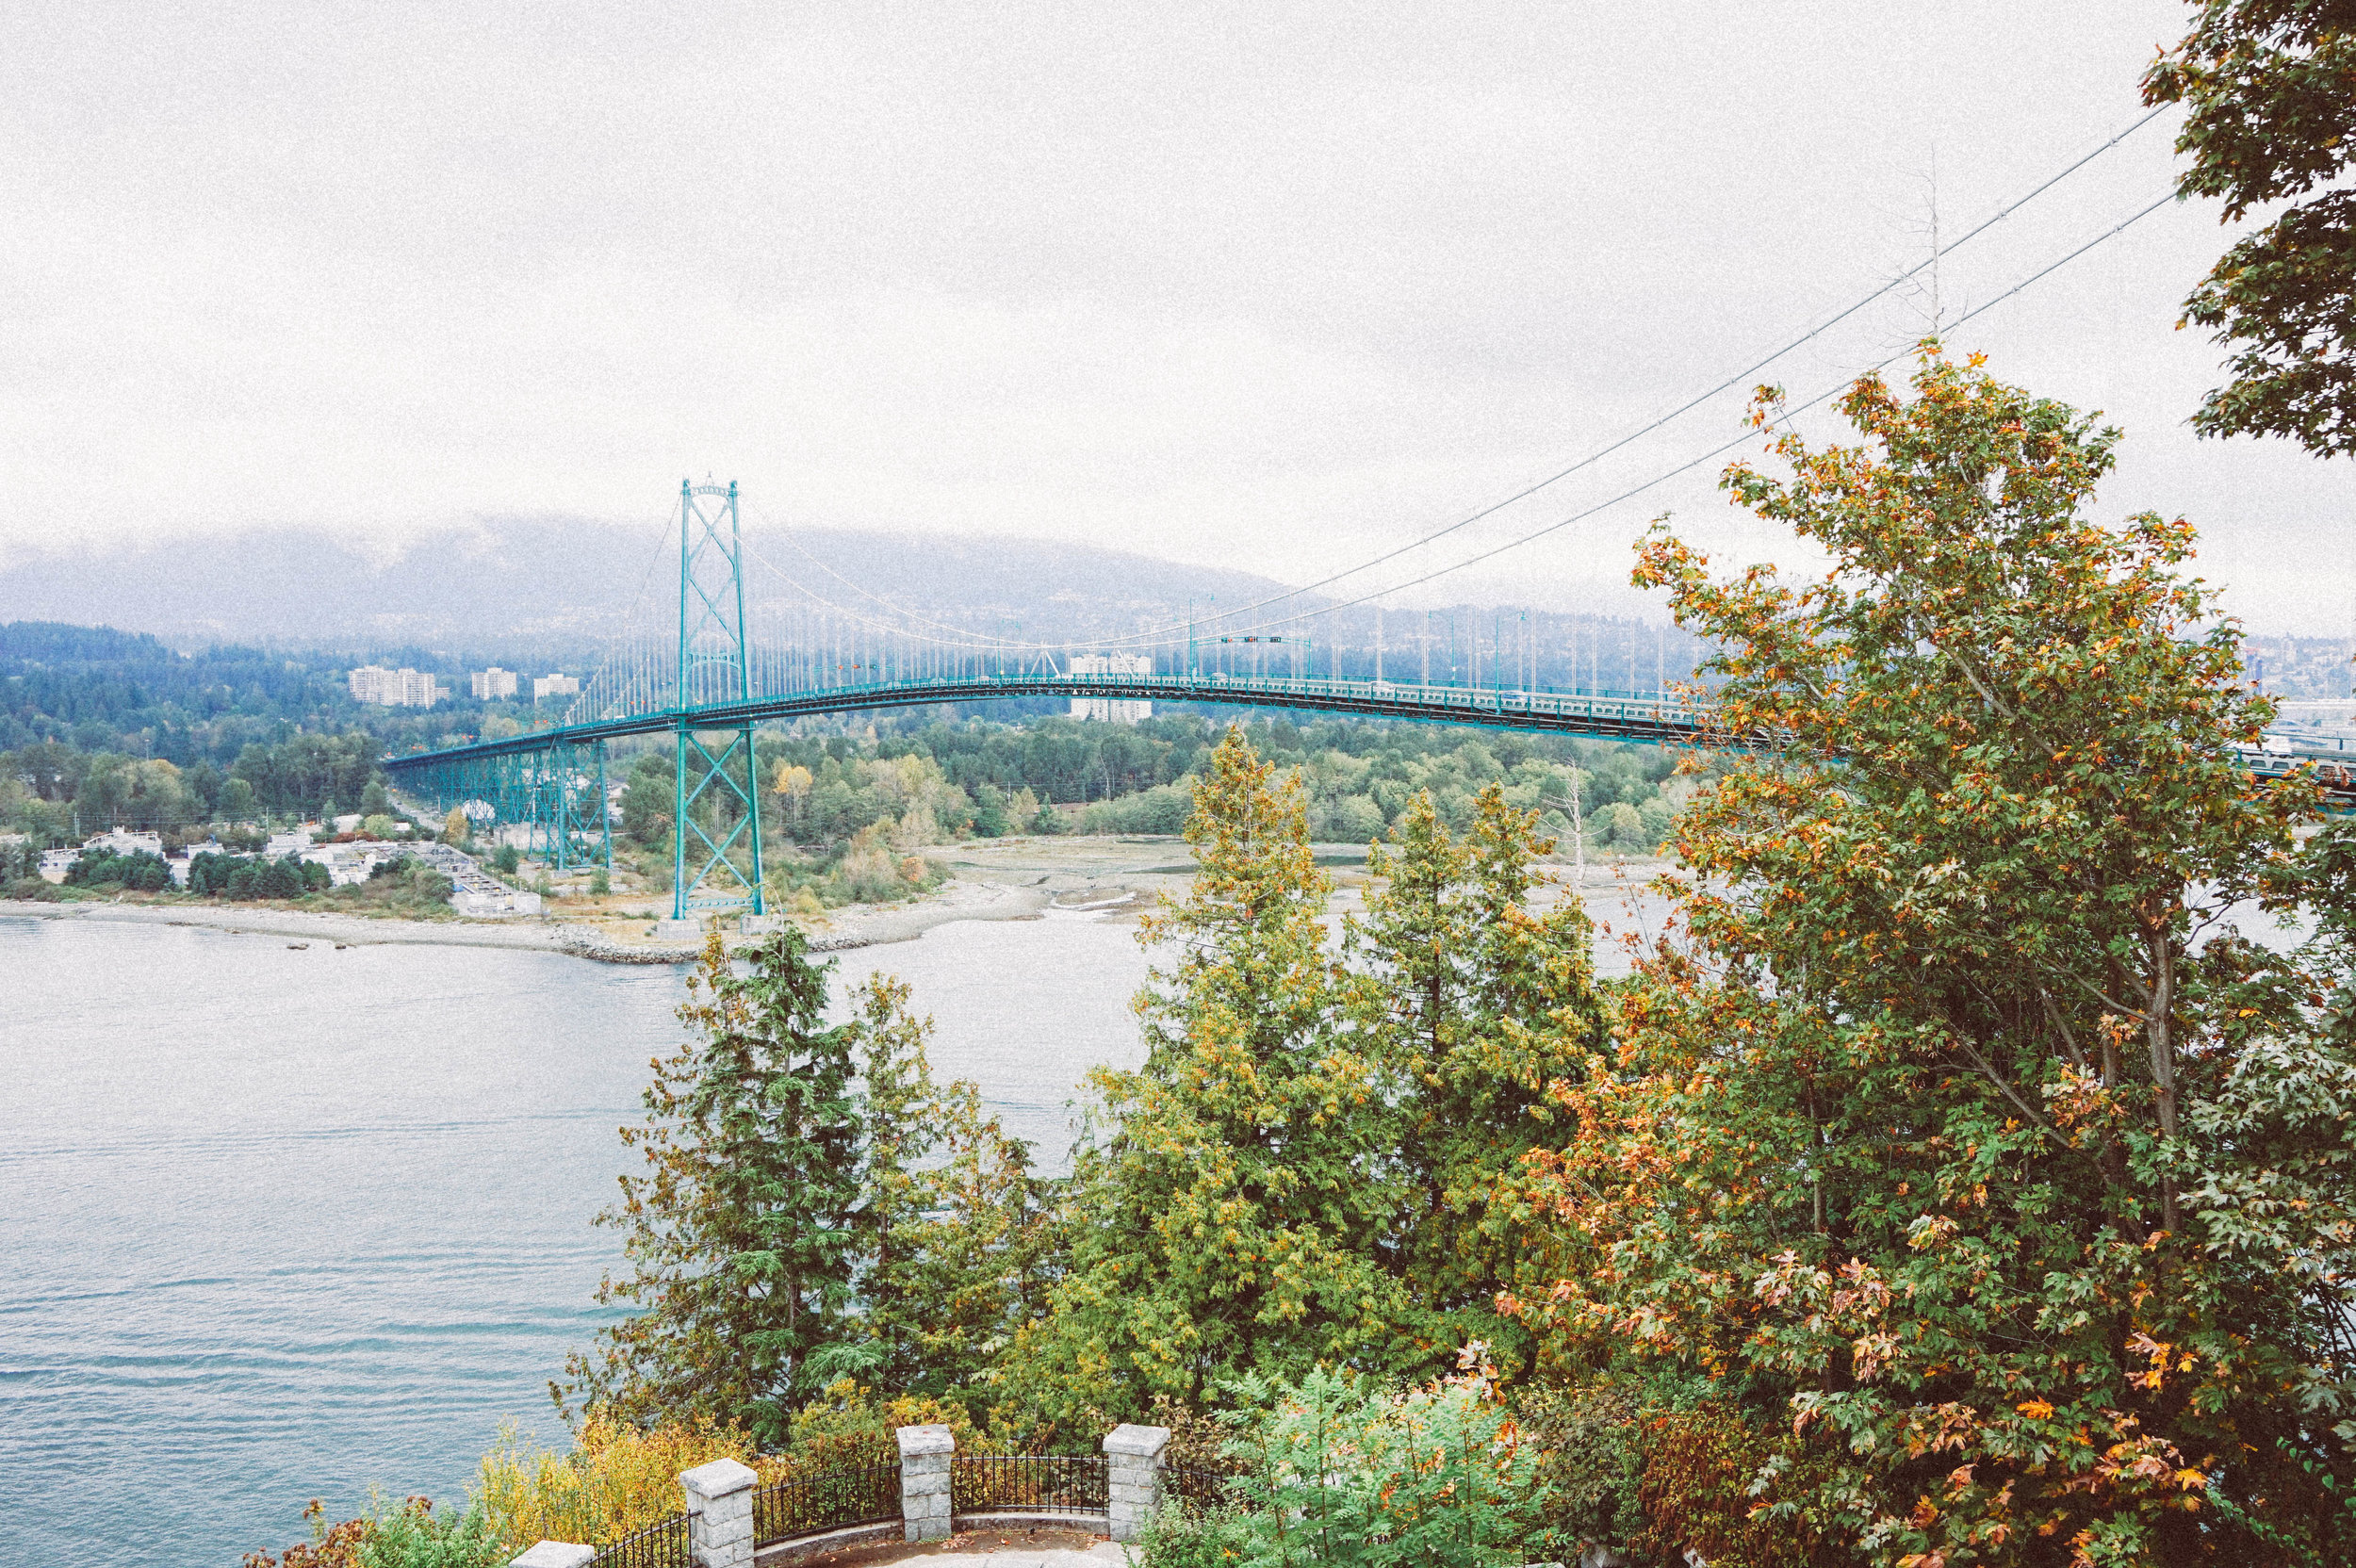
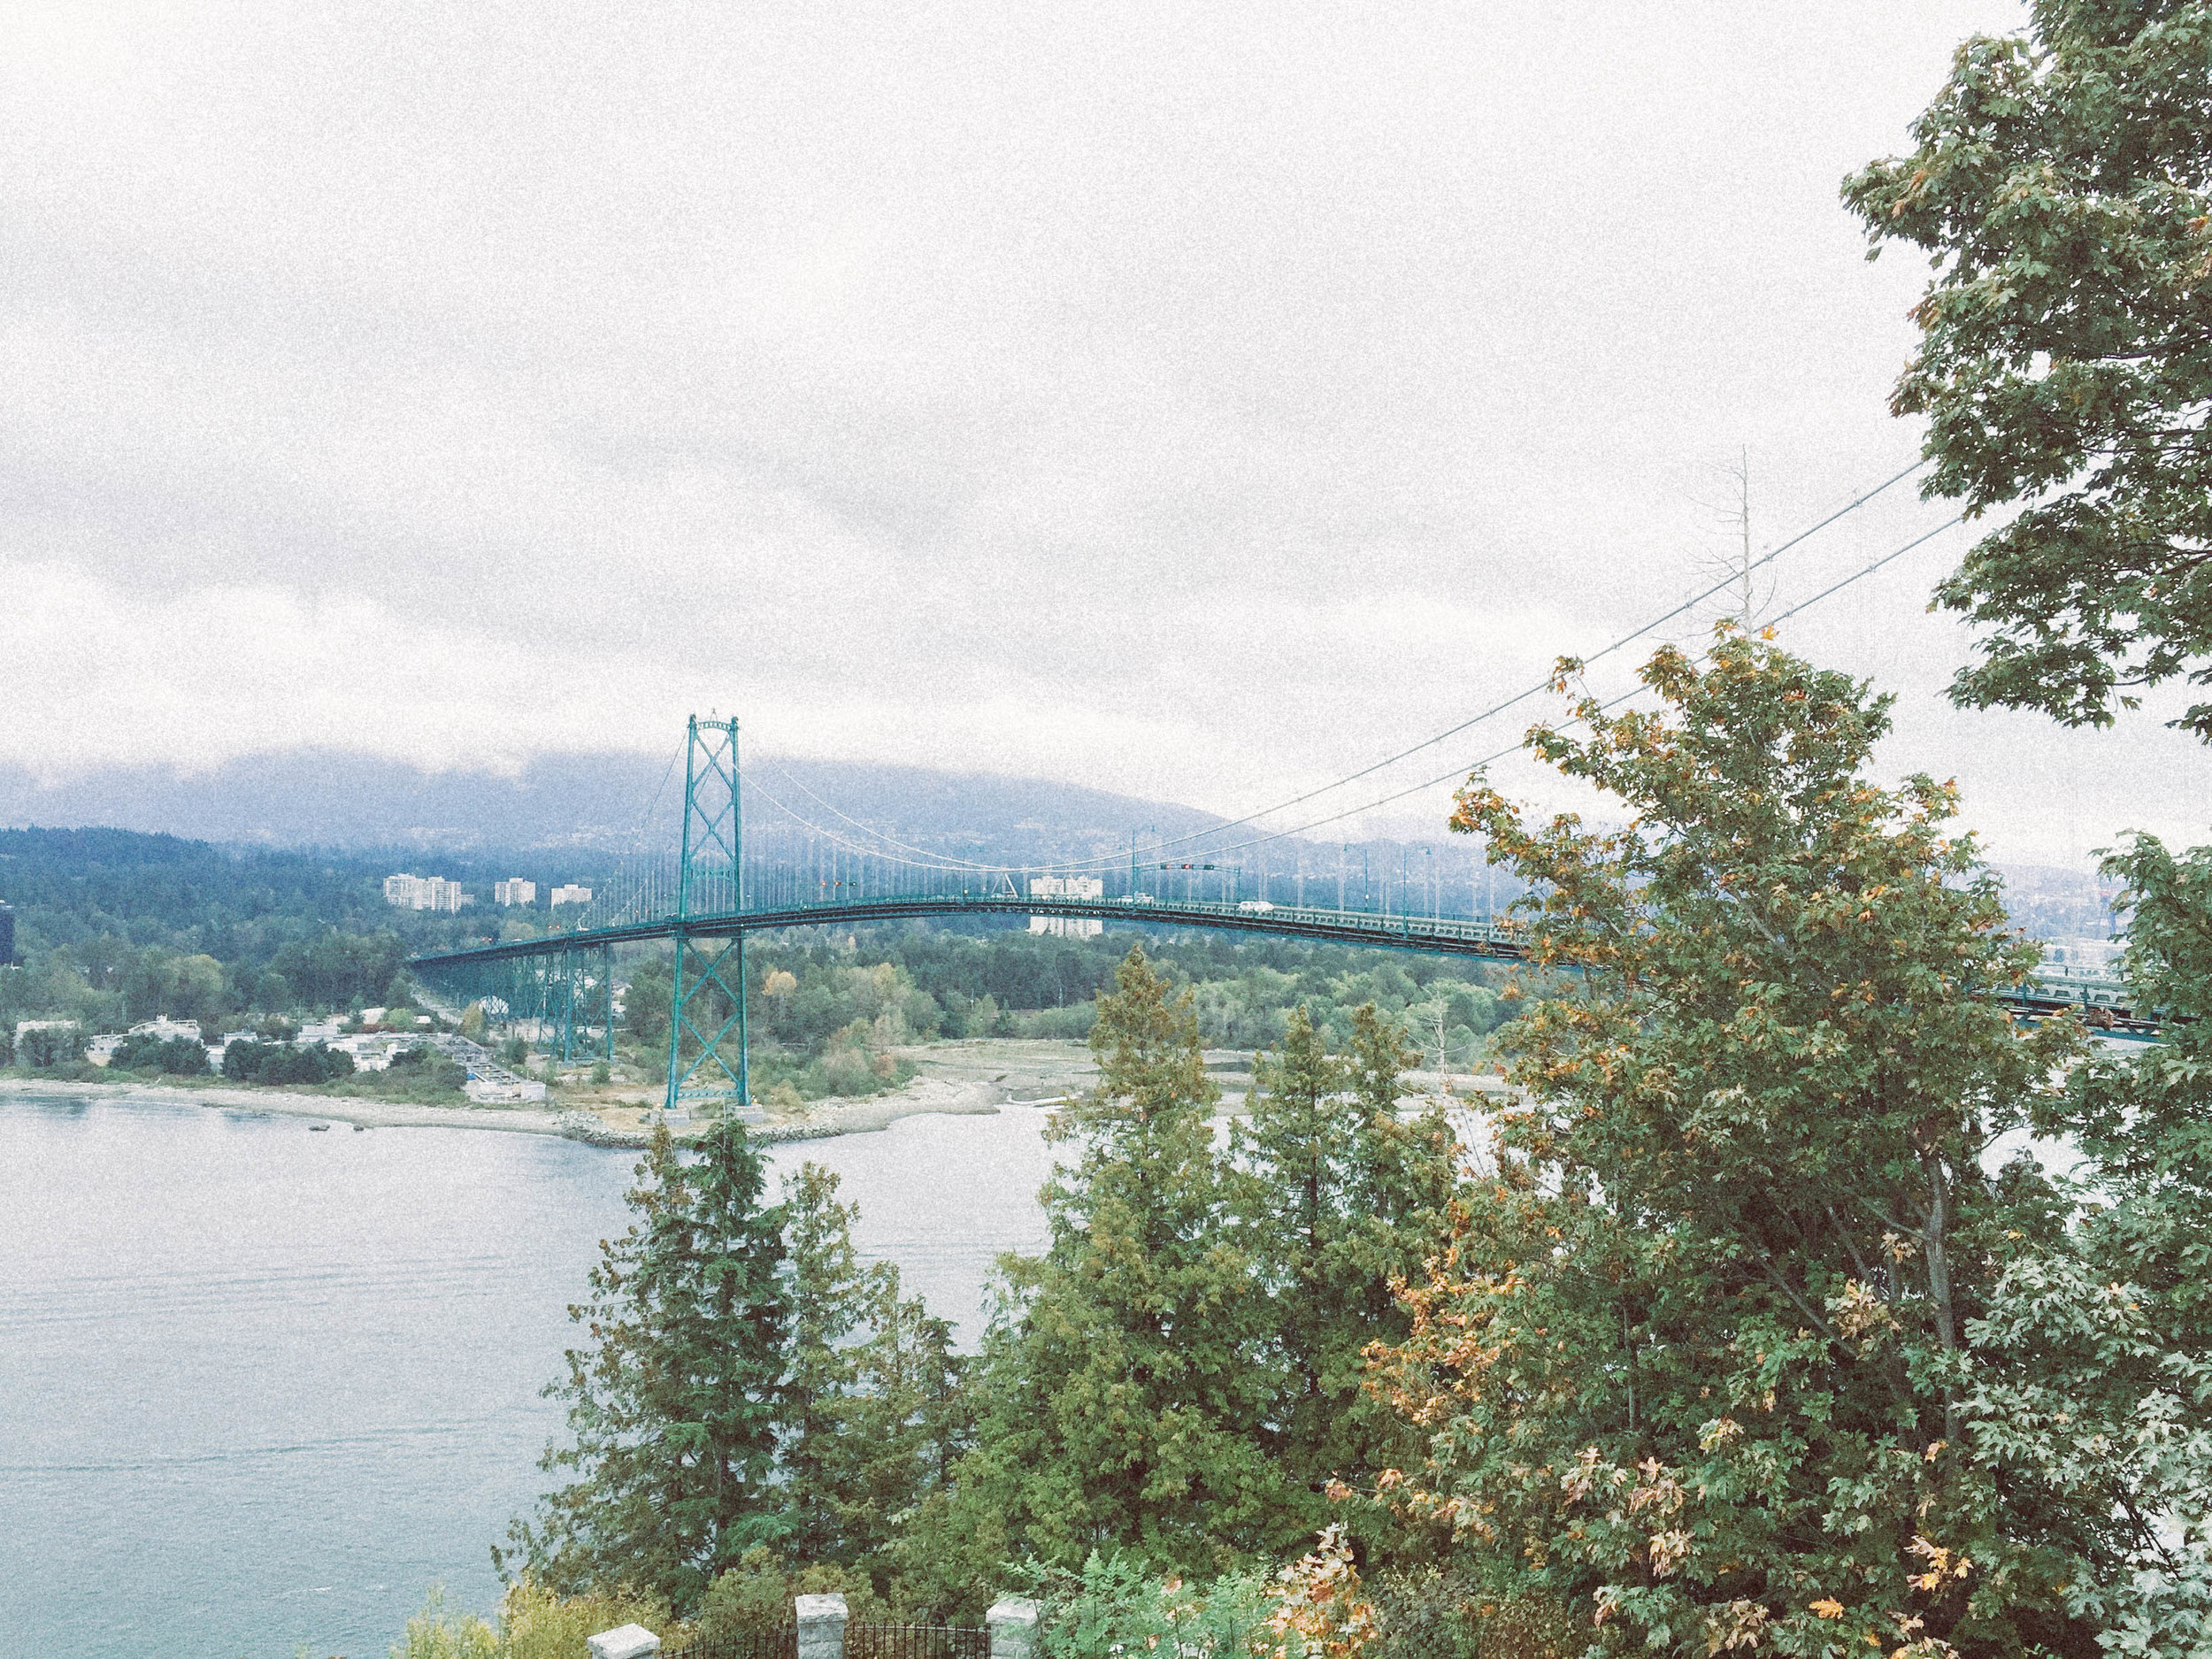
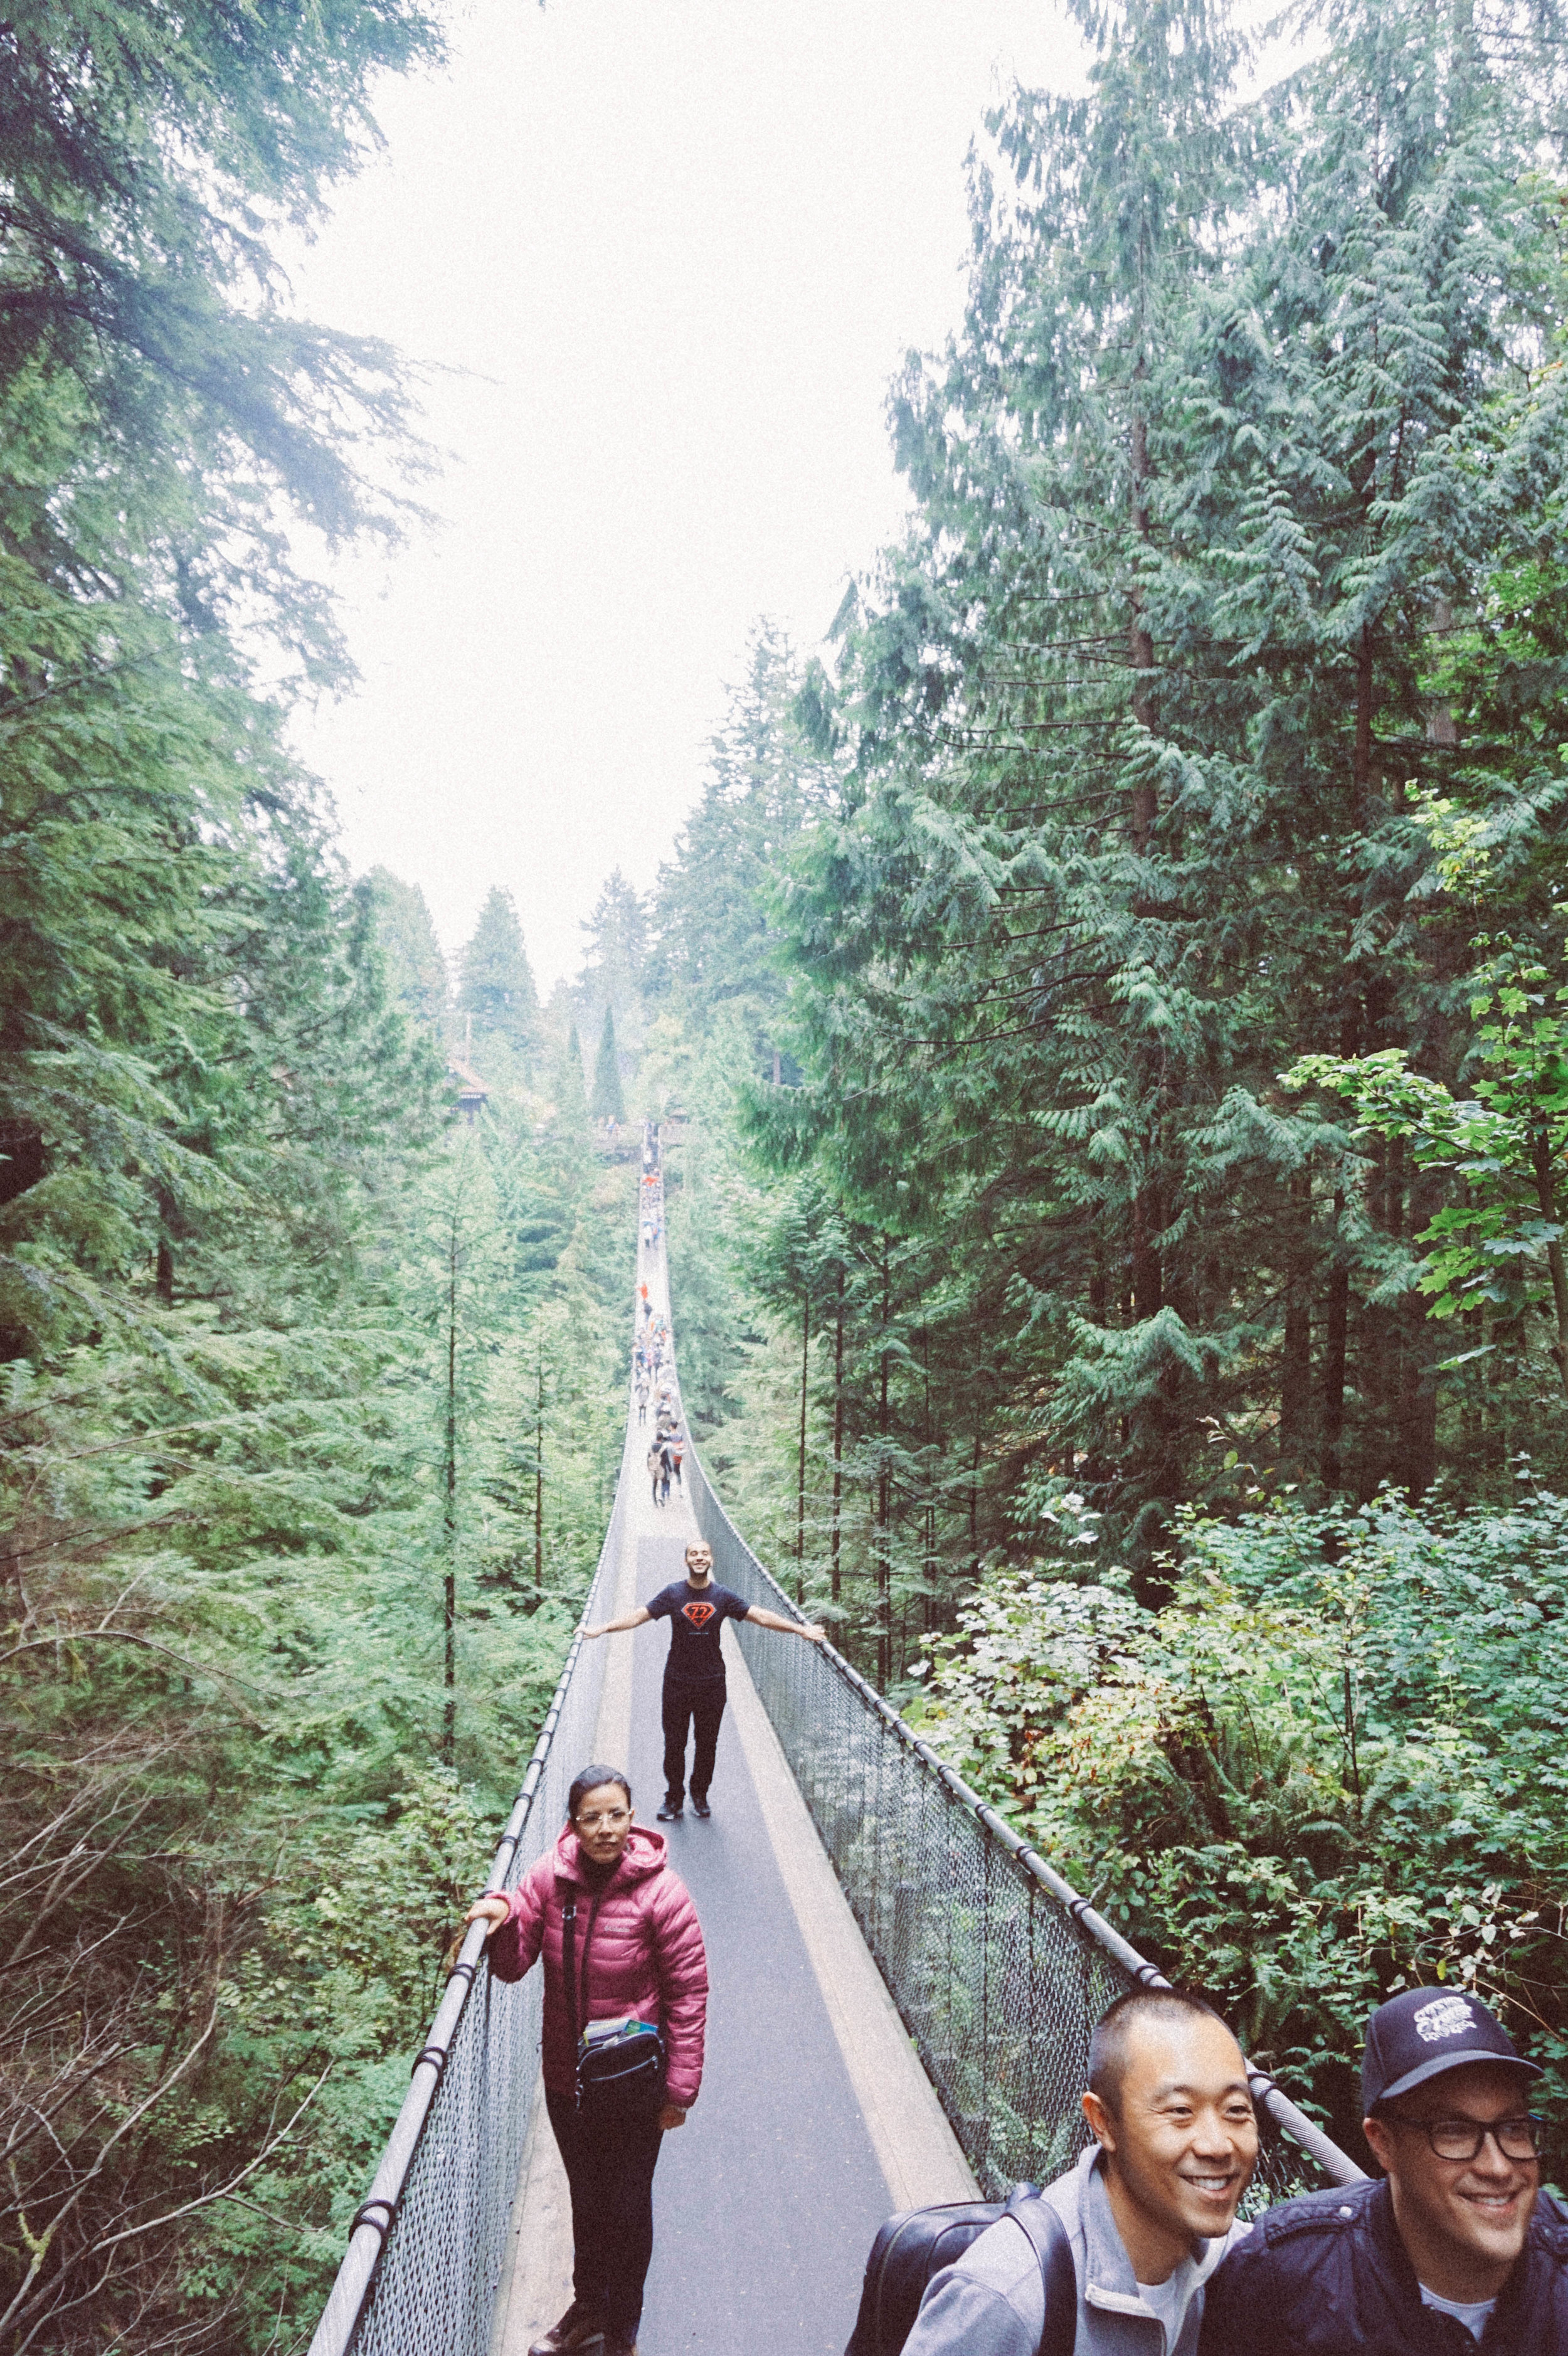
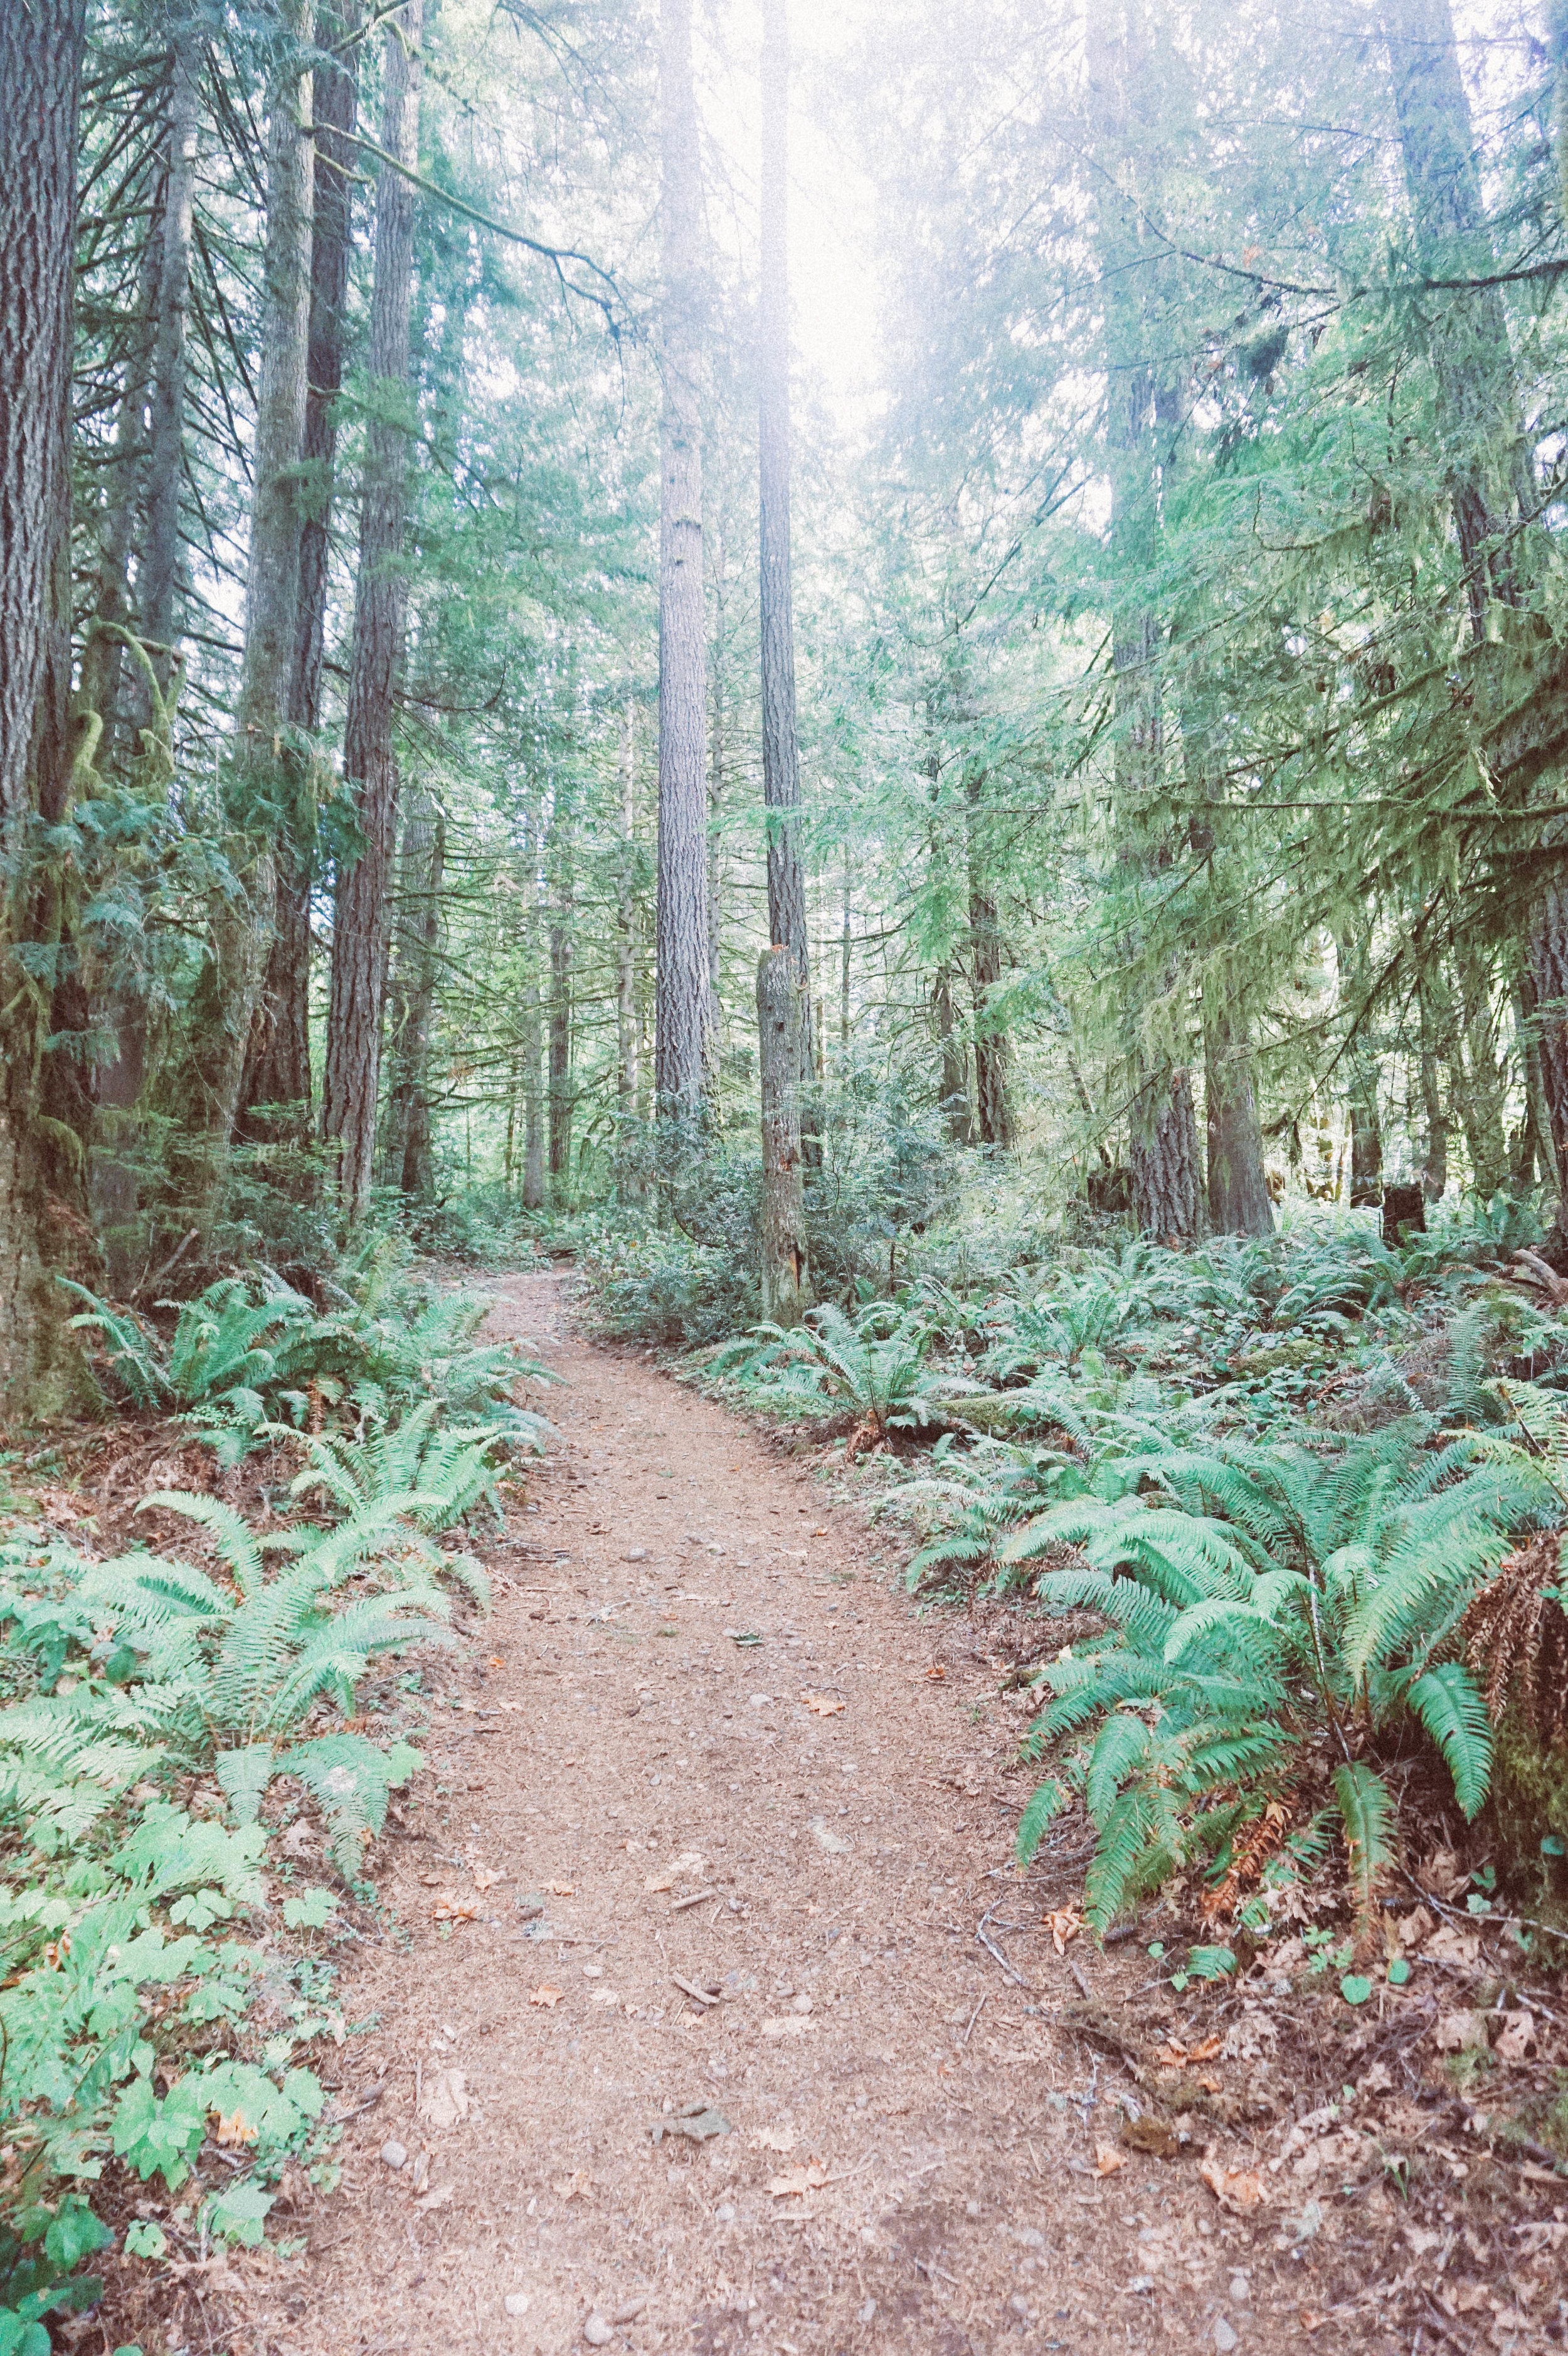
    As we left Seattle and ventured through winding roads of towering pines, we arrived in Vancouver with eagerness to cross the border, for my first time. There are so many lovely things about Vancouver, it is a melting pot of cultures, neighborhoods and people. From the streets of China Town to the crowded streets and trails of downtown filled with bikers and fitness enthusiasts to the vast nothingness of nature starring out into the ocean or amongst the tall red oaks, Vancouver has something to offer for everyone. 

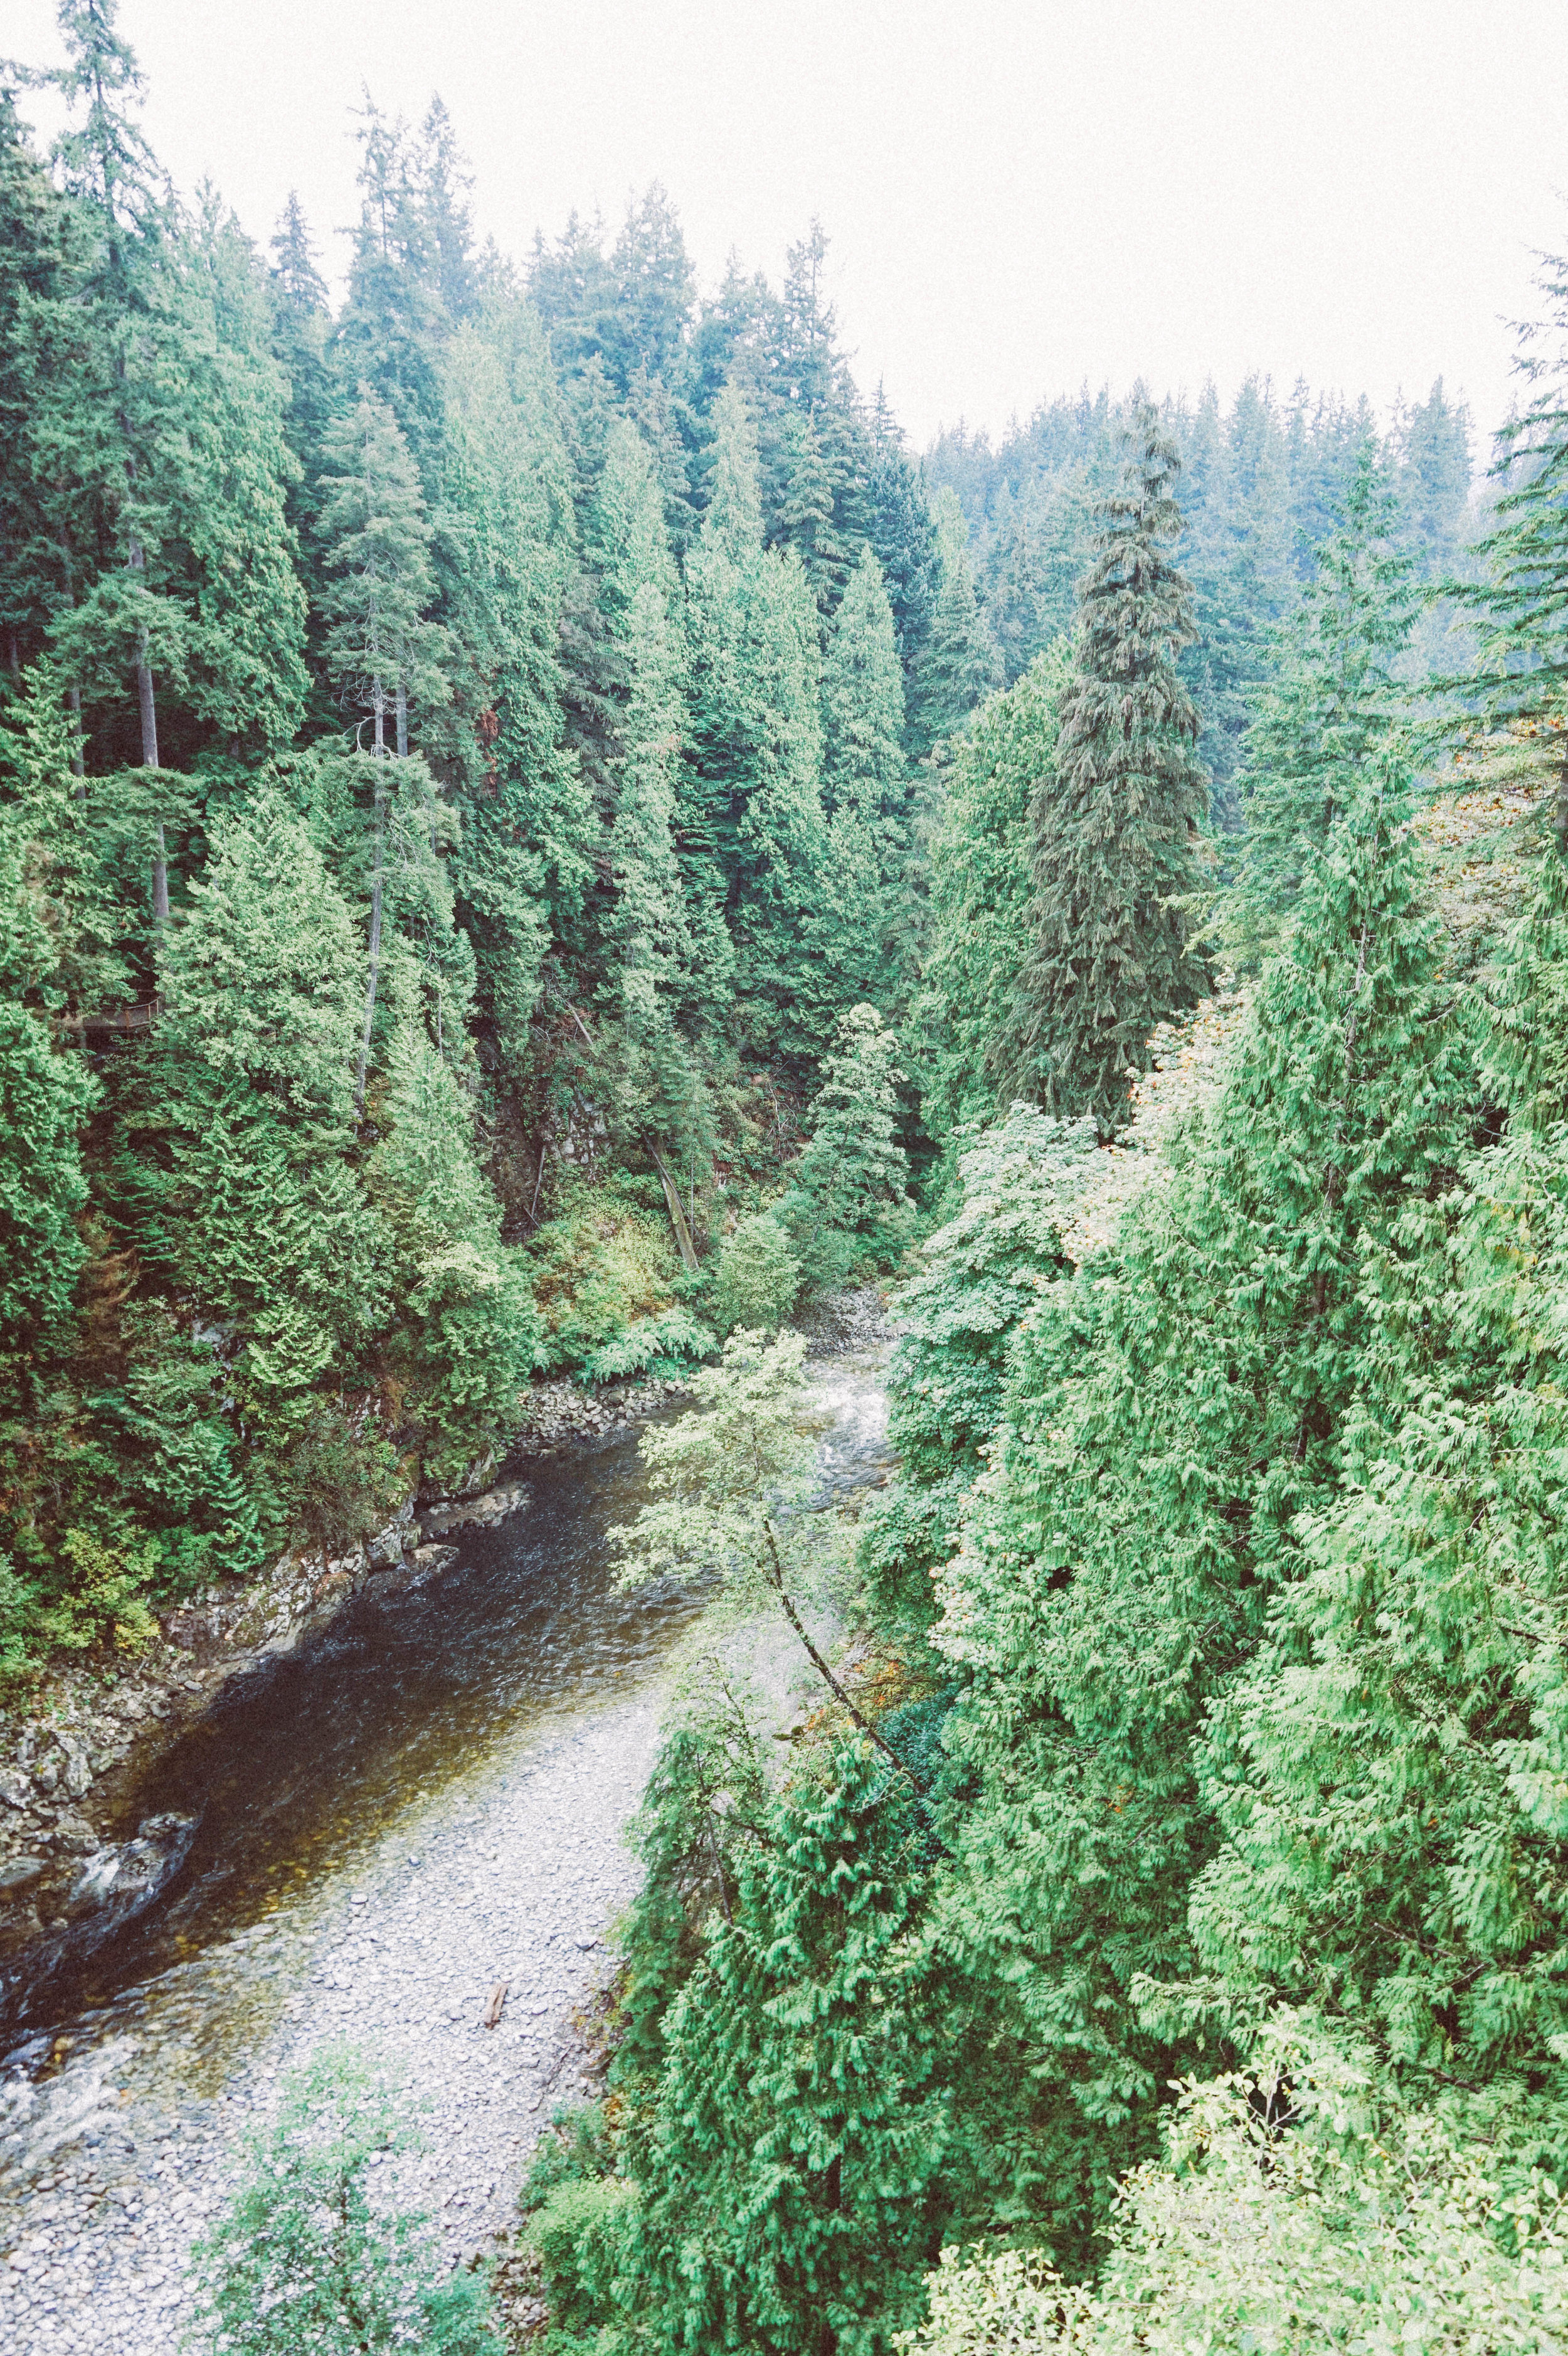
    Must do adventure - Vancouver: Capilano Suspension Bridge

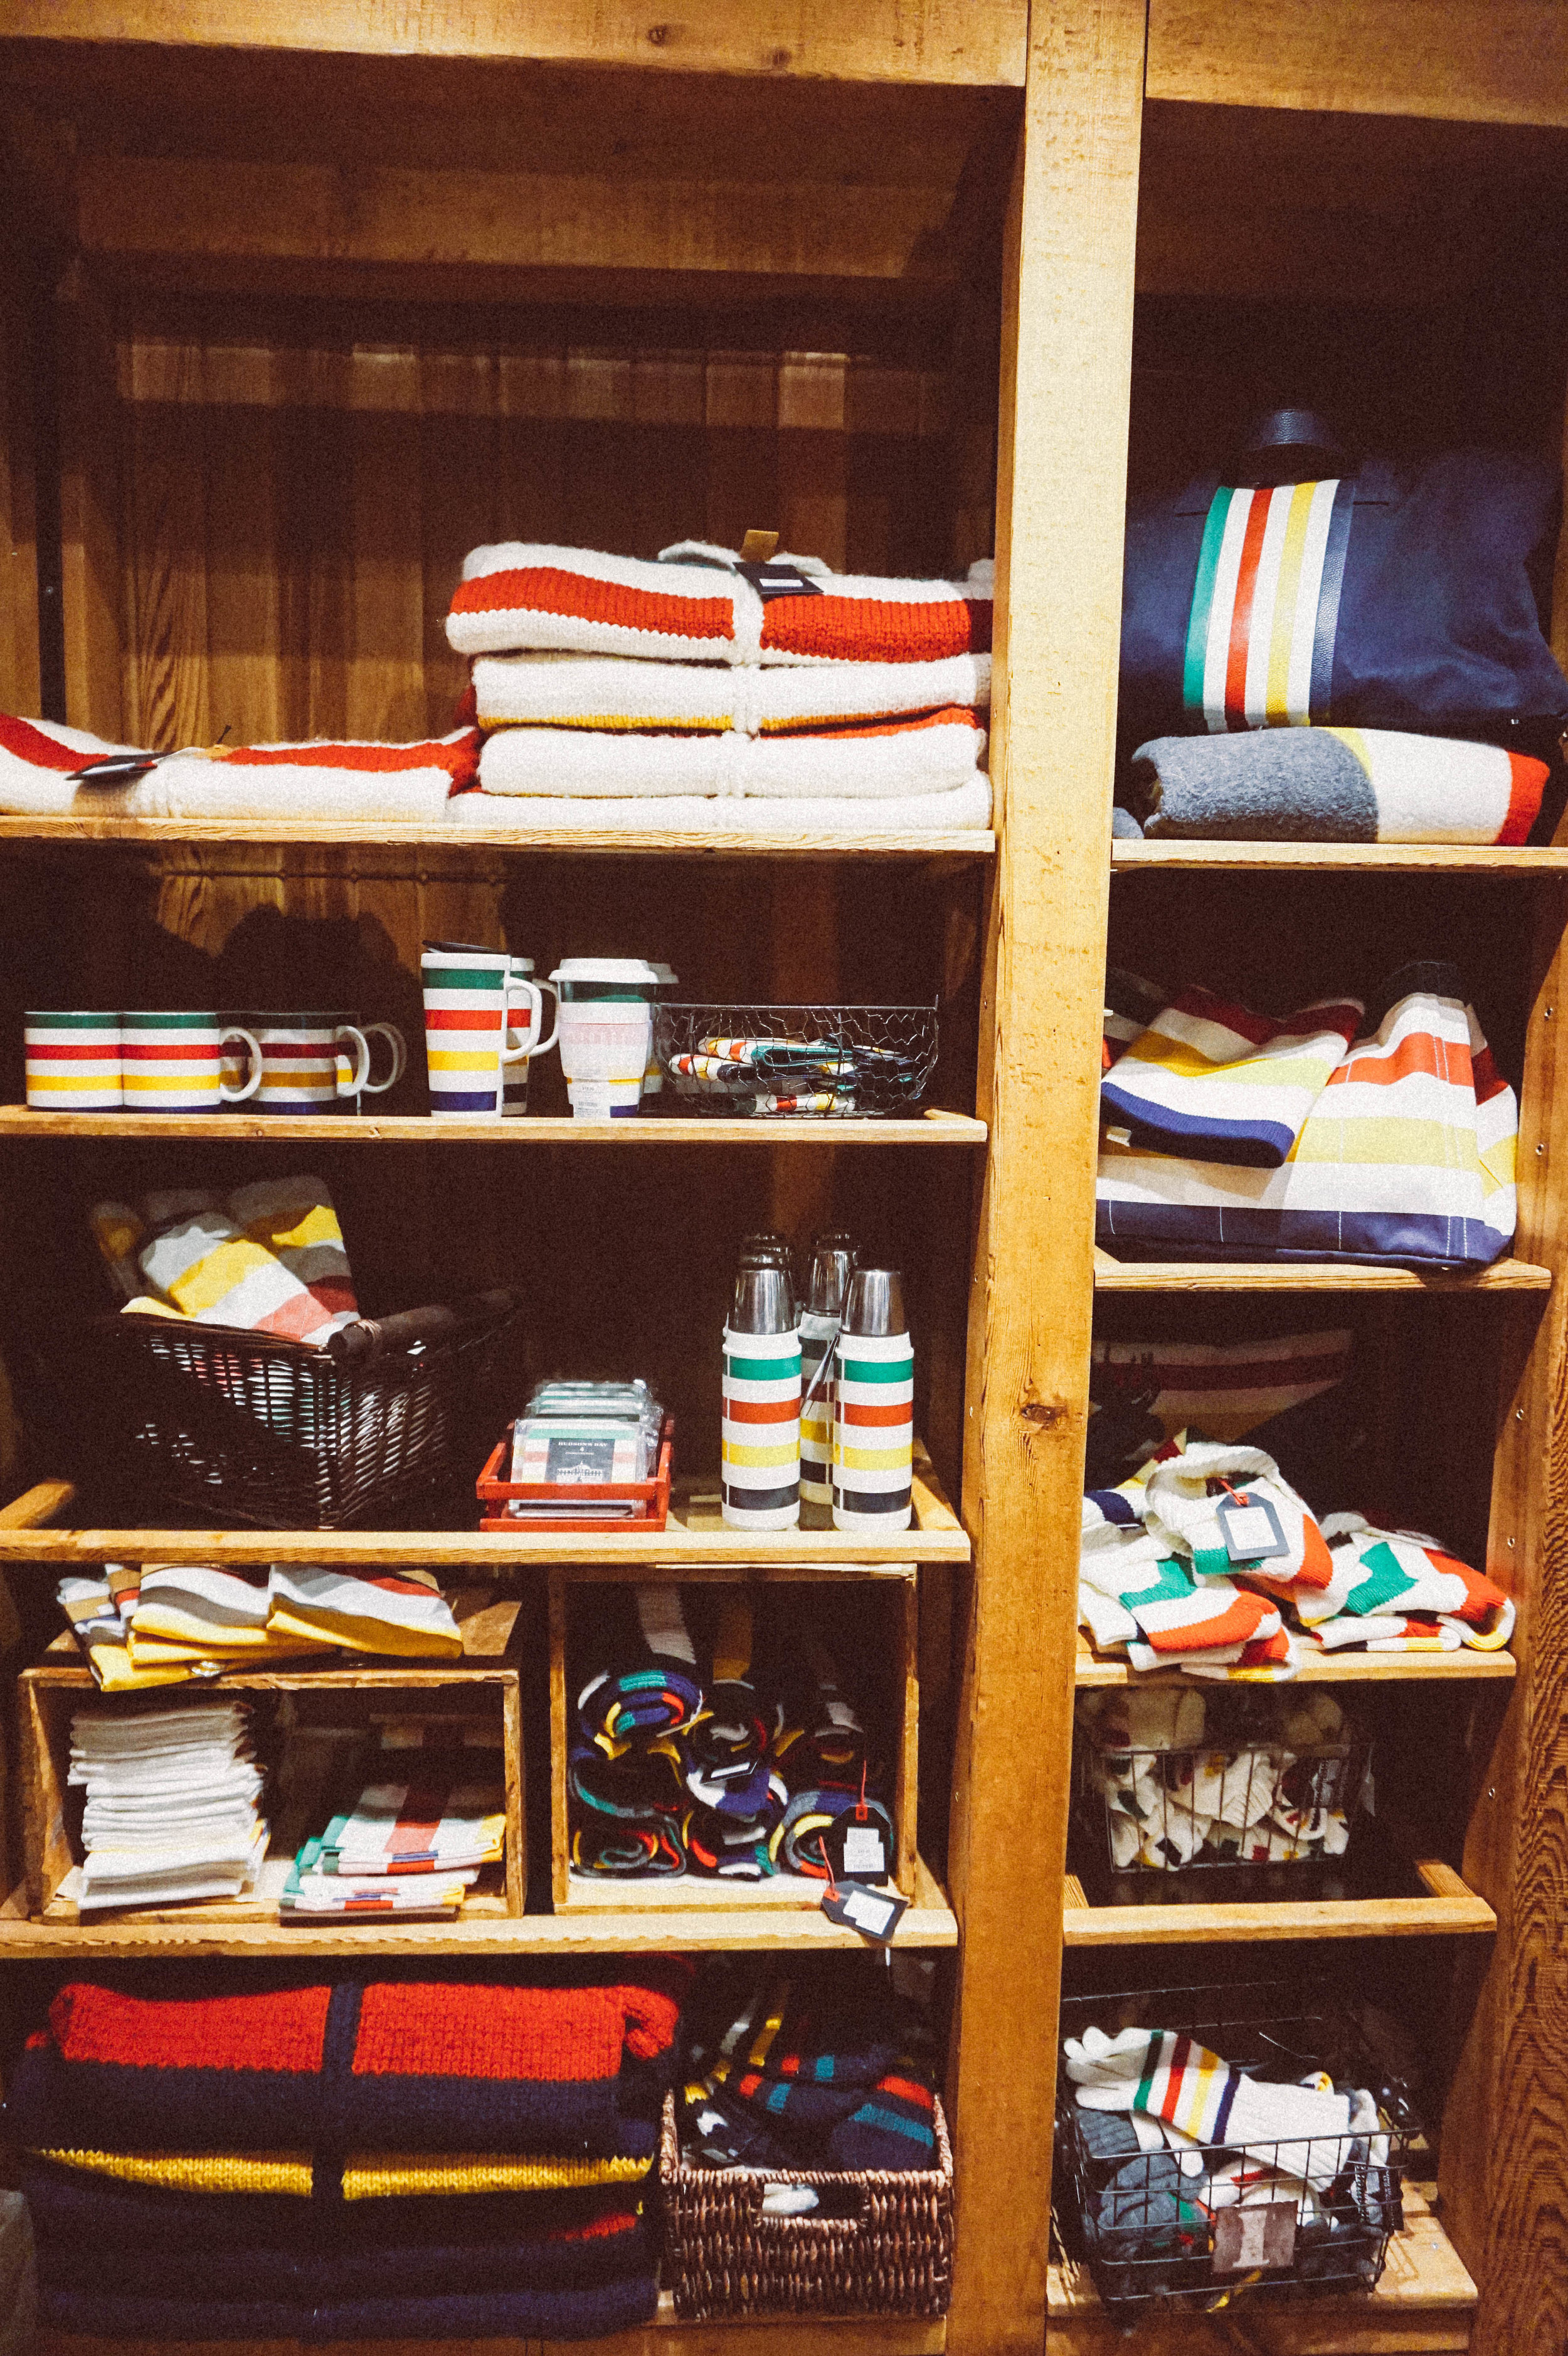
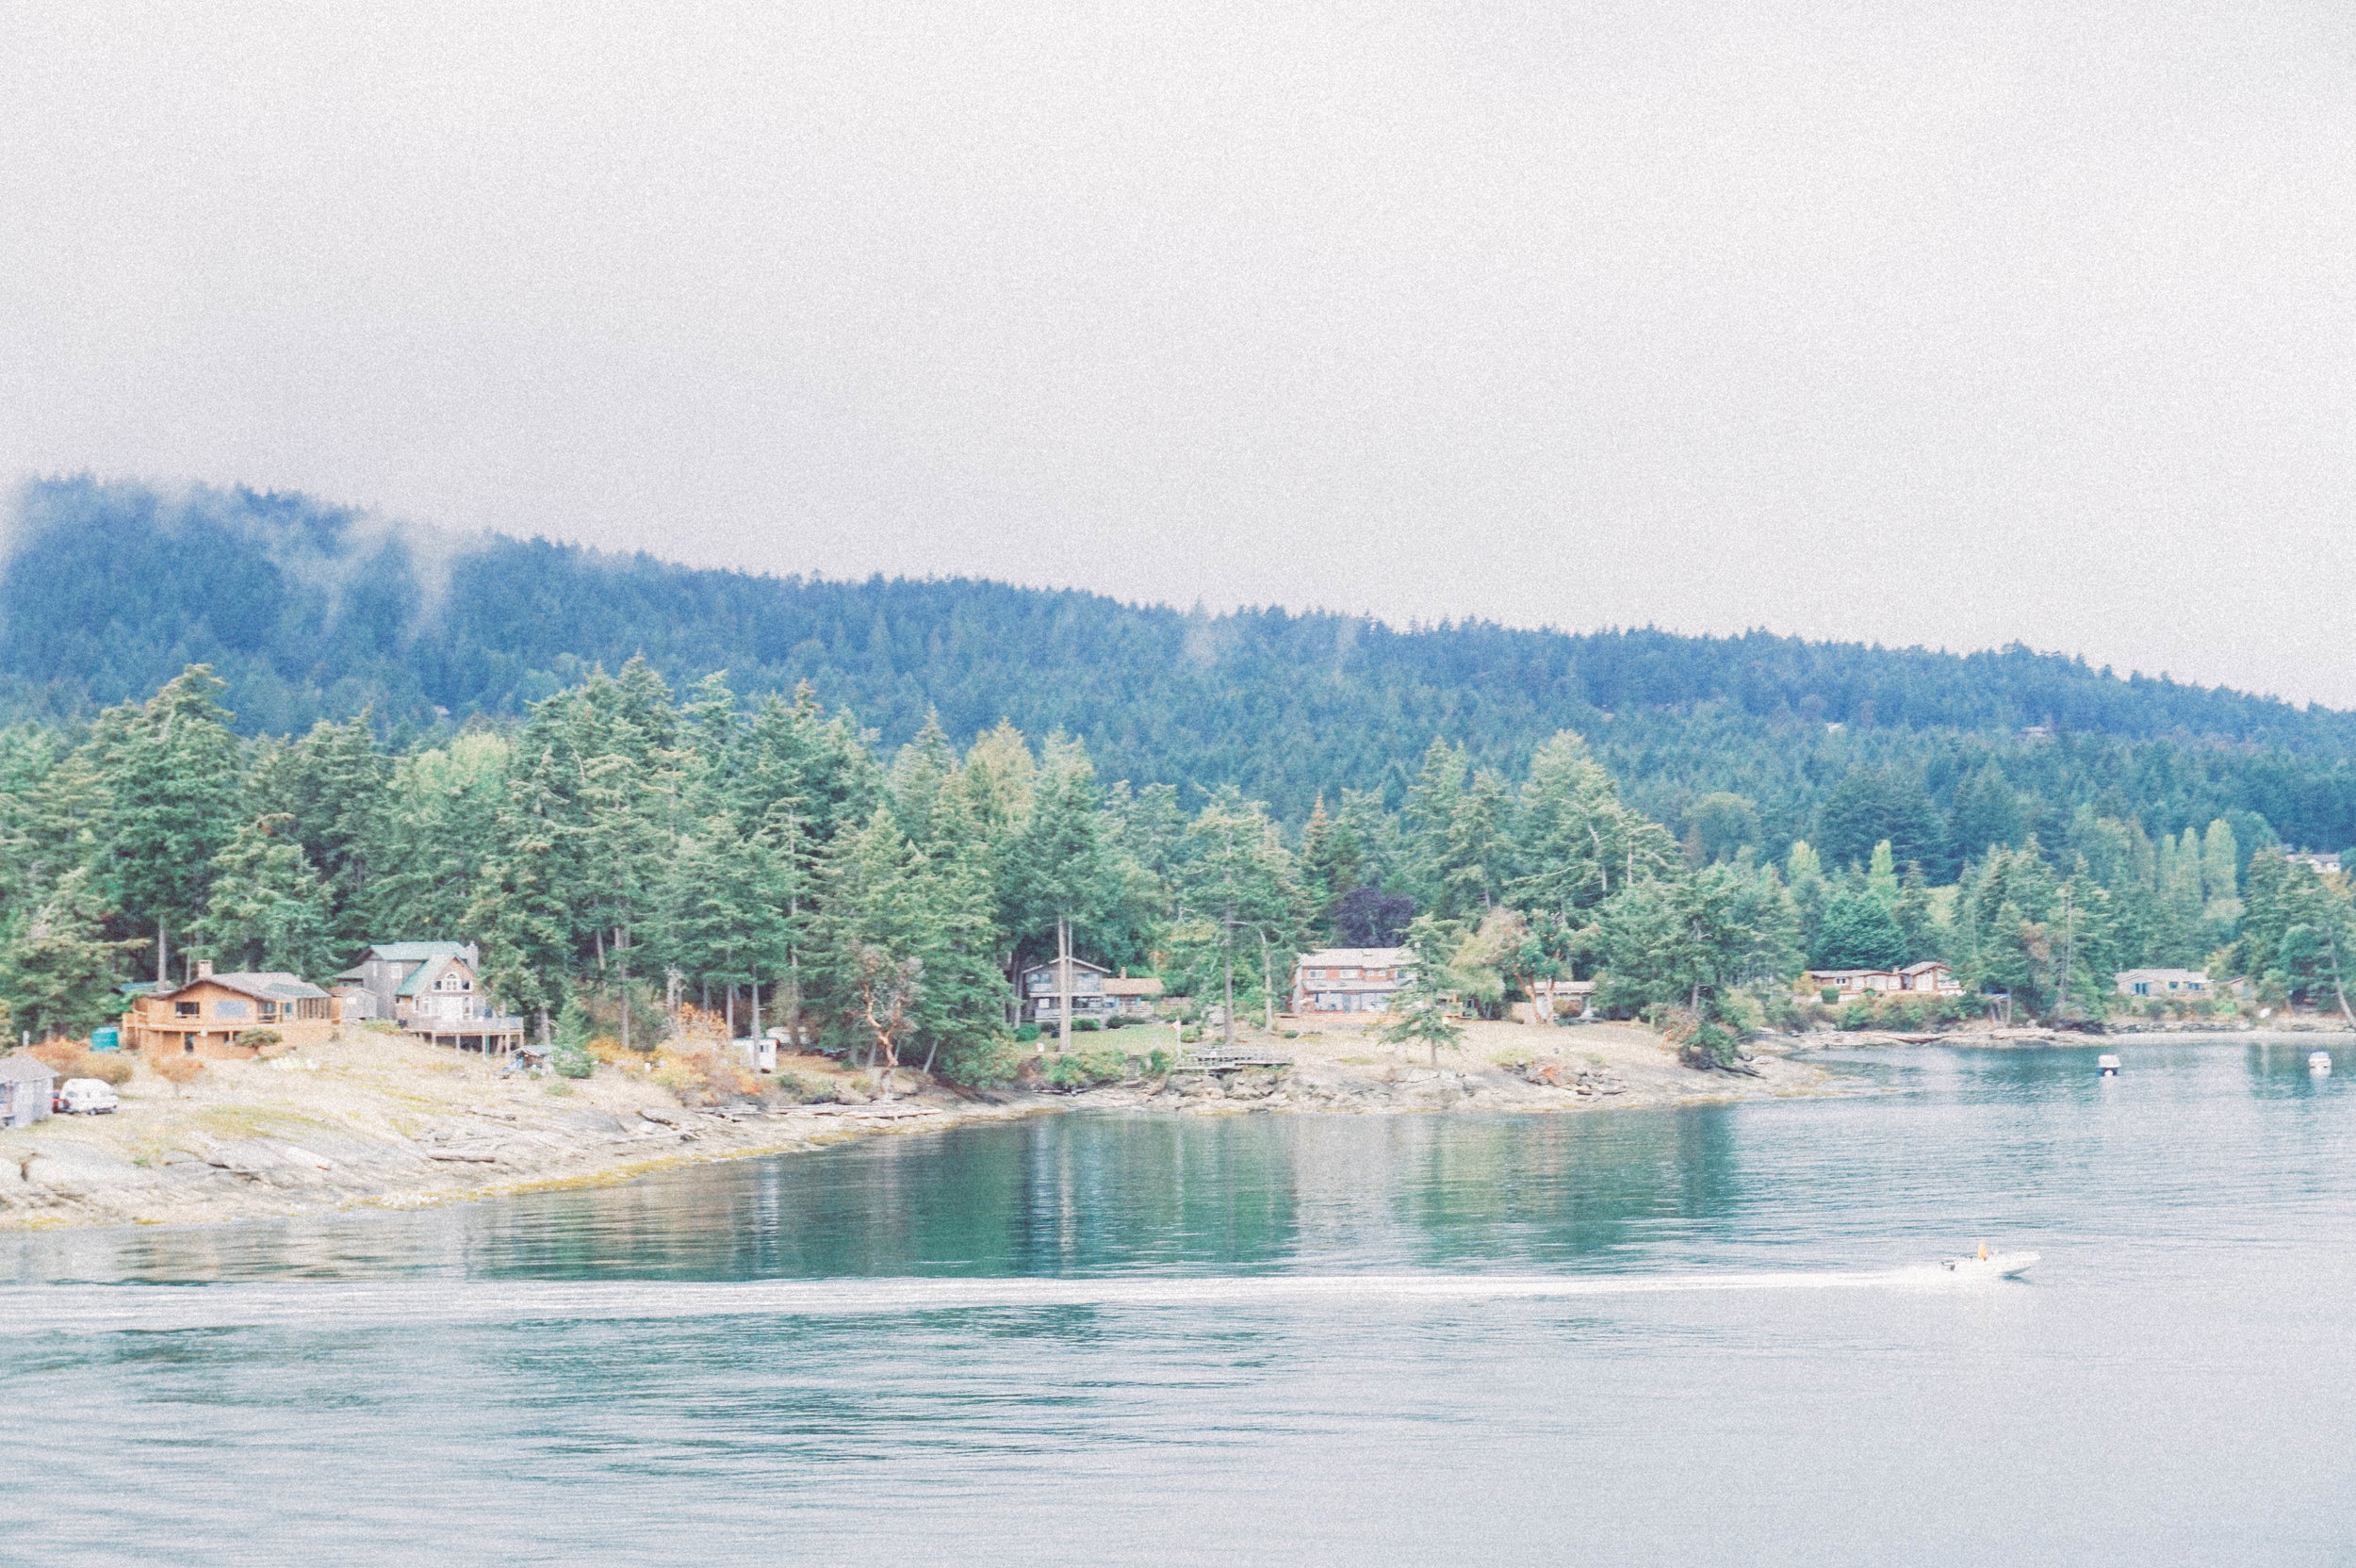
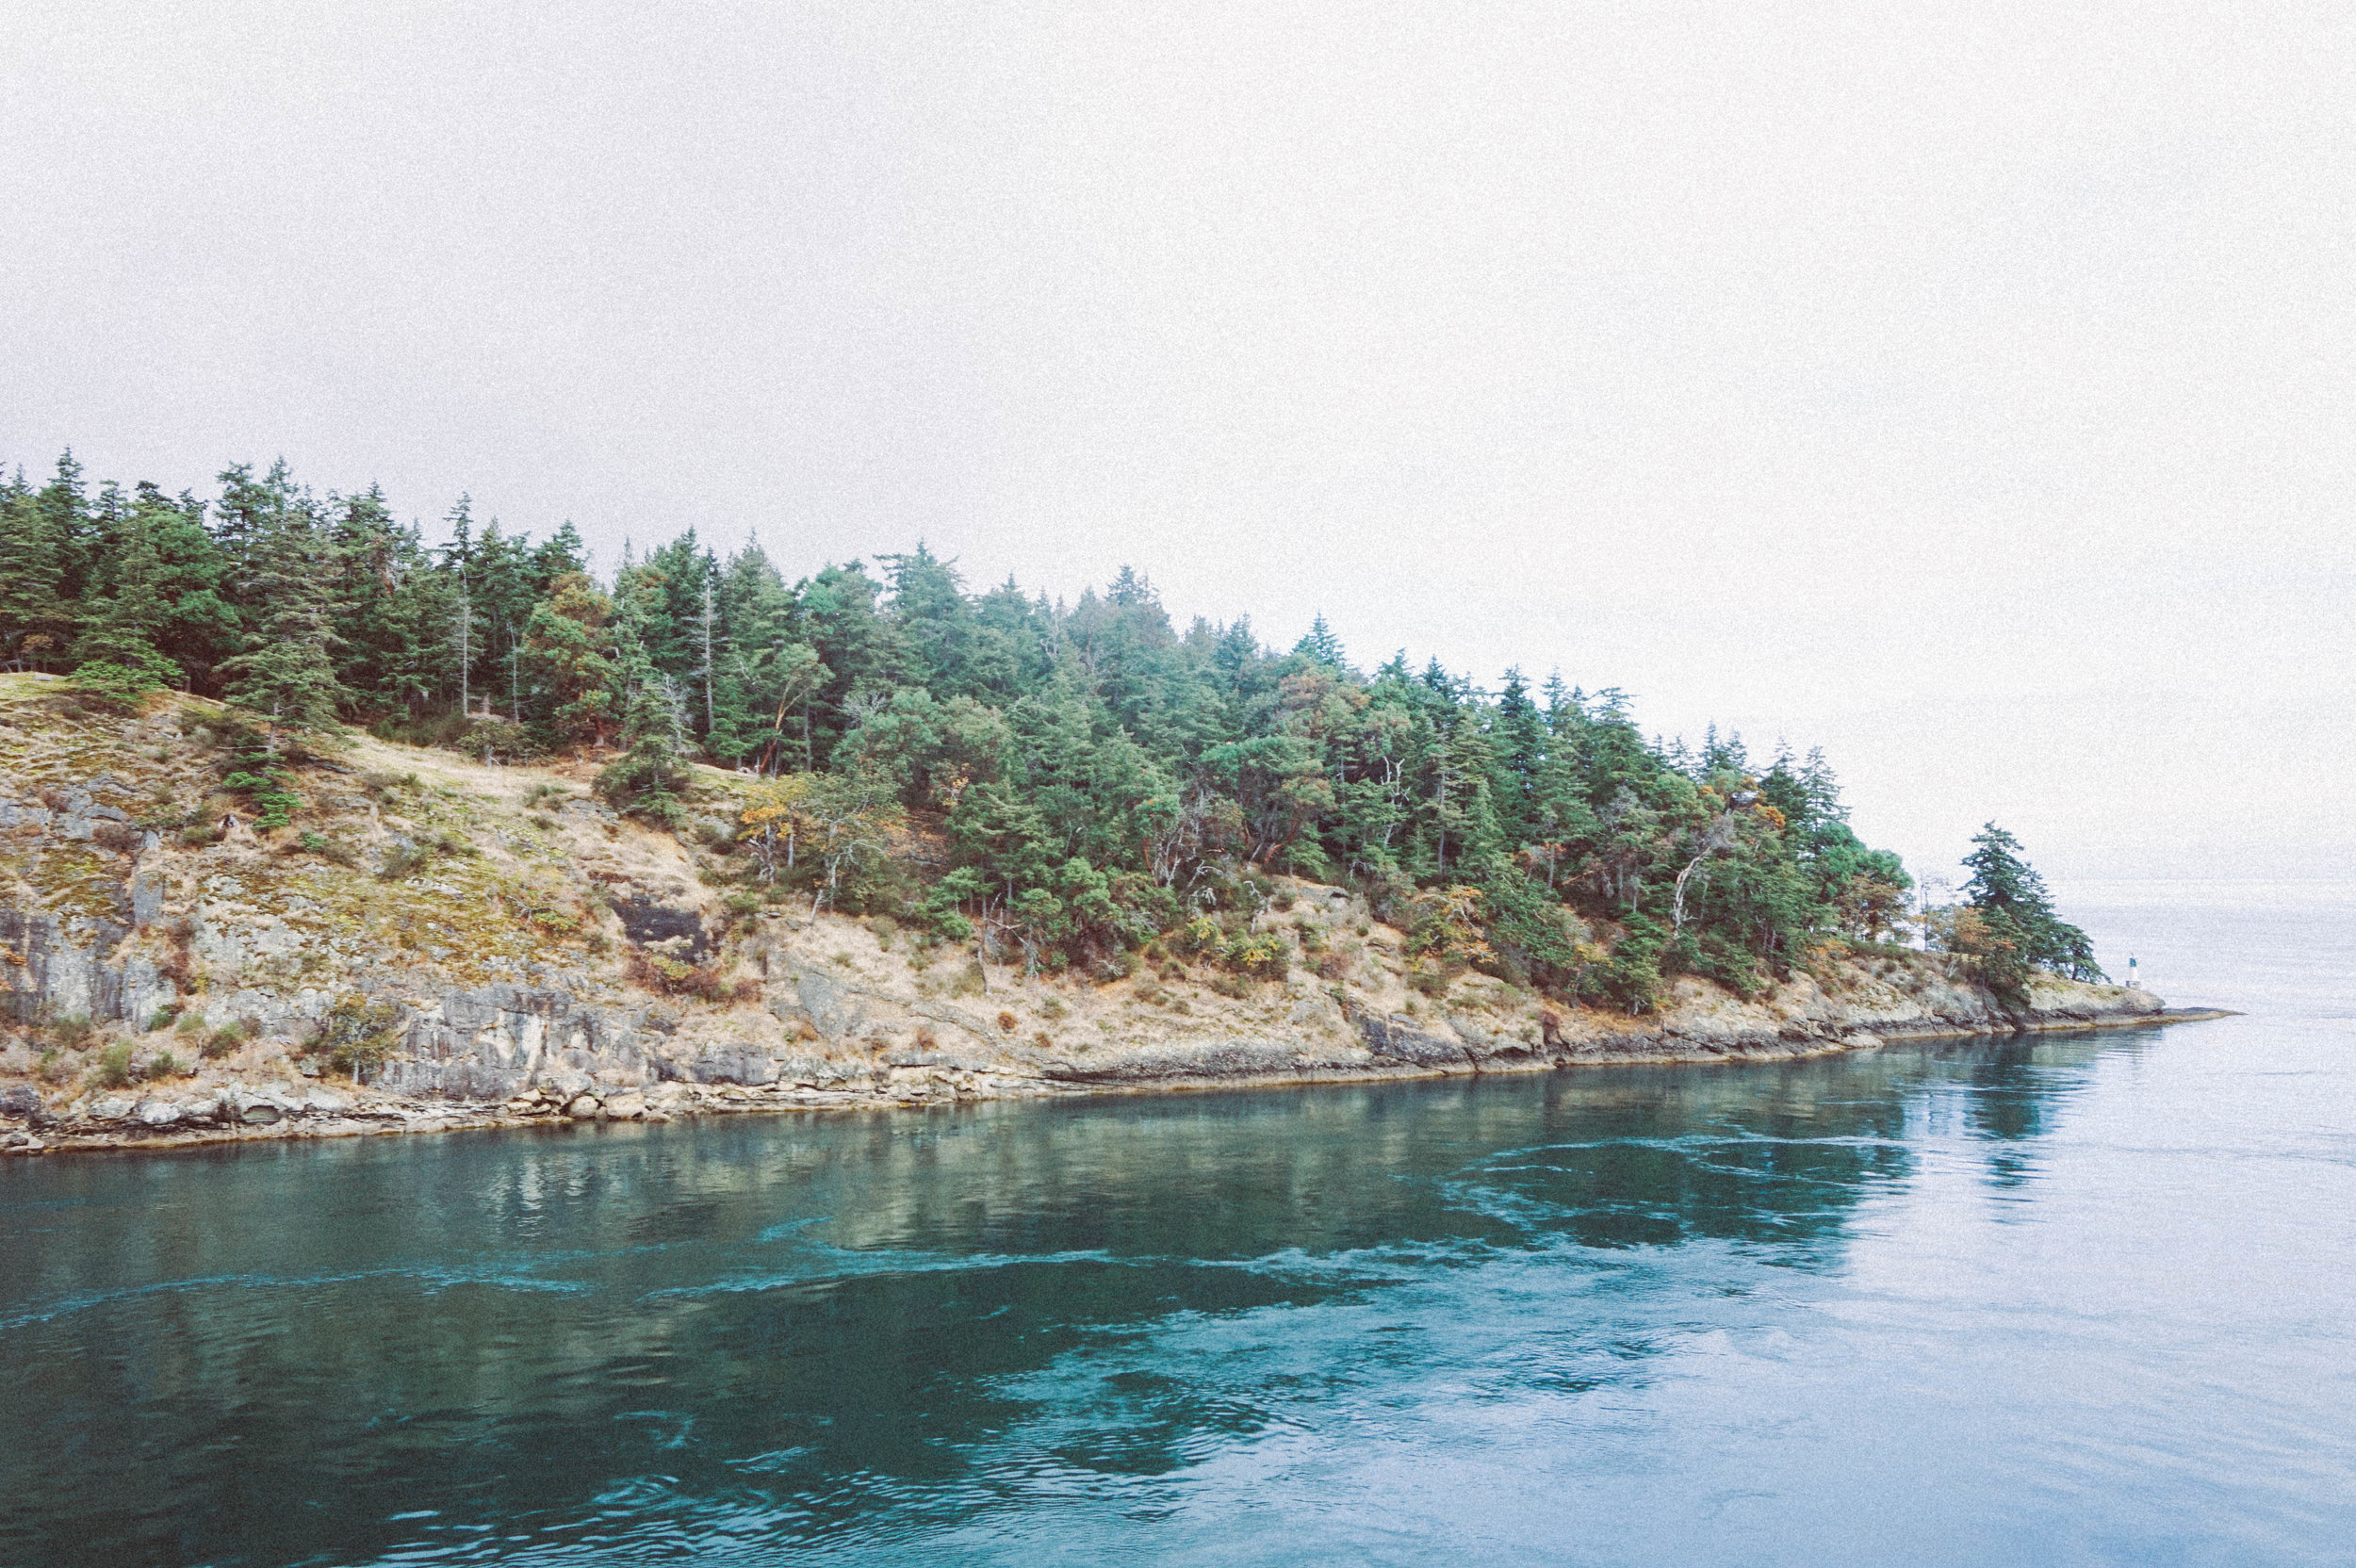
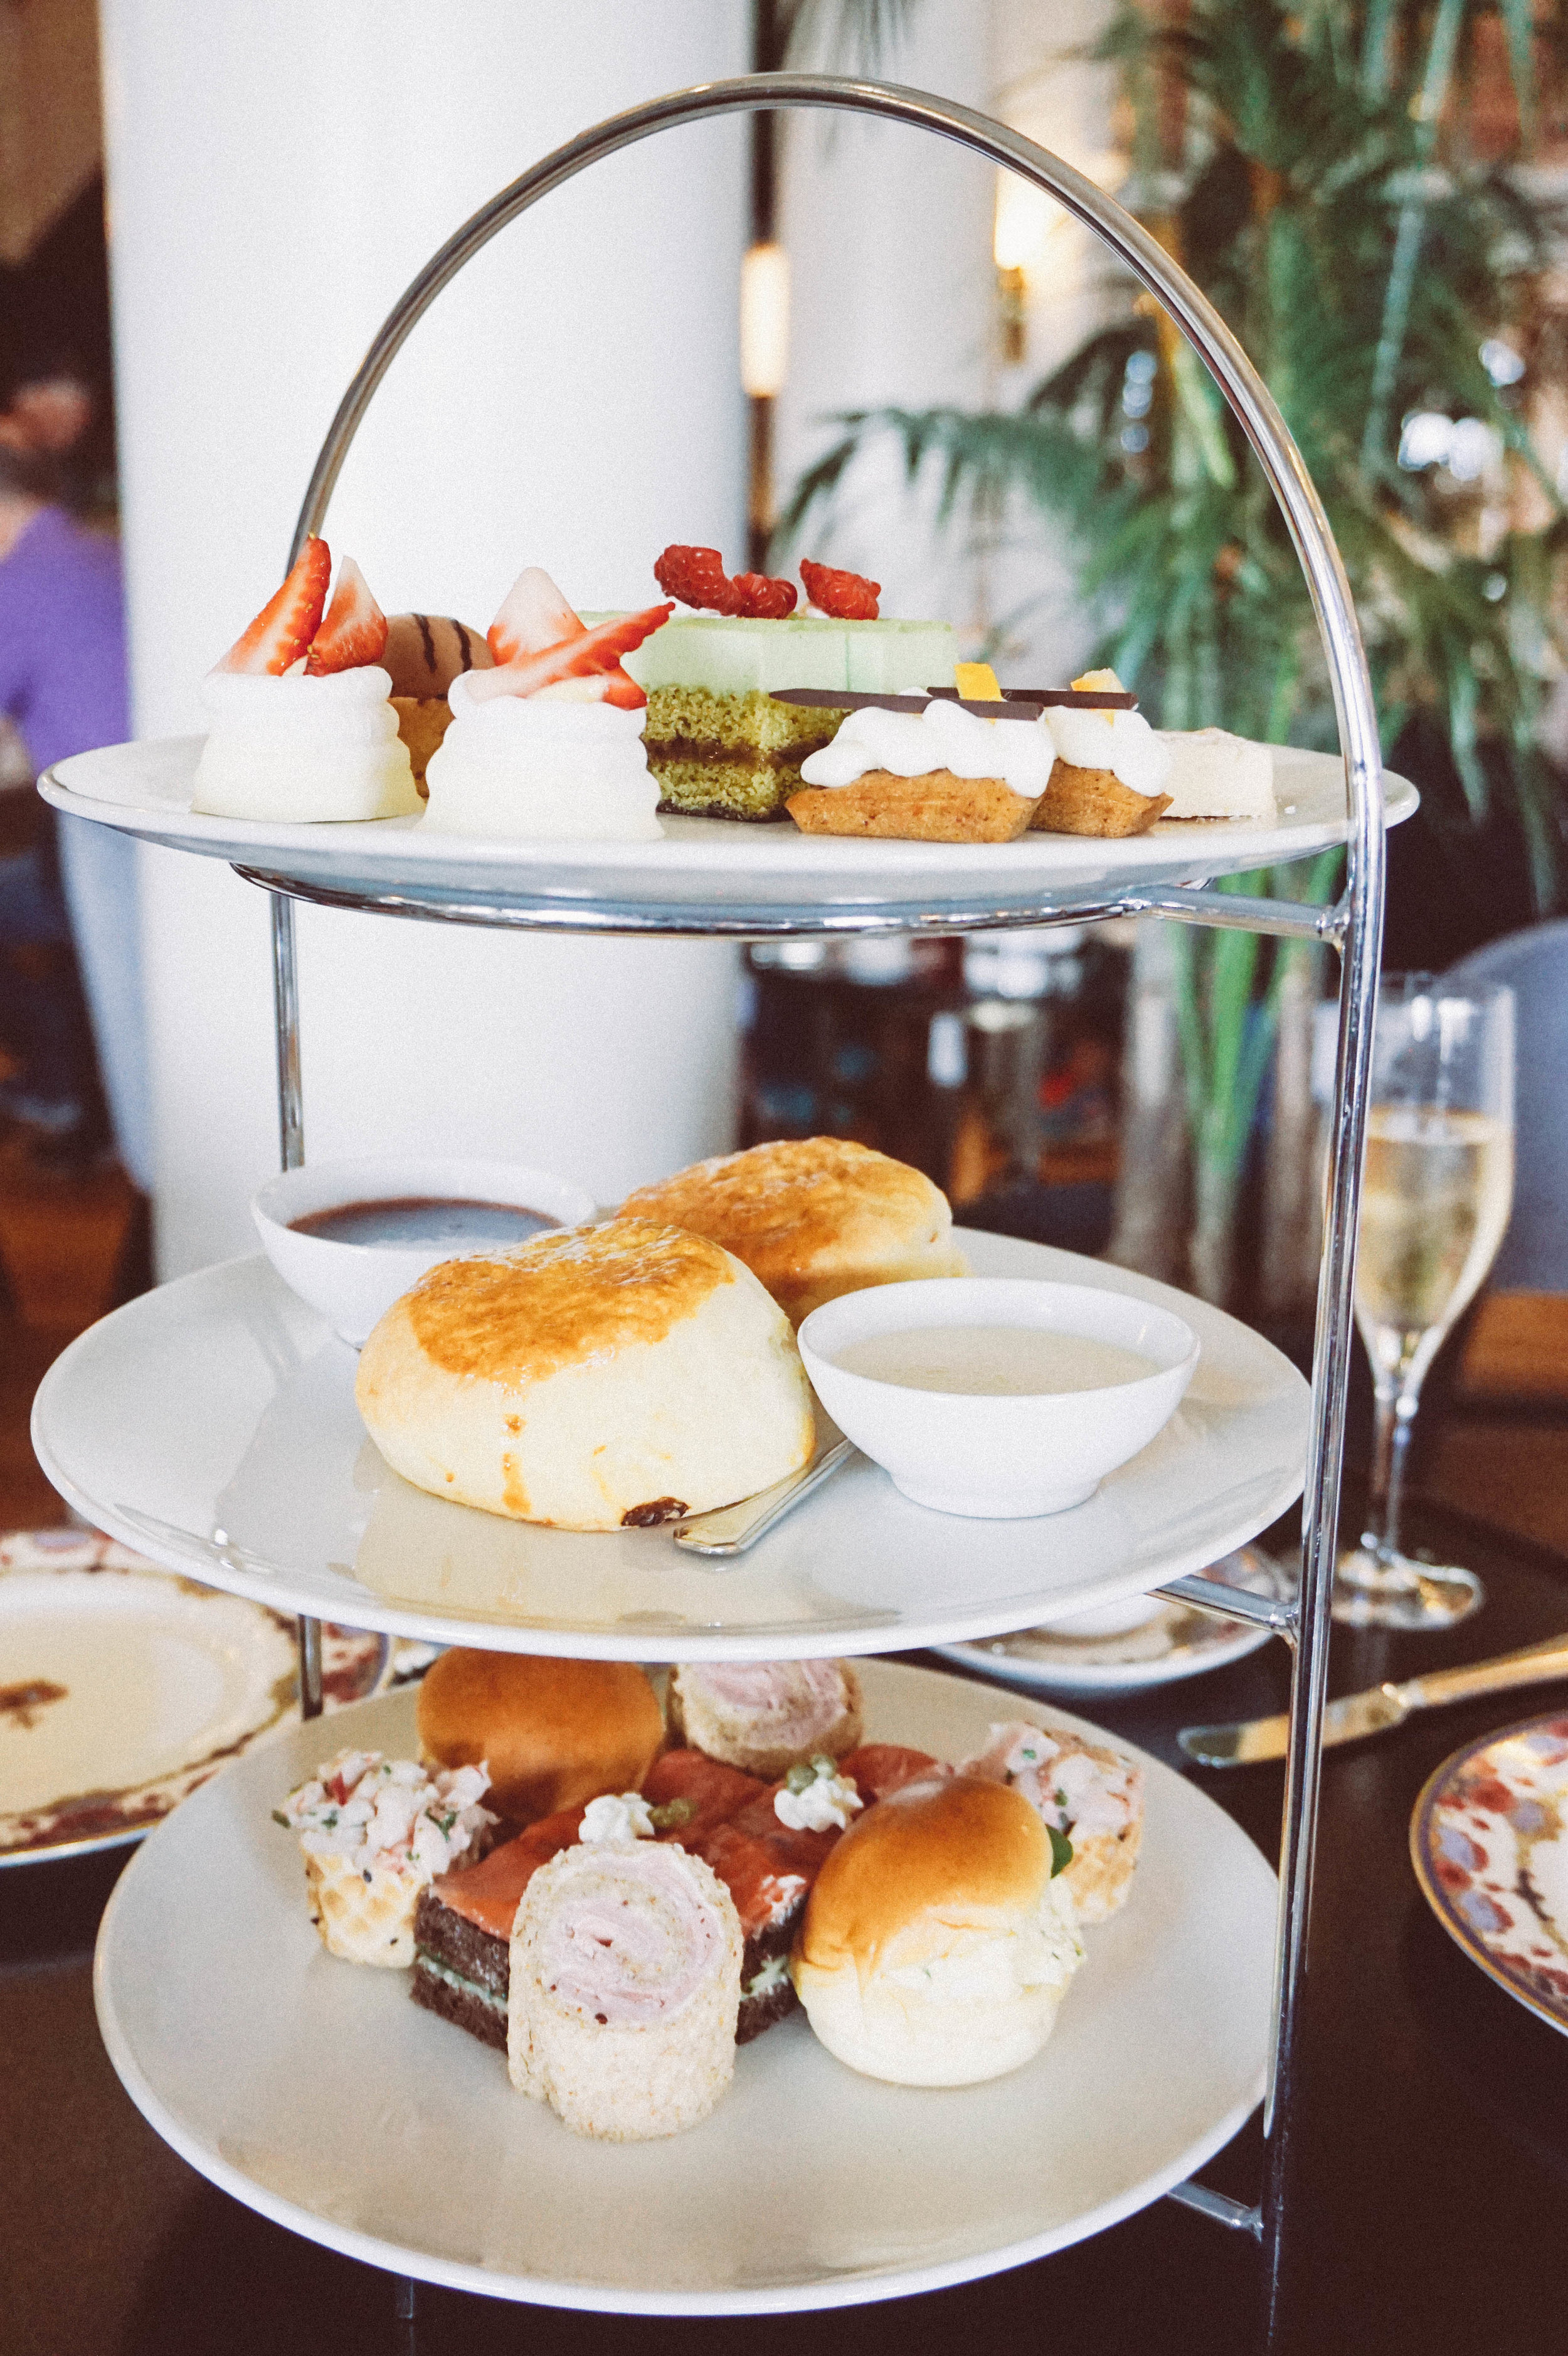
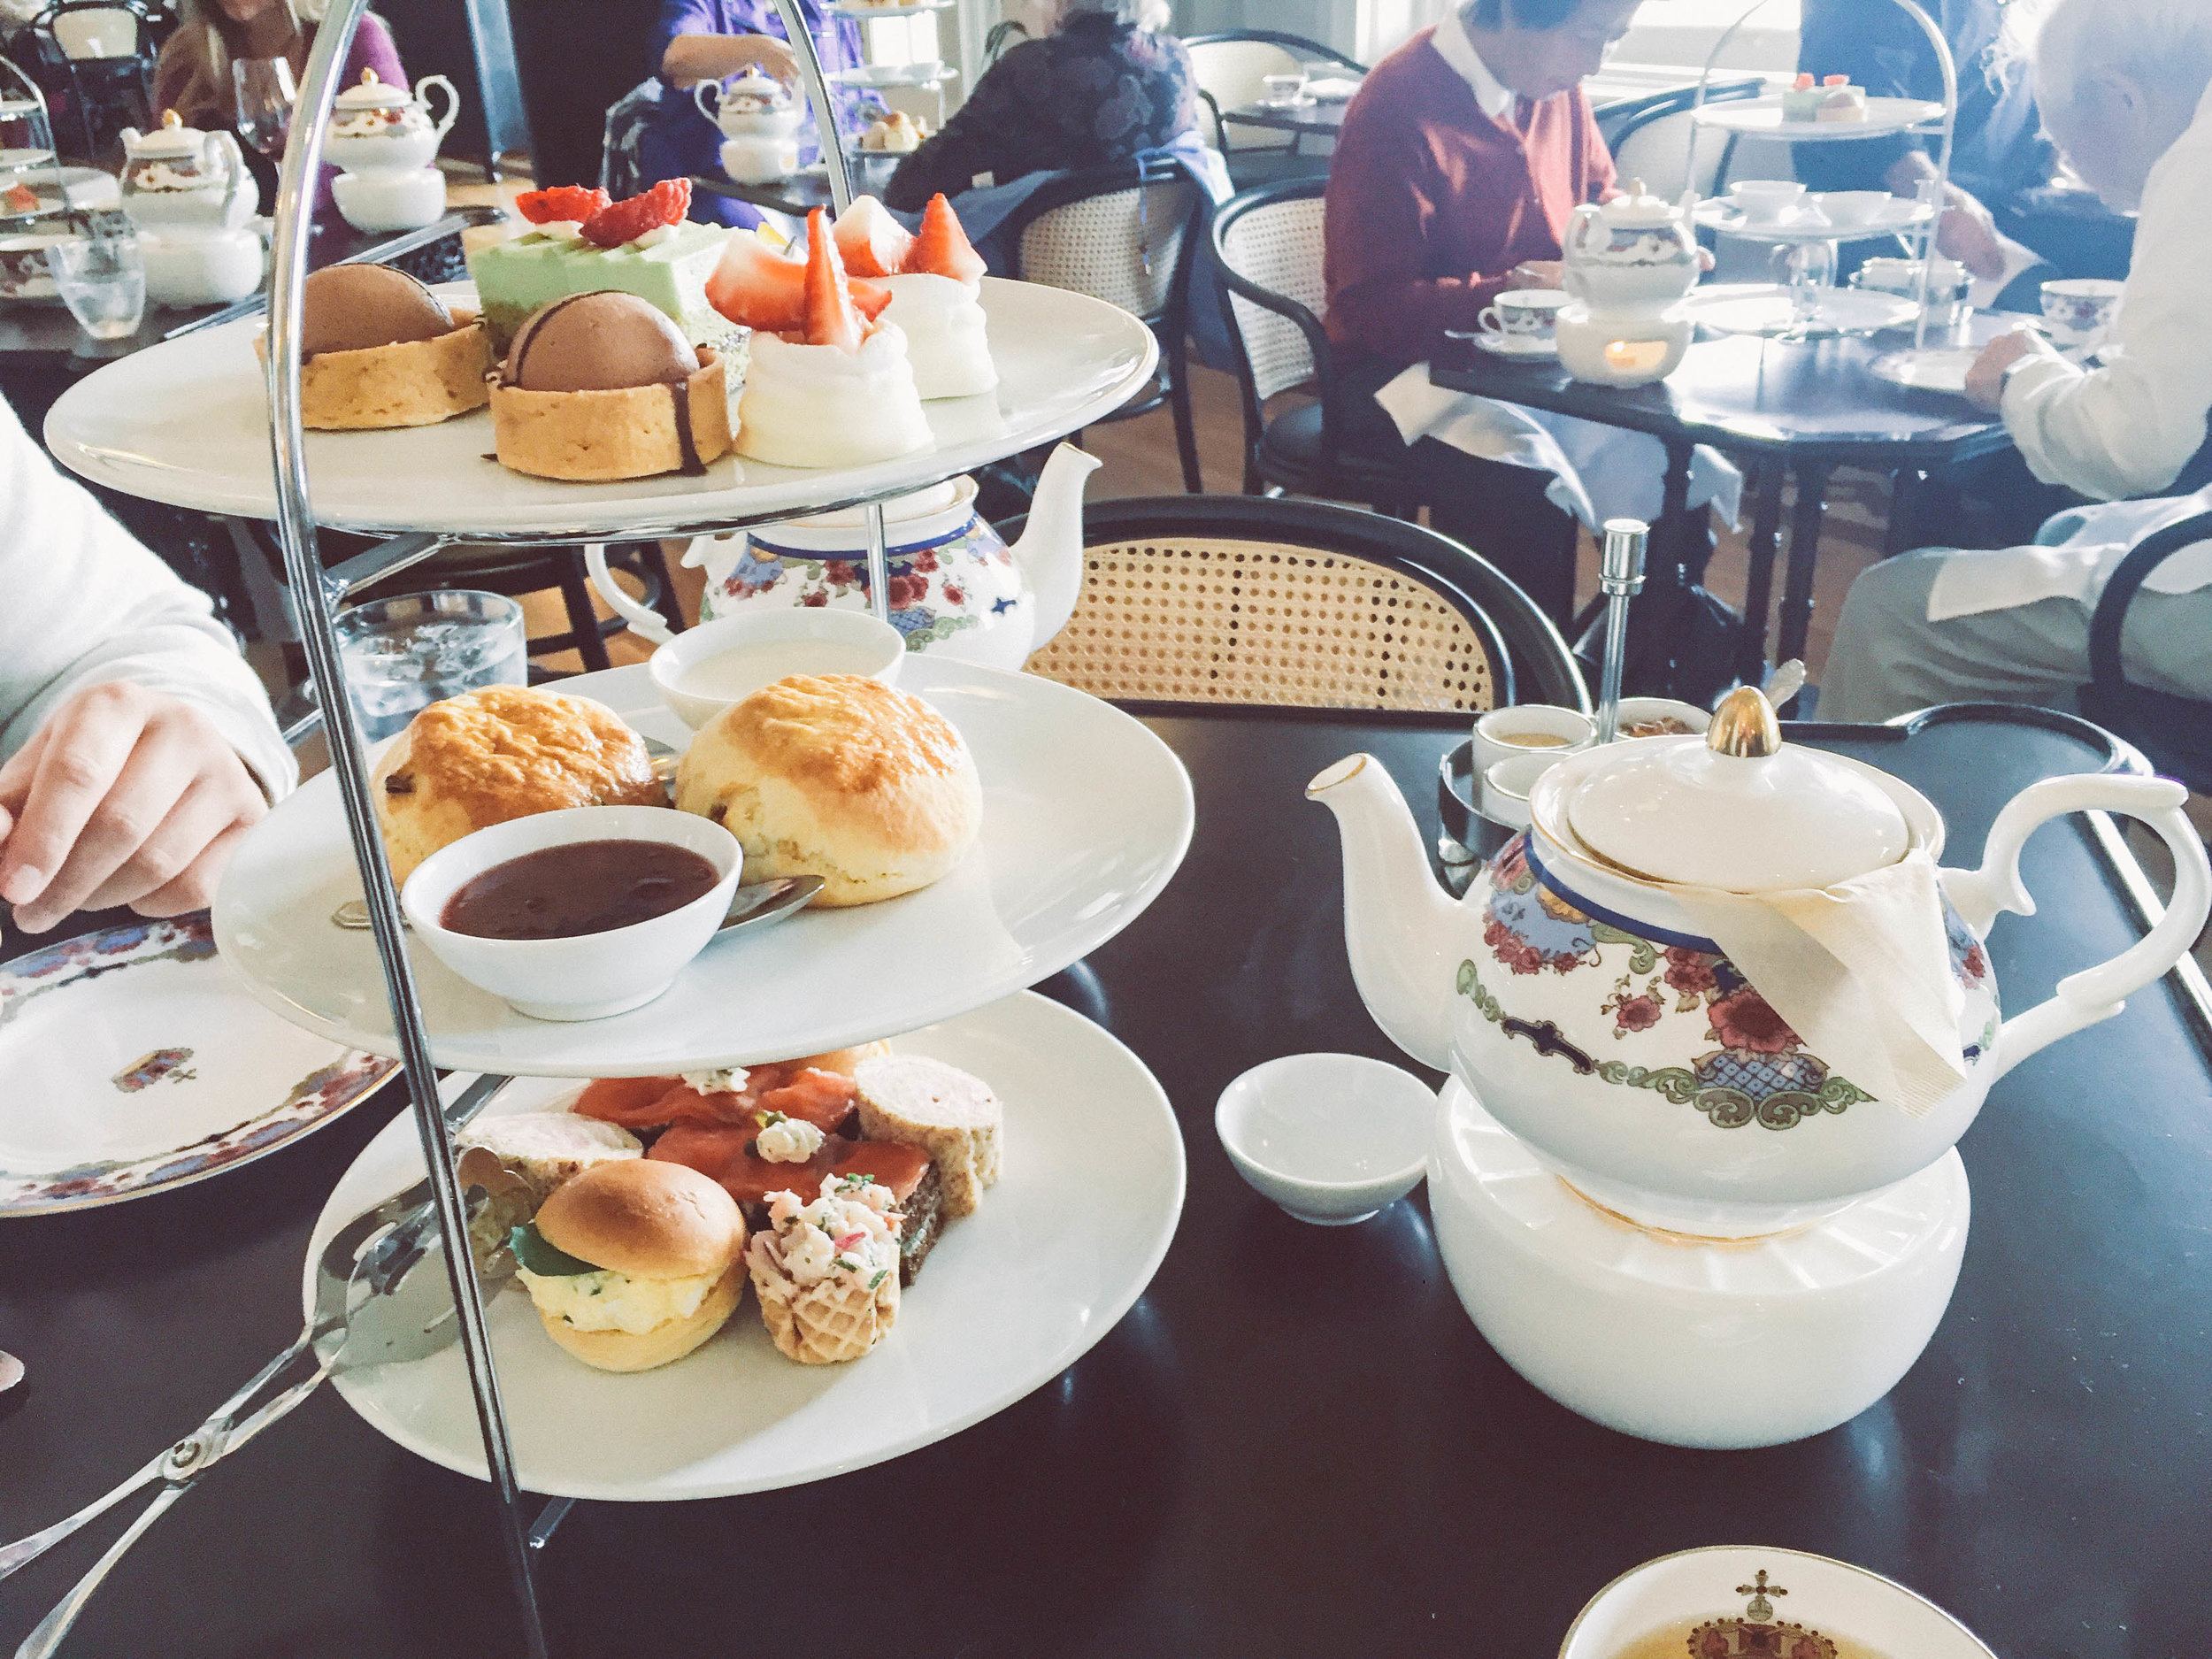
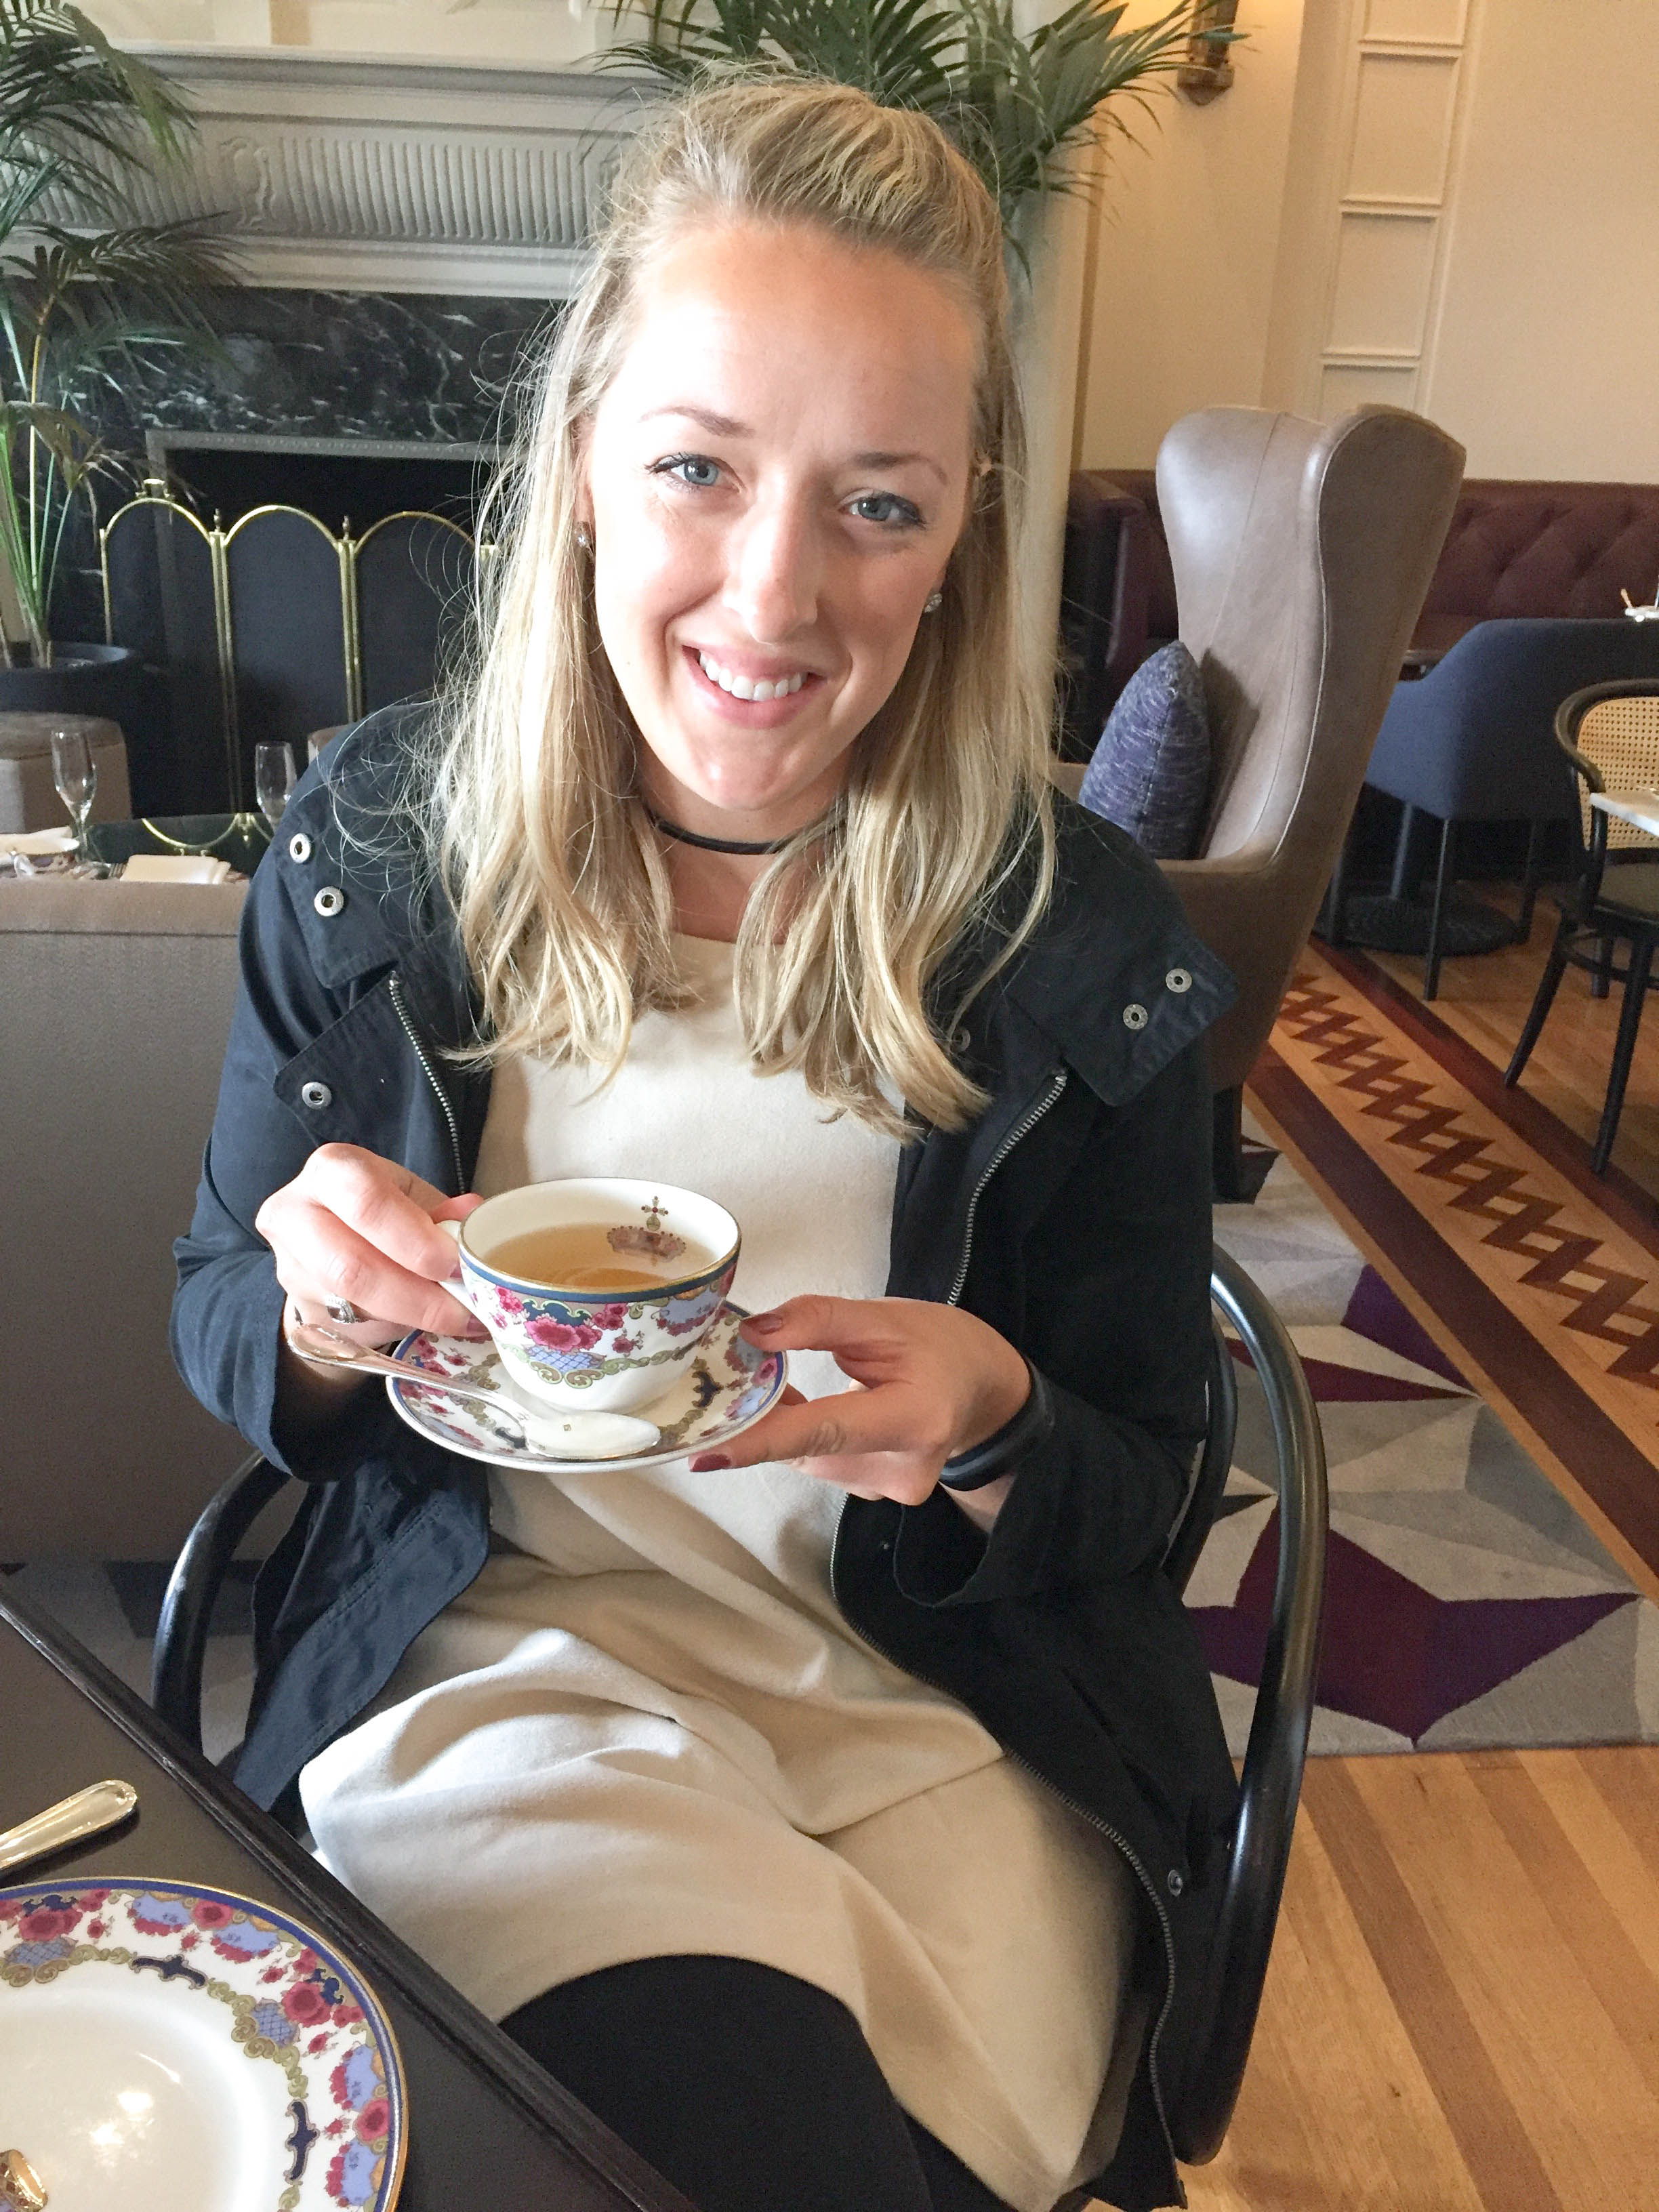
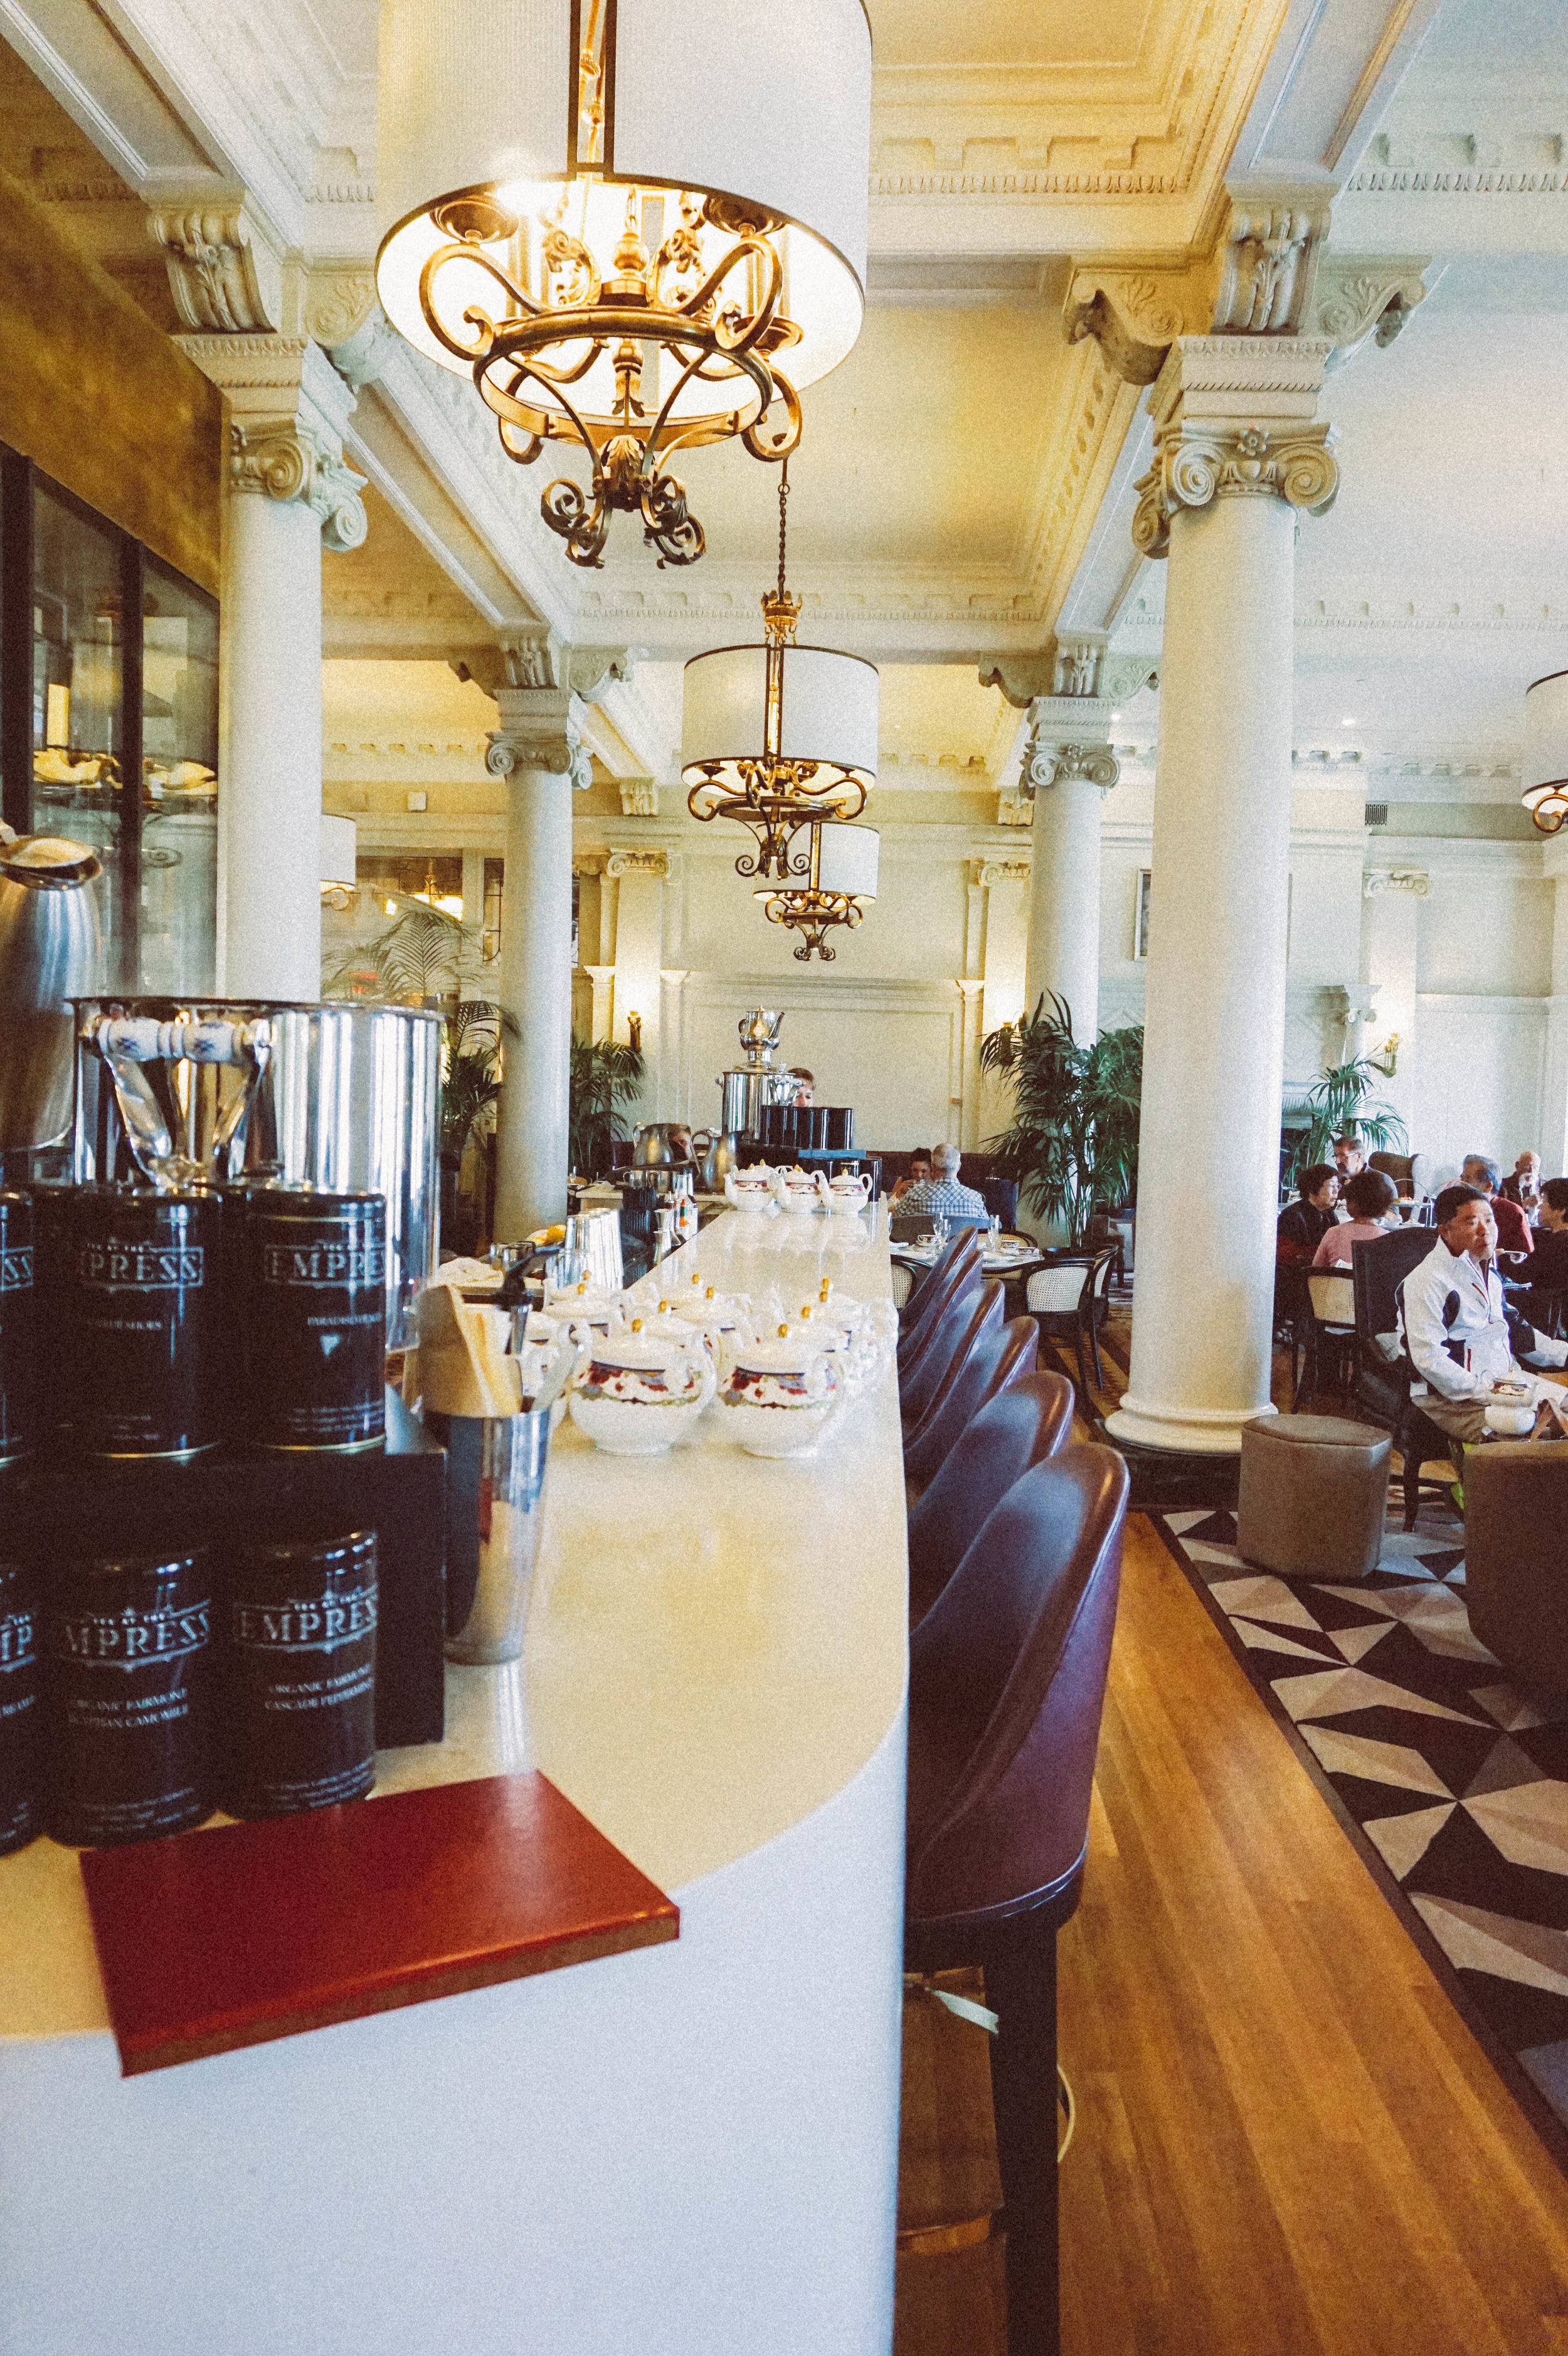
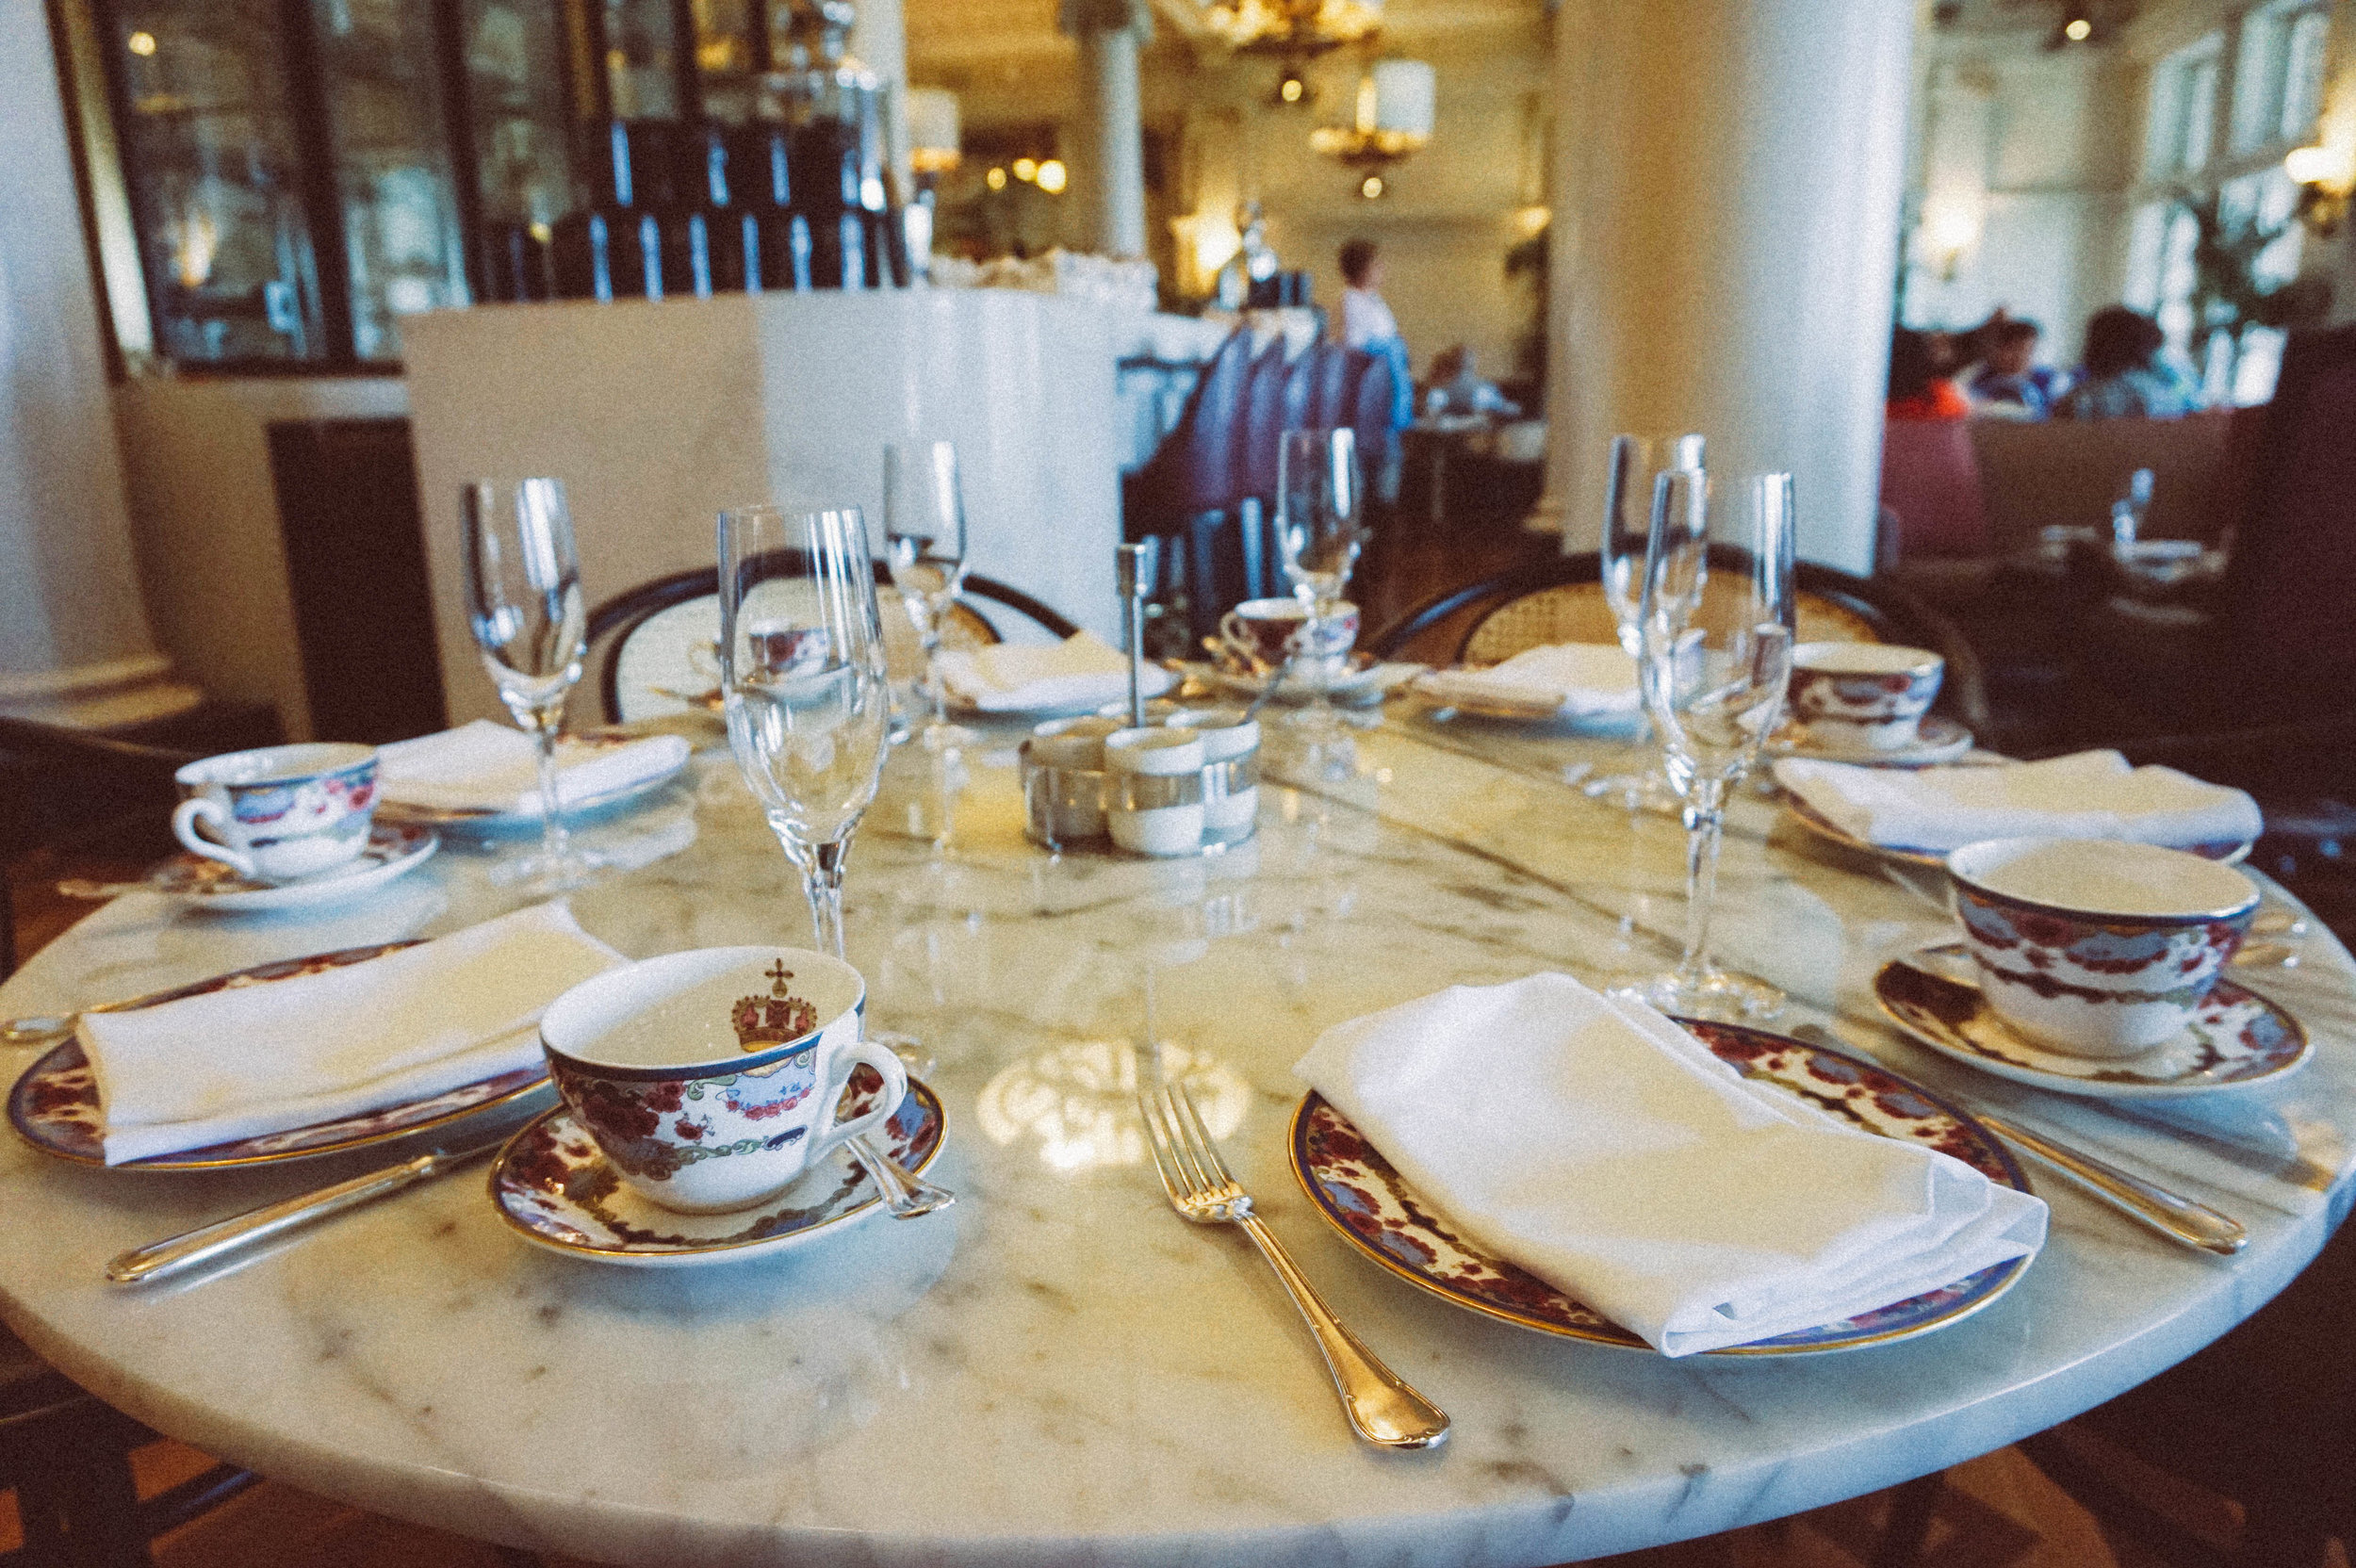
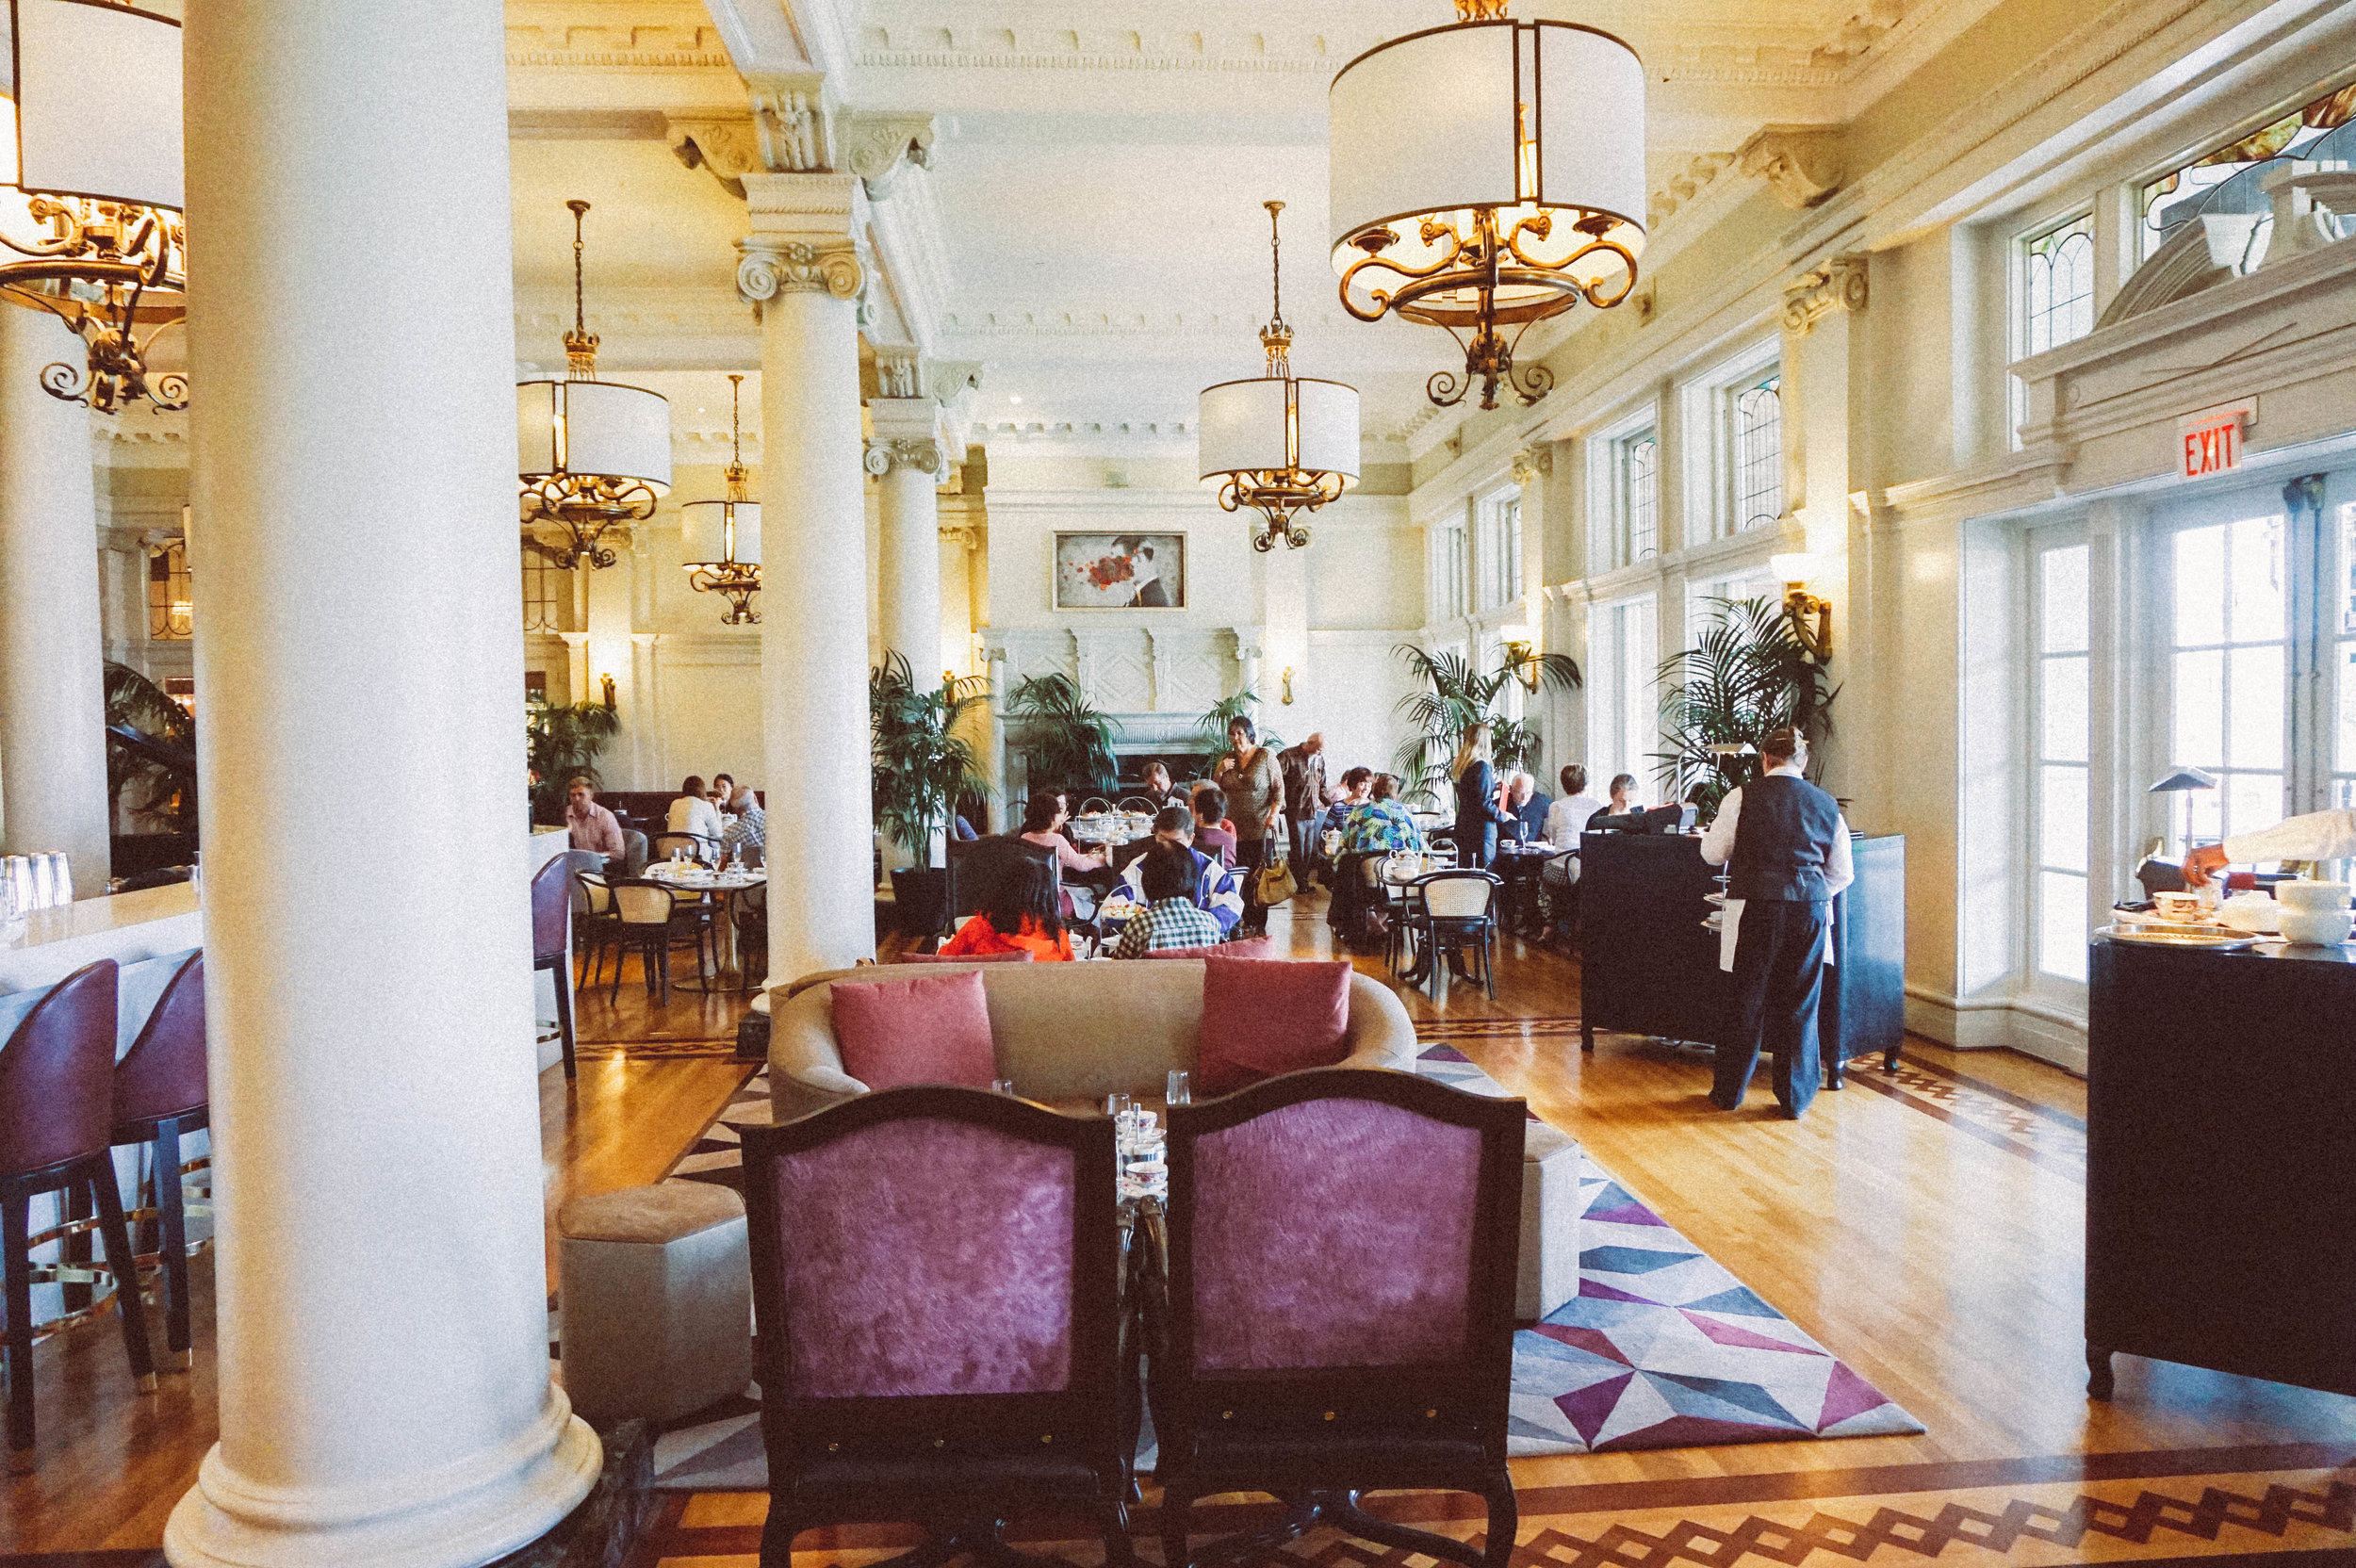
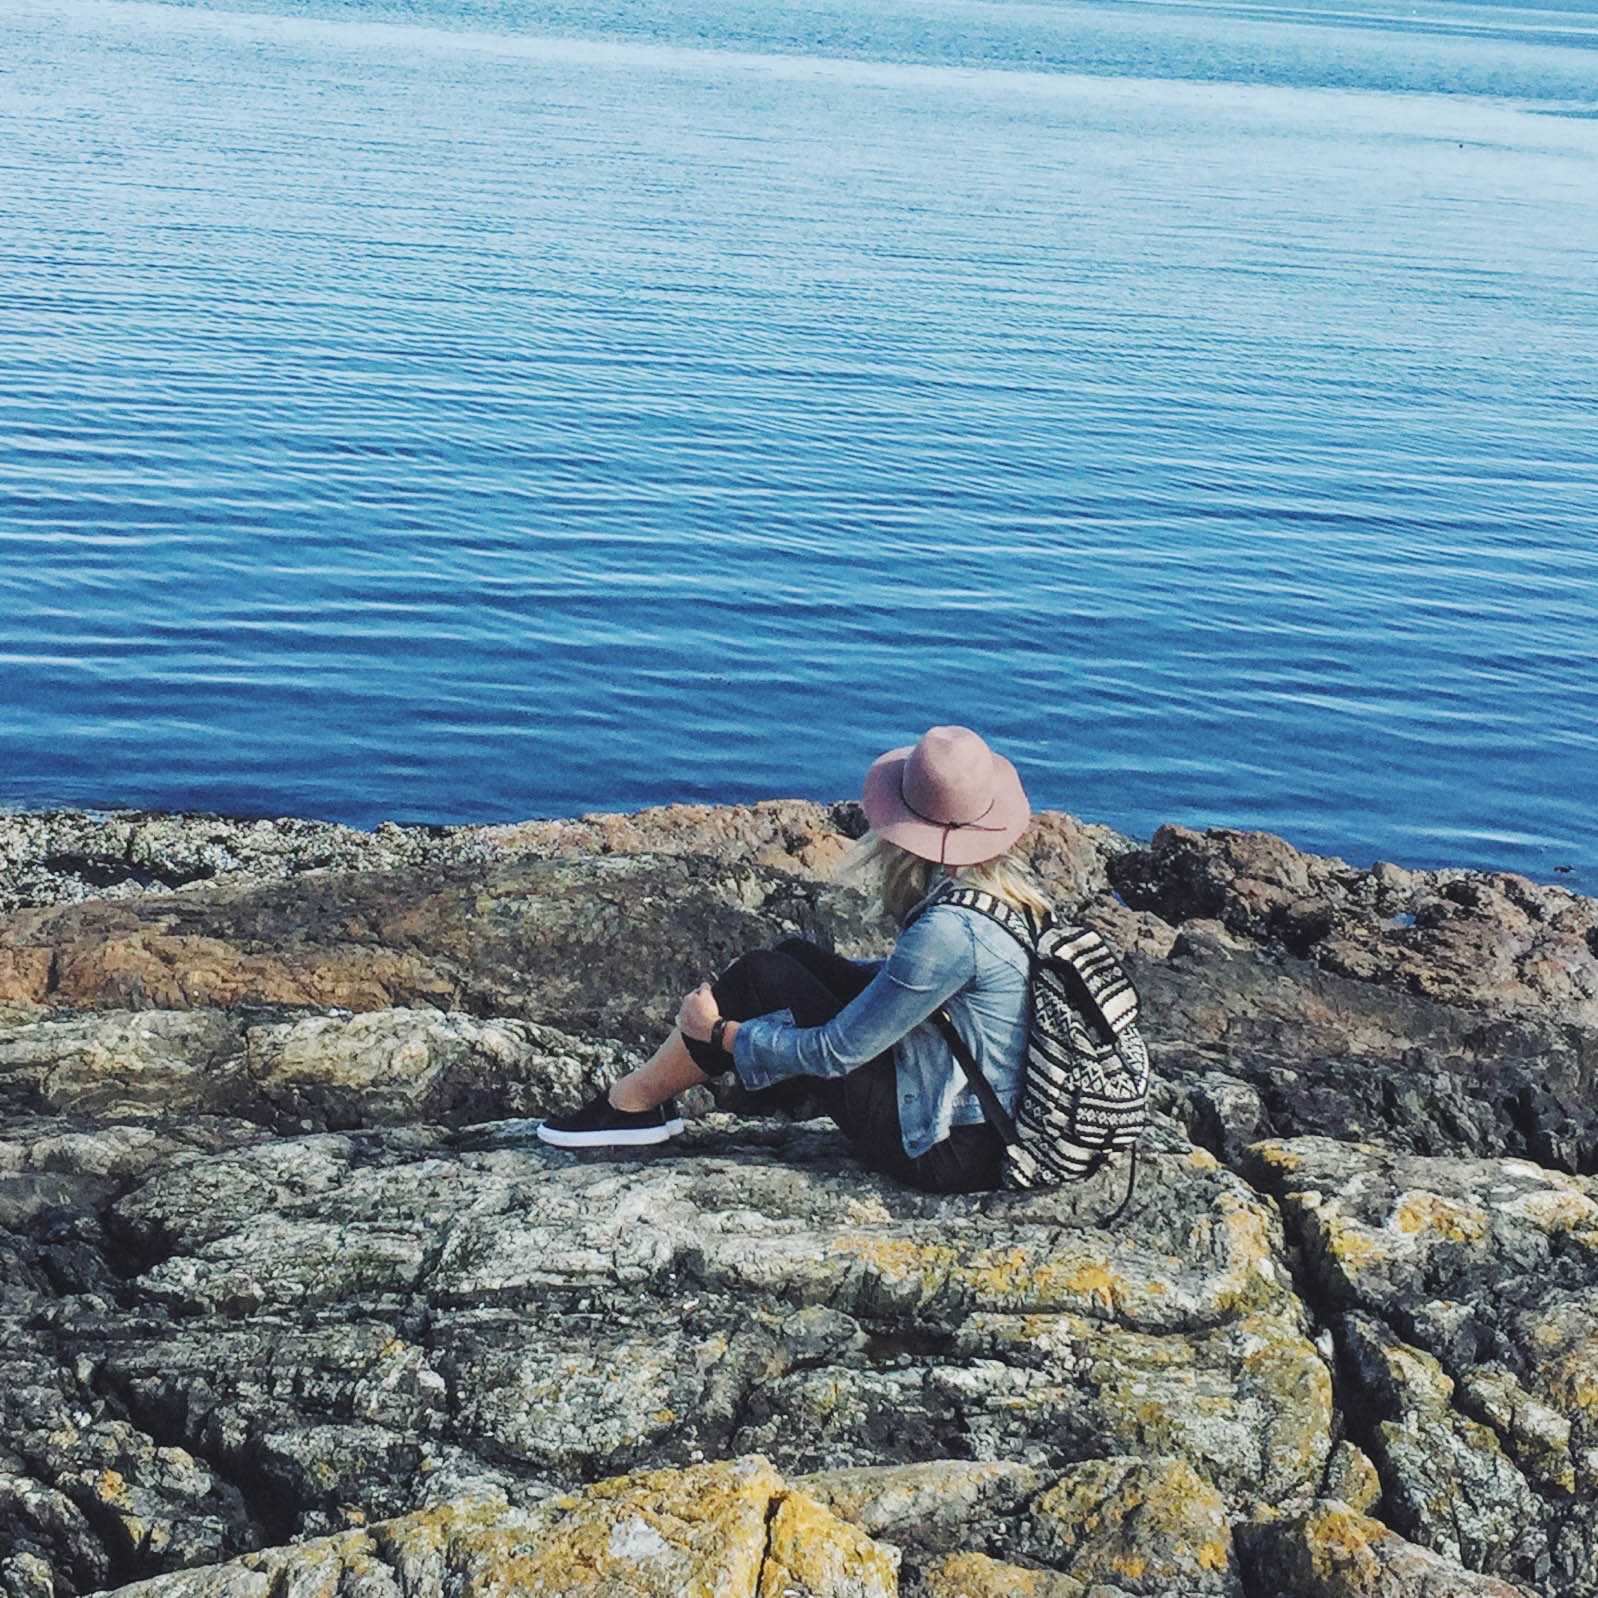
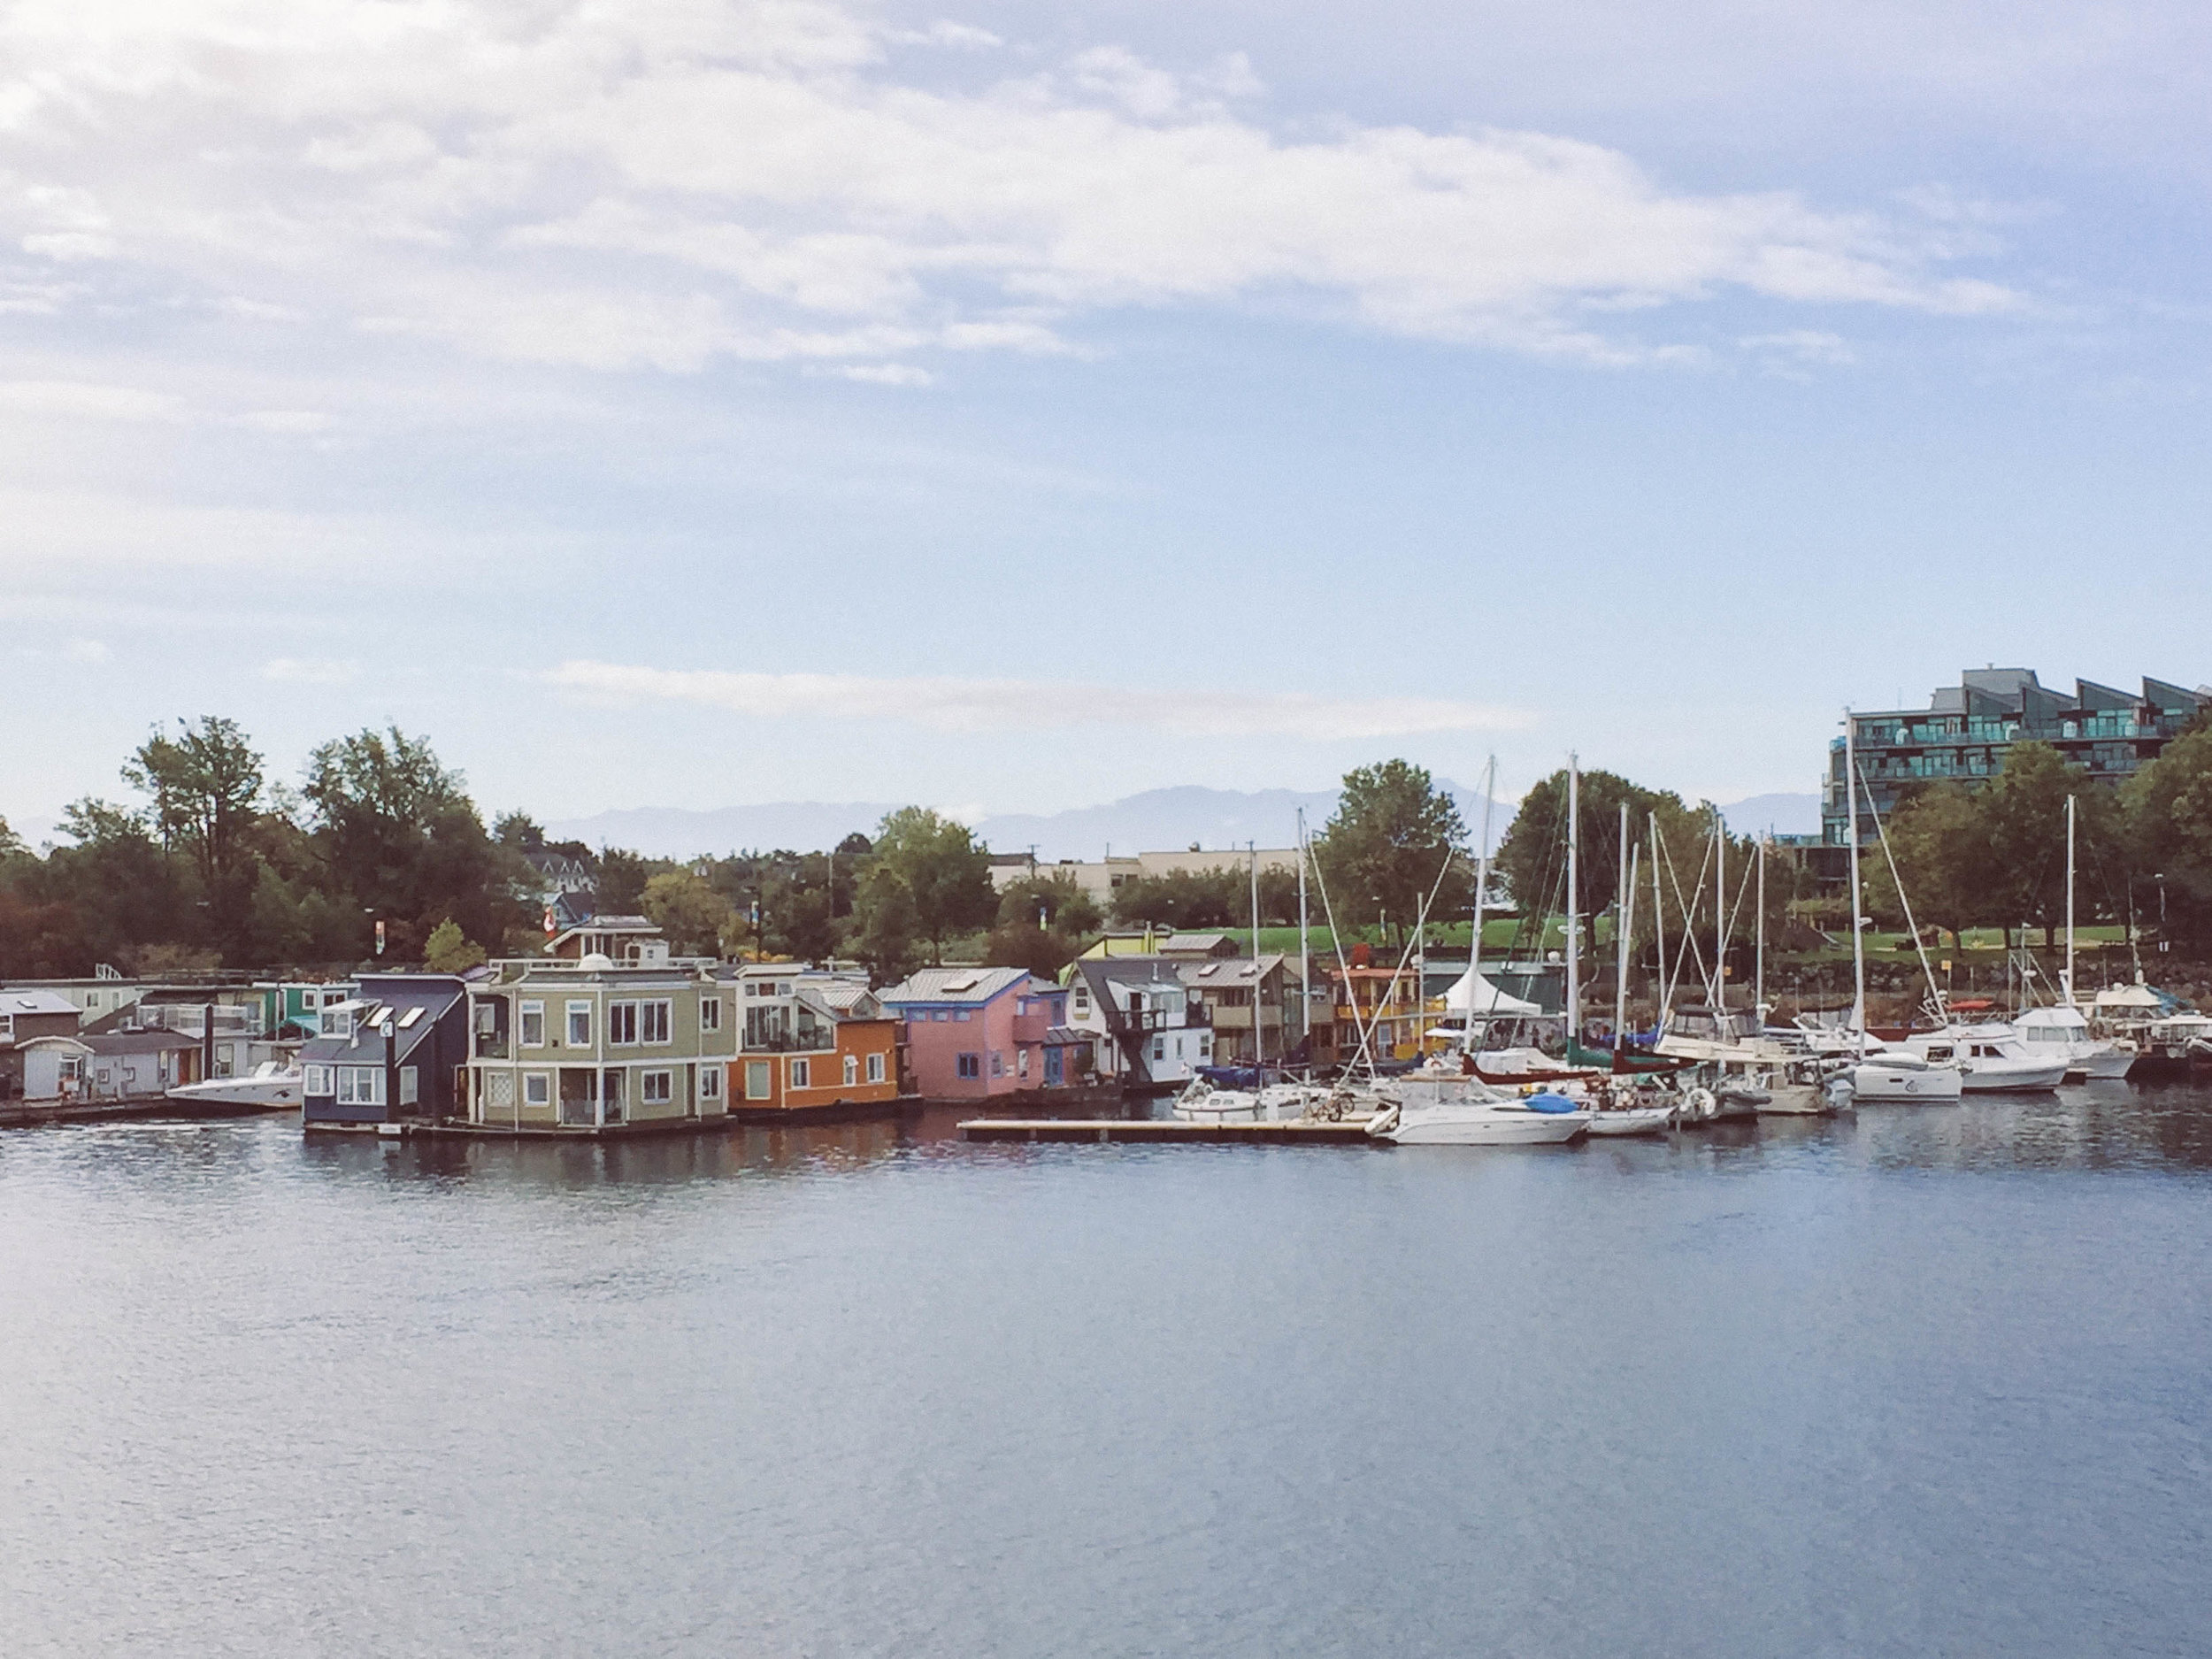
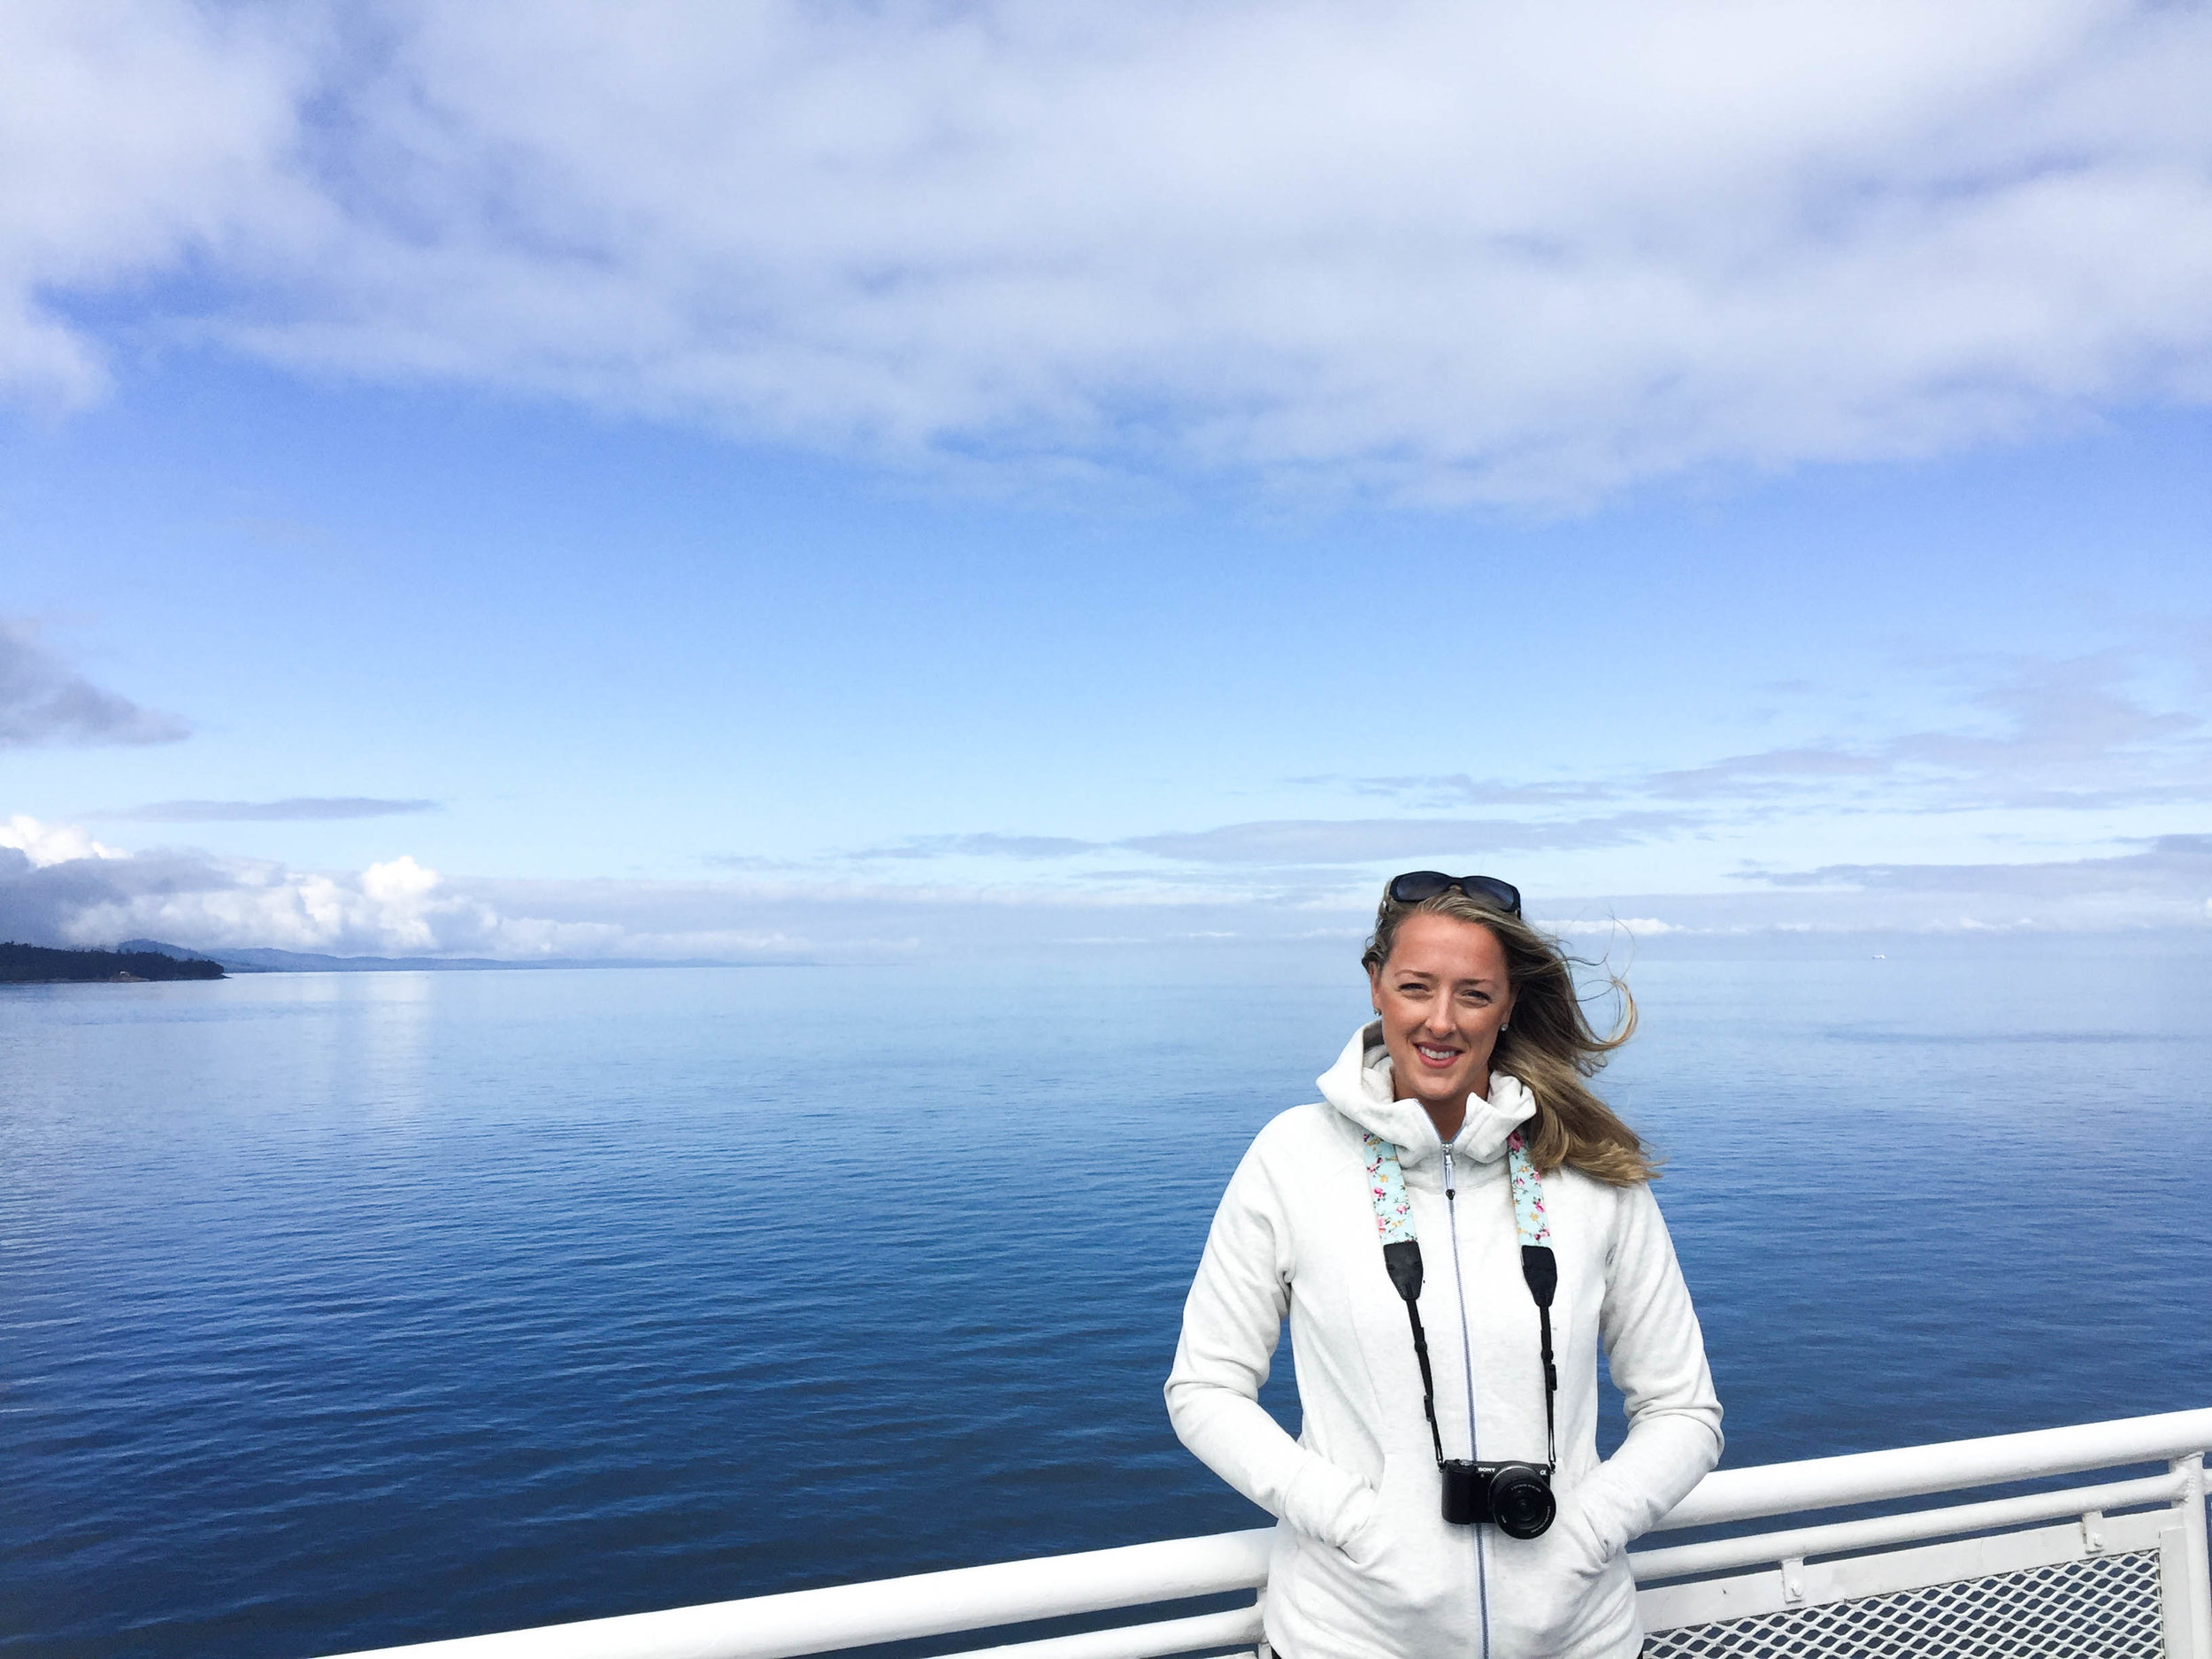
    Of course, without knowing it, we saved the best for last as we departed Vancouver on a ferry to the city of Victoria on Vancouver Island. There are so many lovely things I could say about the city of Victoria. With cheerful, friendly people, quaint shops, and a quintessentially British feel throughout the town, I immediately fell in love. Of course one of my personal must dos was to have High Tea at the Empress Hotel. This gorgeous hotel sits right on the harbor overlooking the float planes and boats coming in and out and provides the most suburb food and tea. 
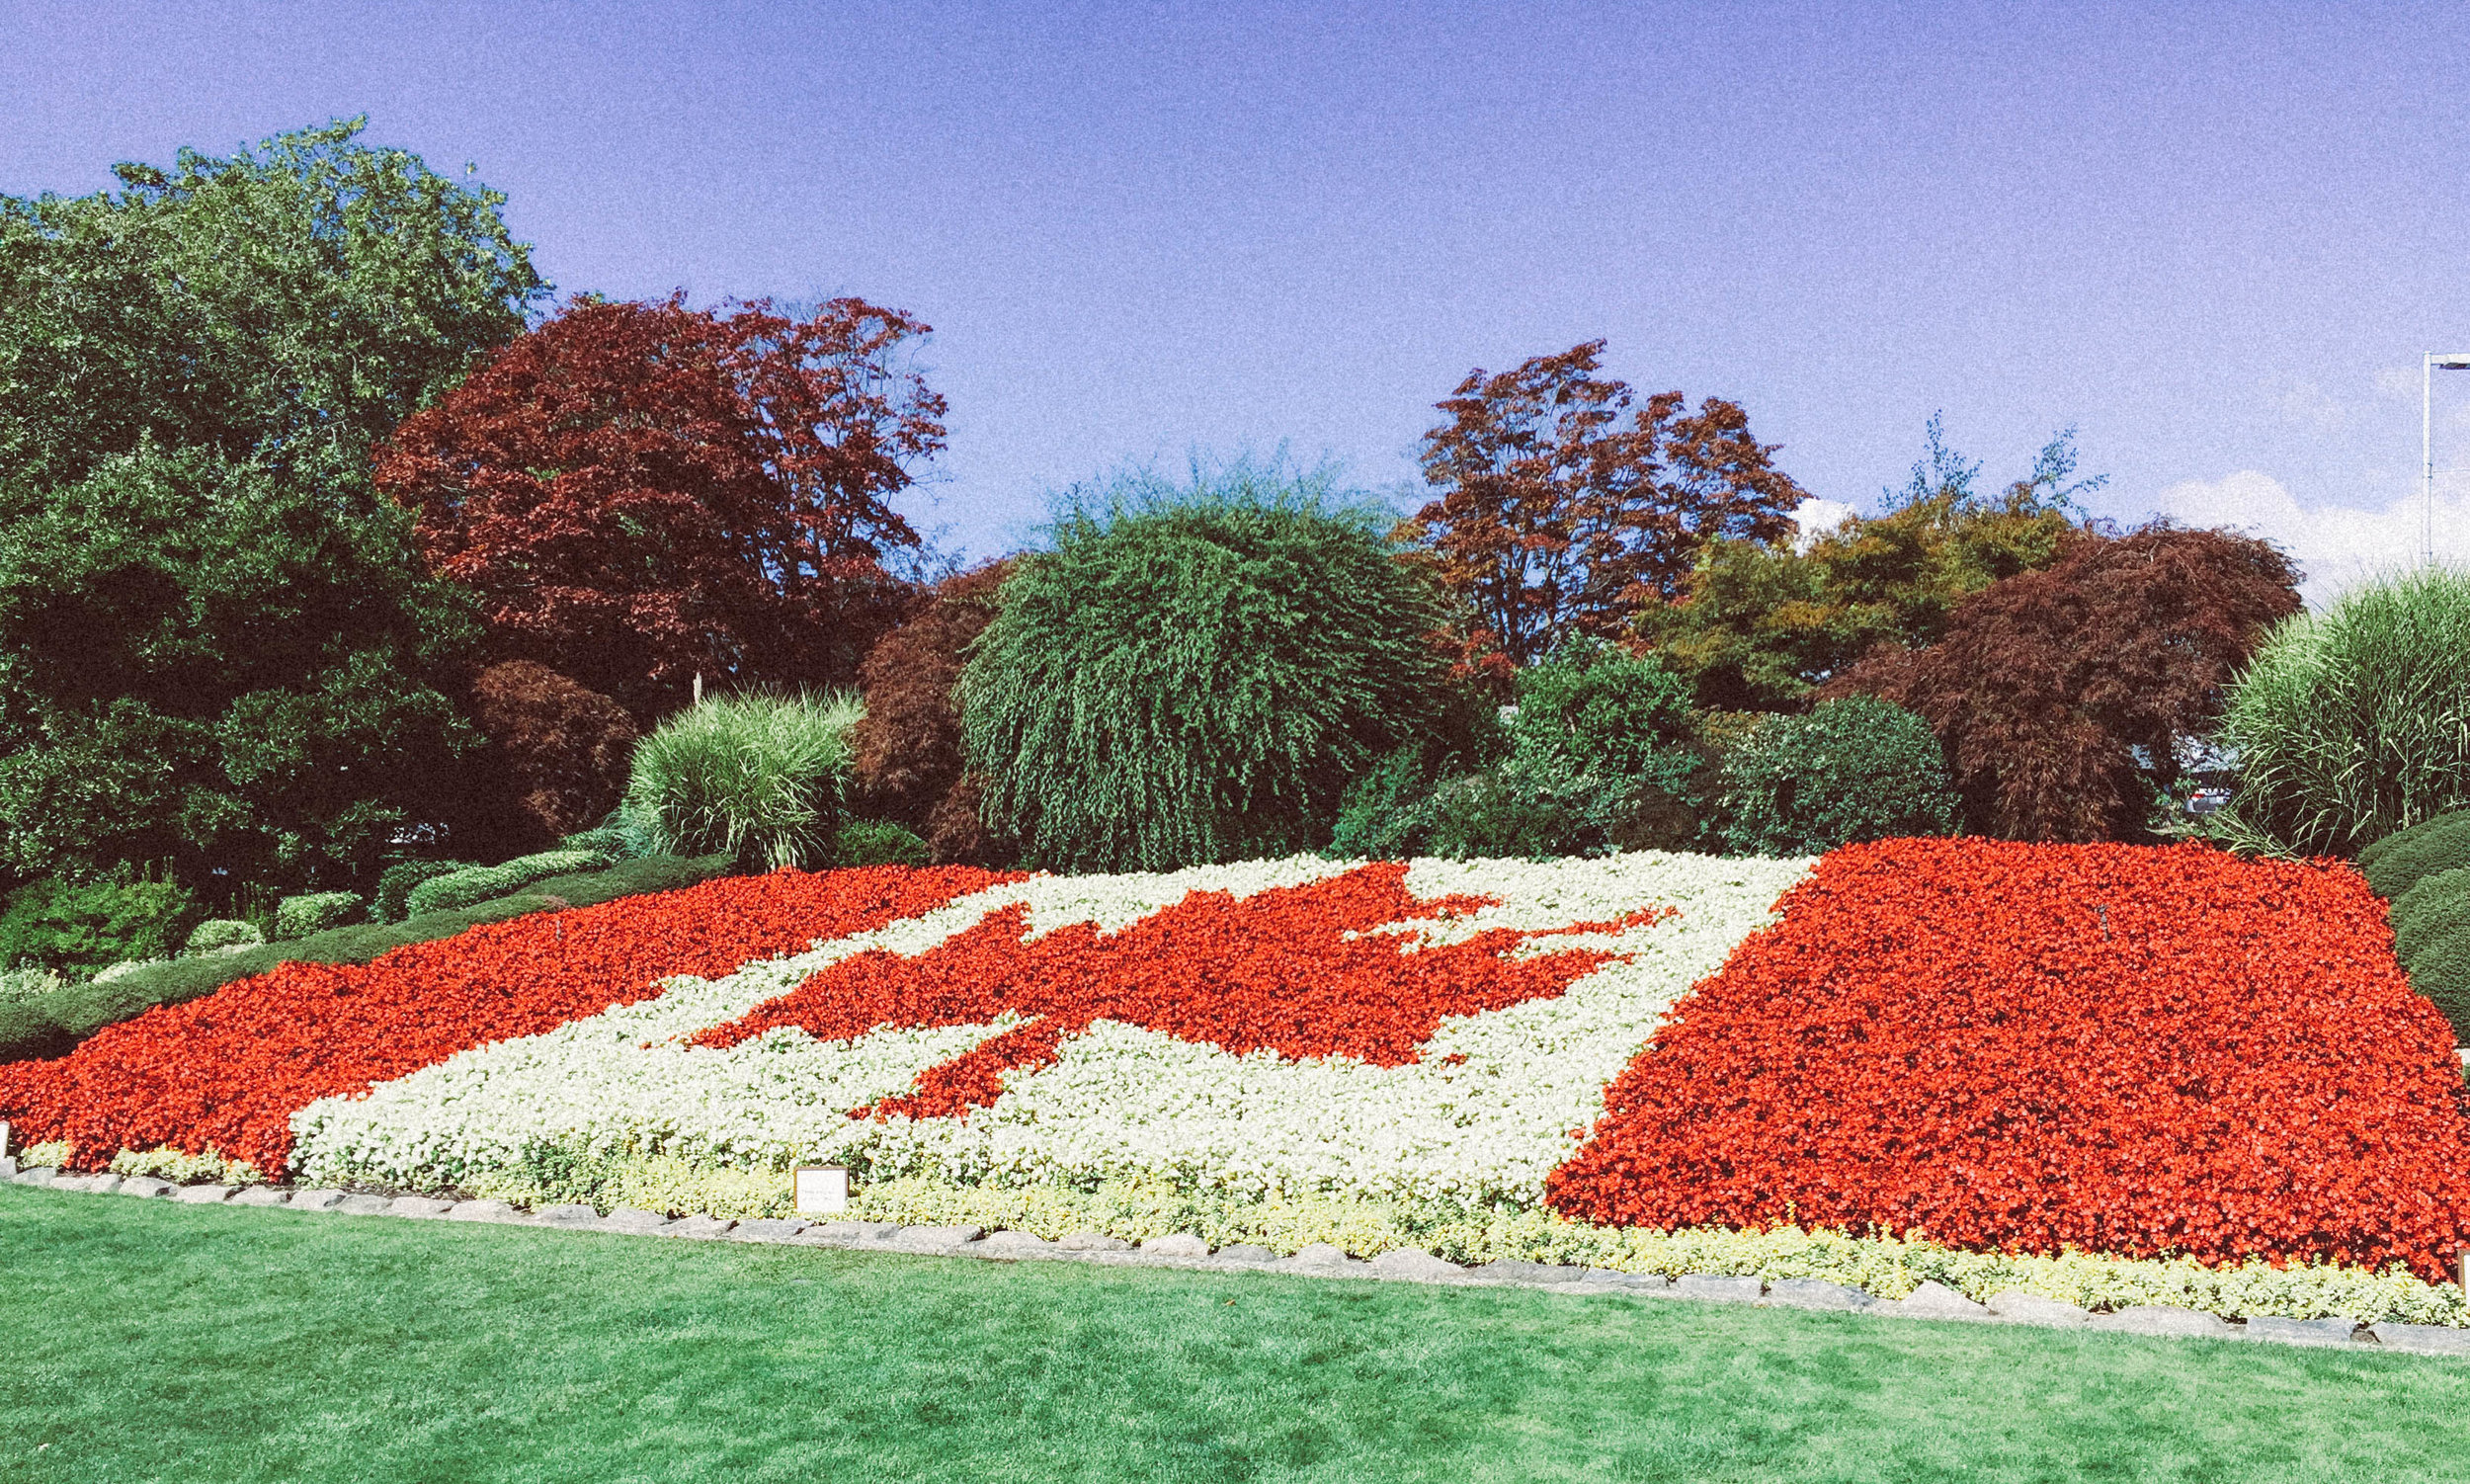
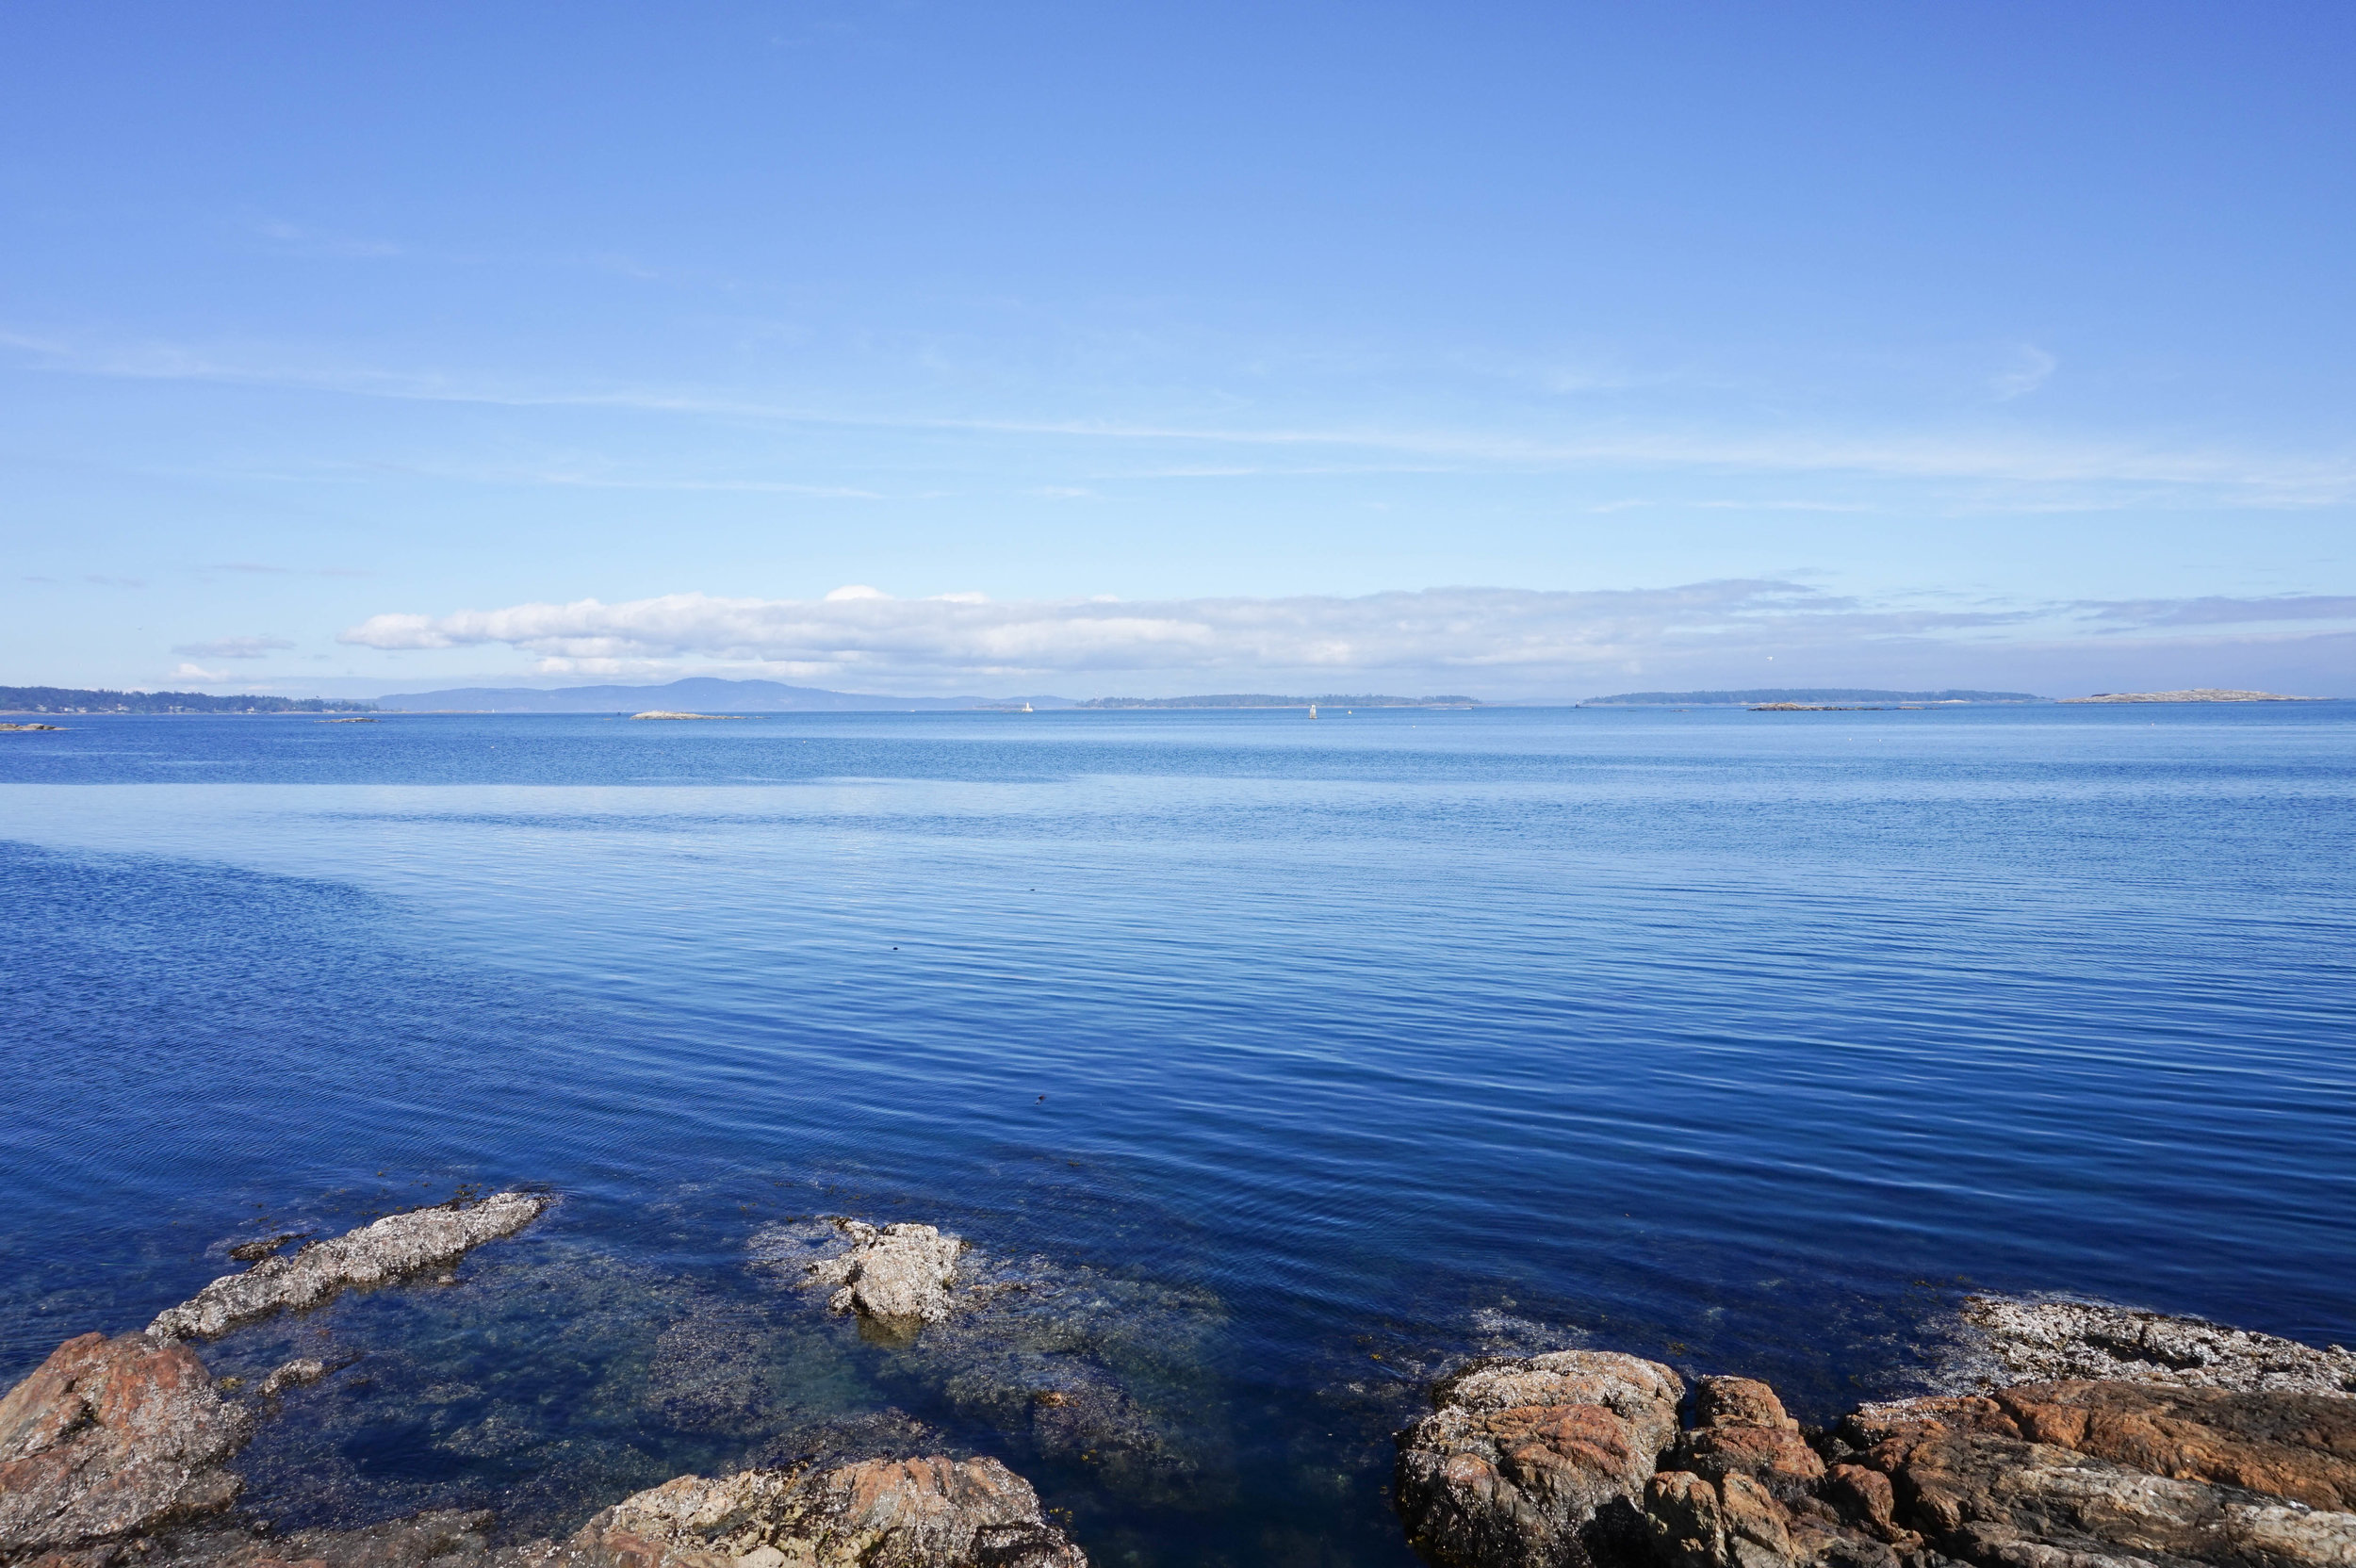
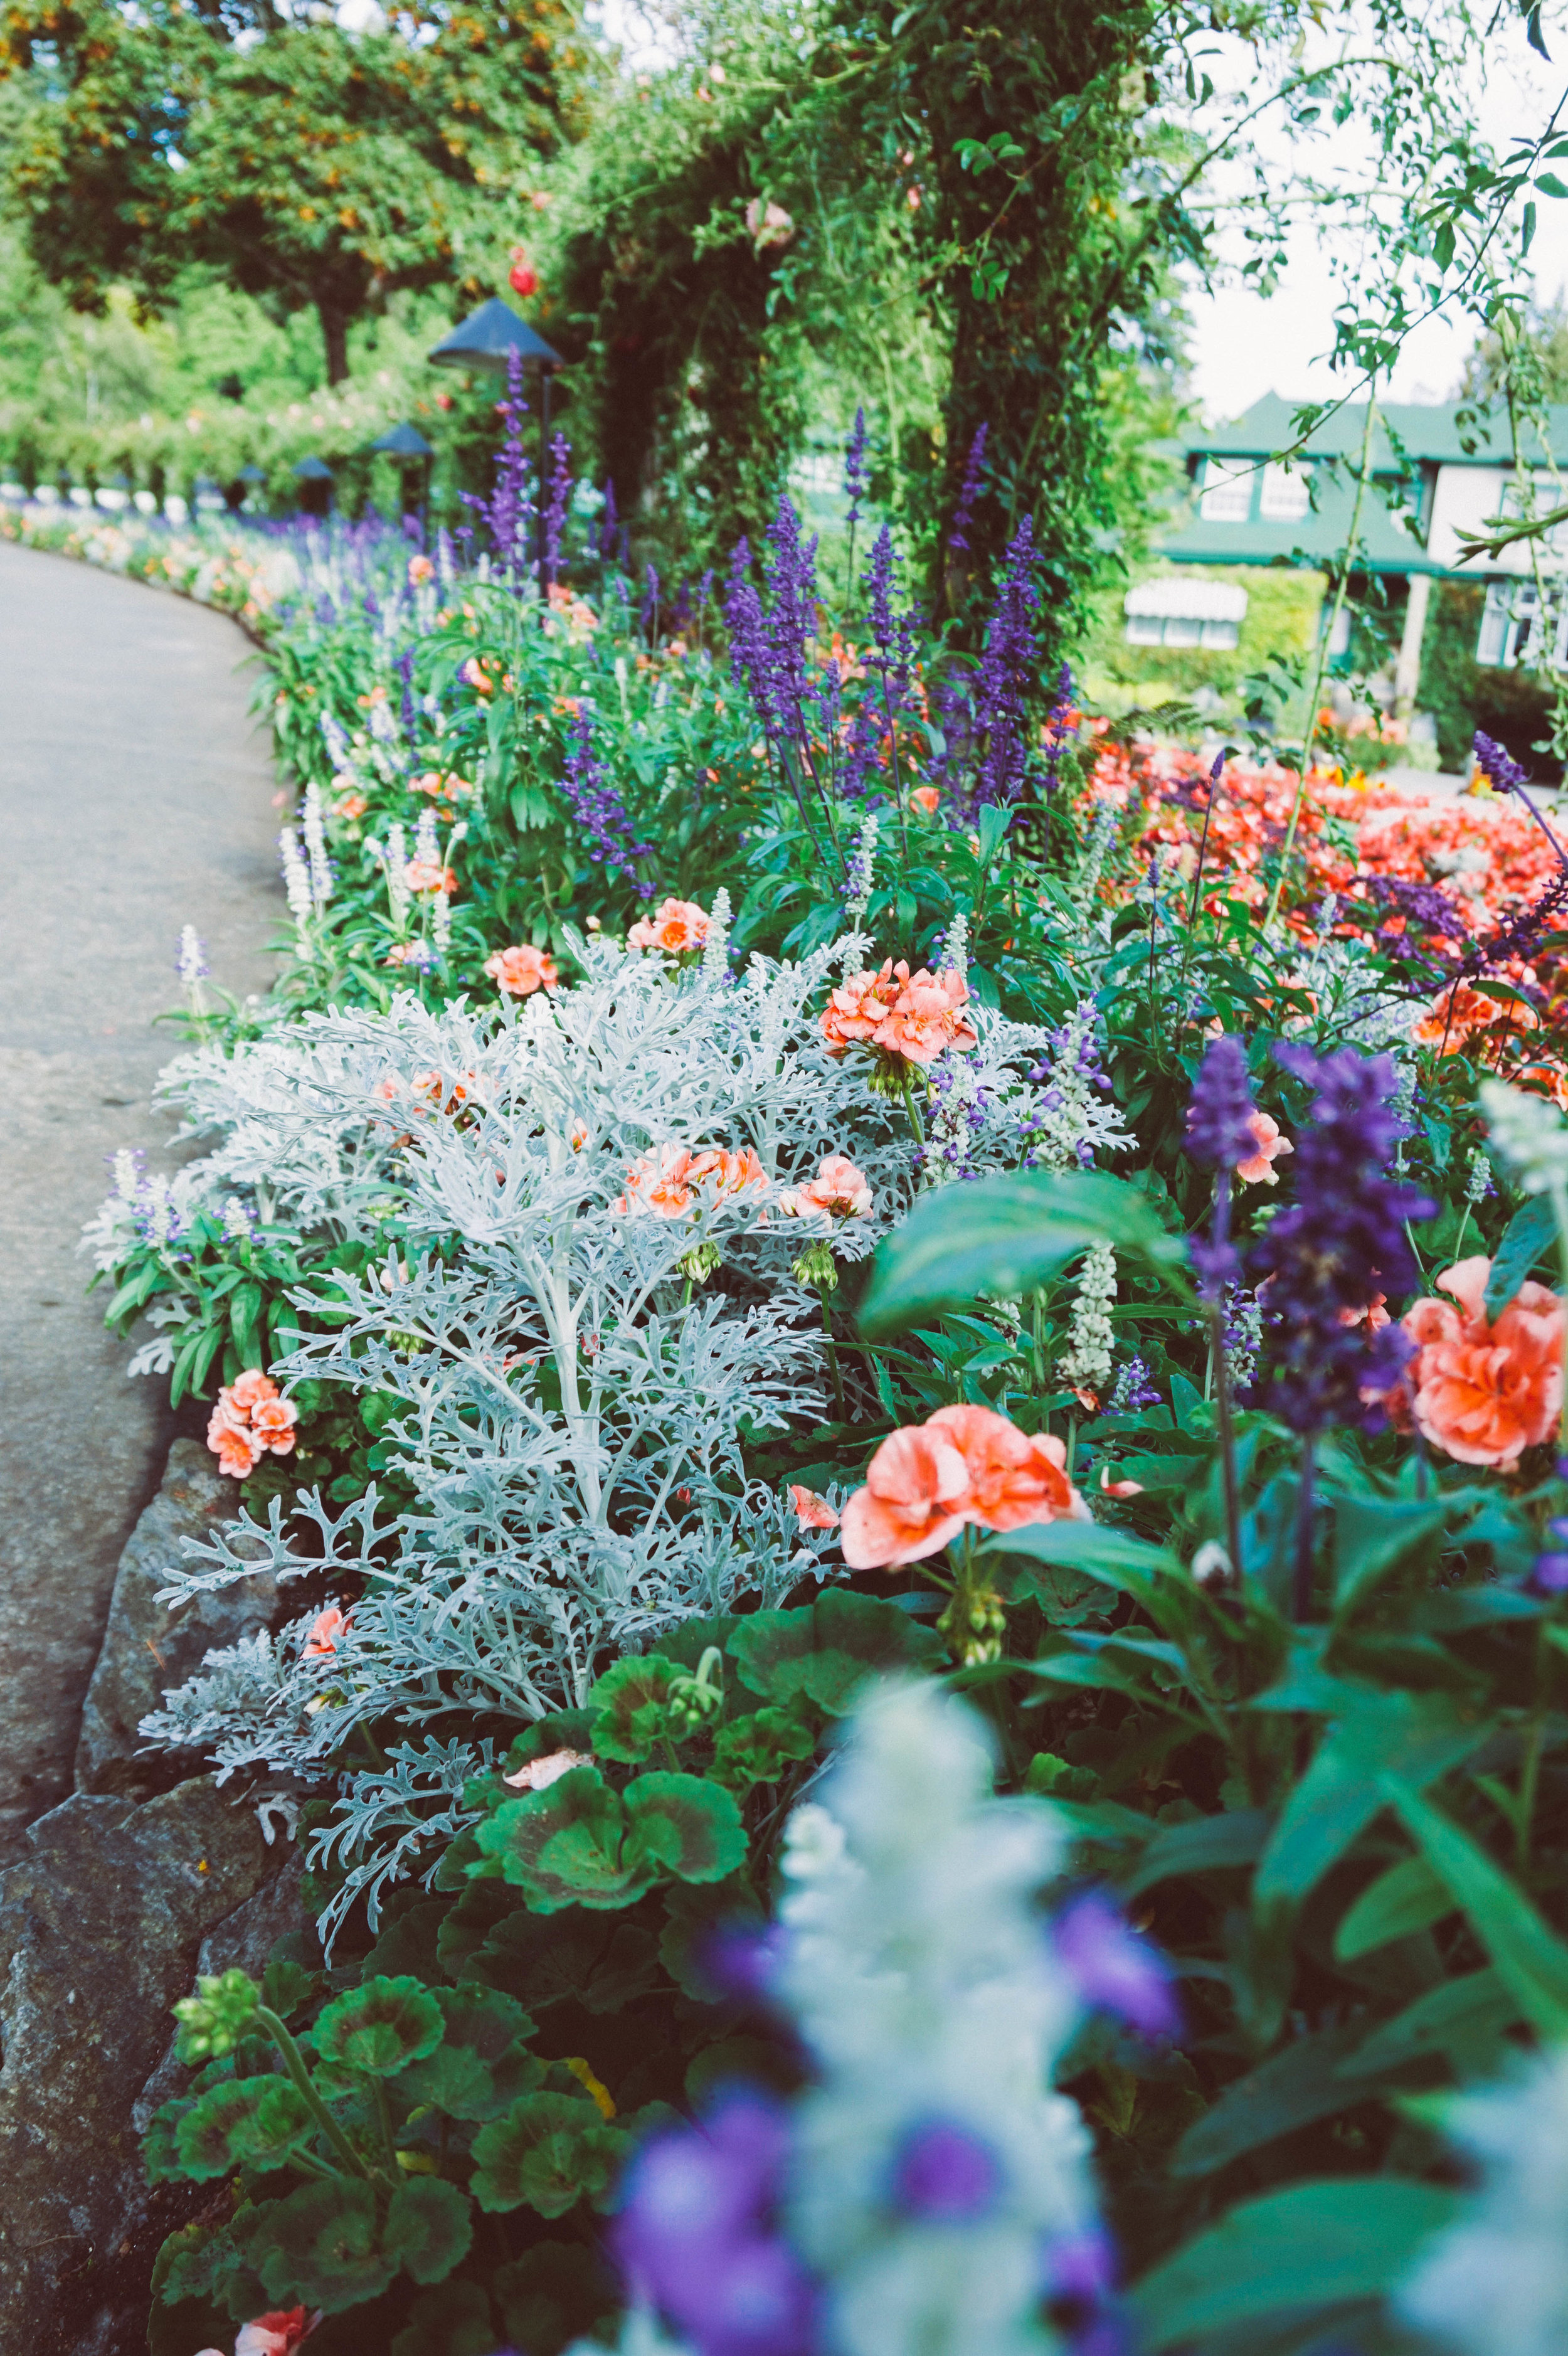
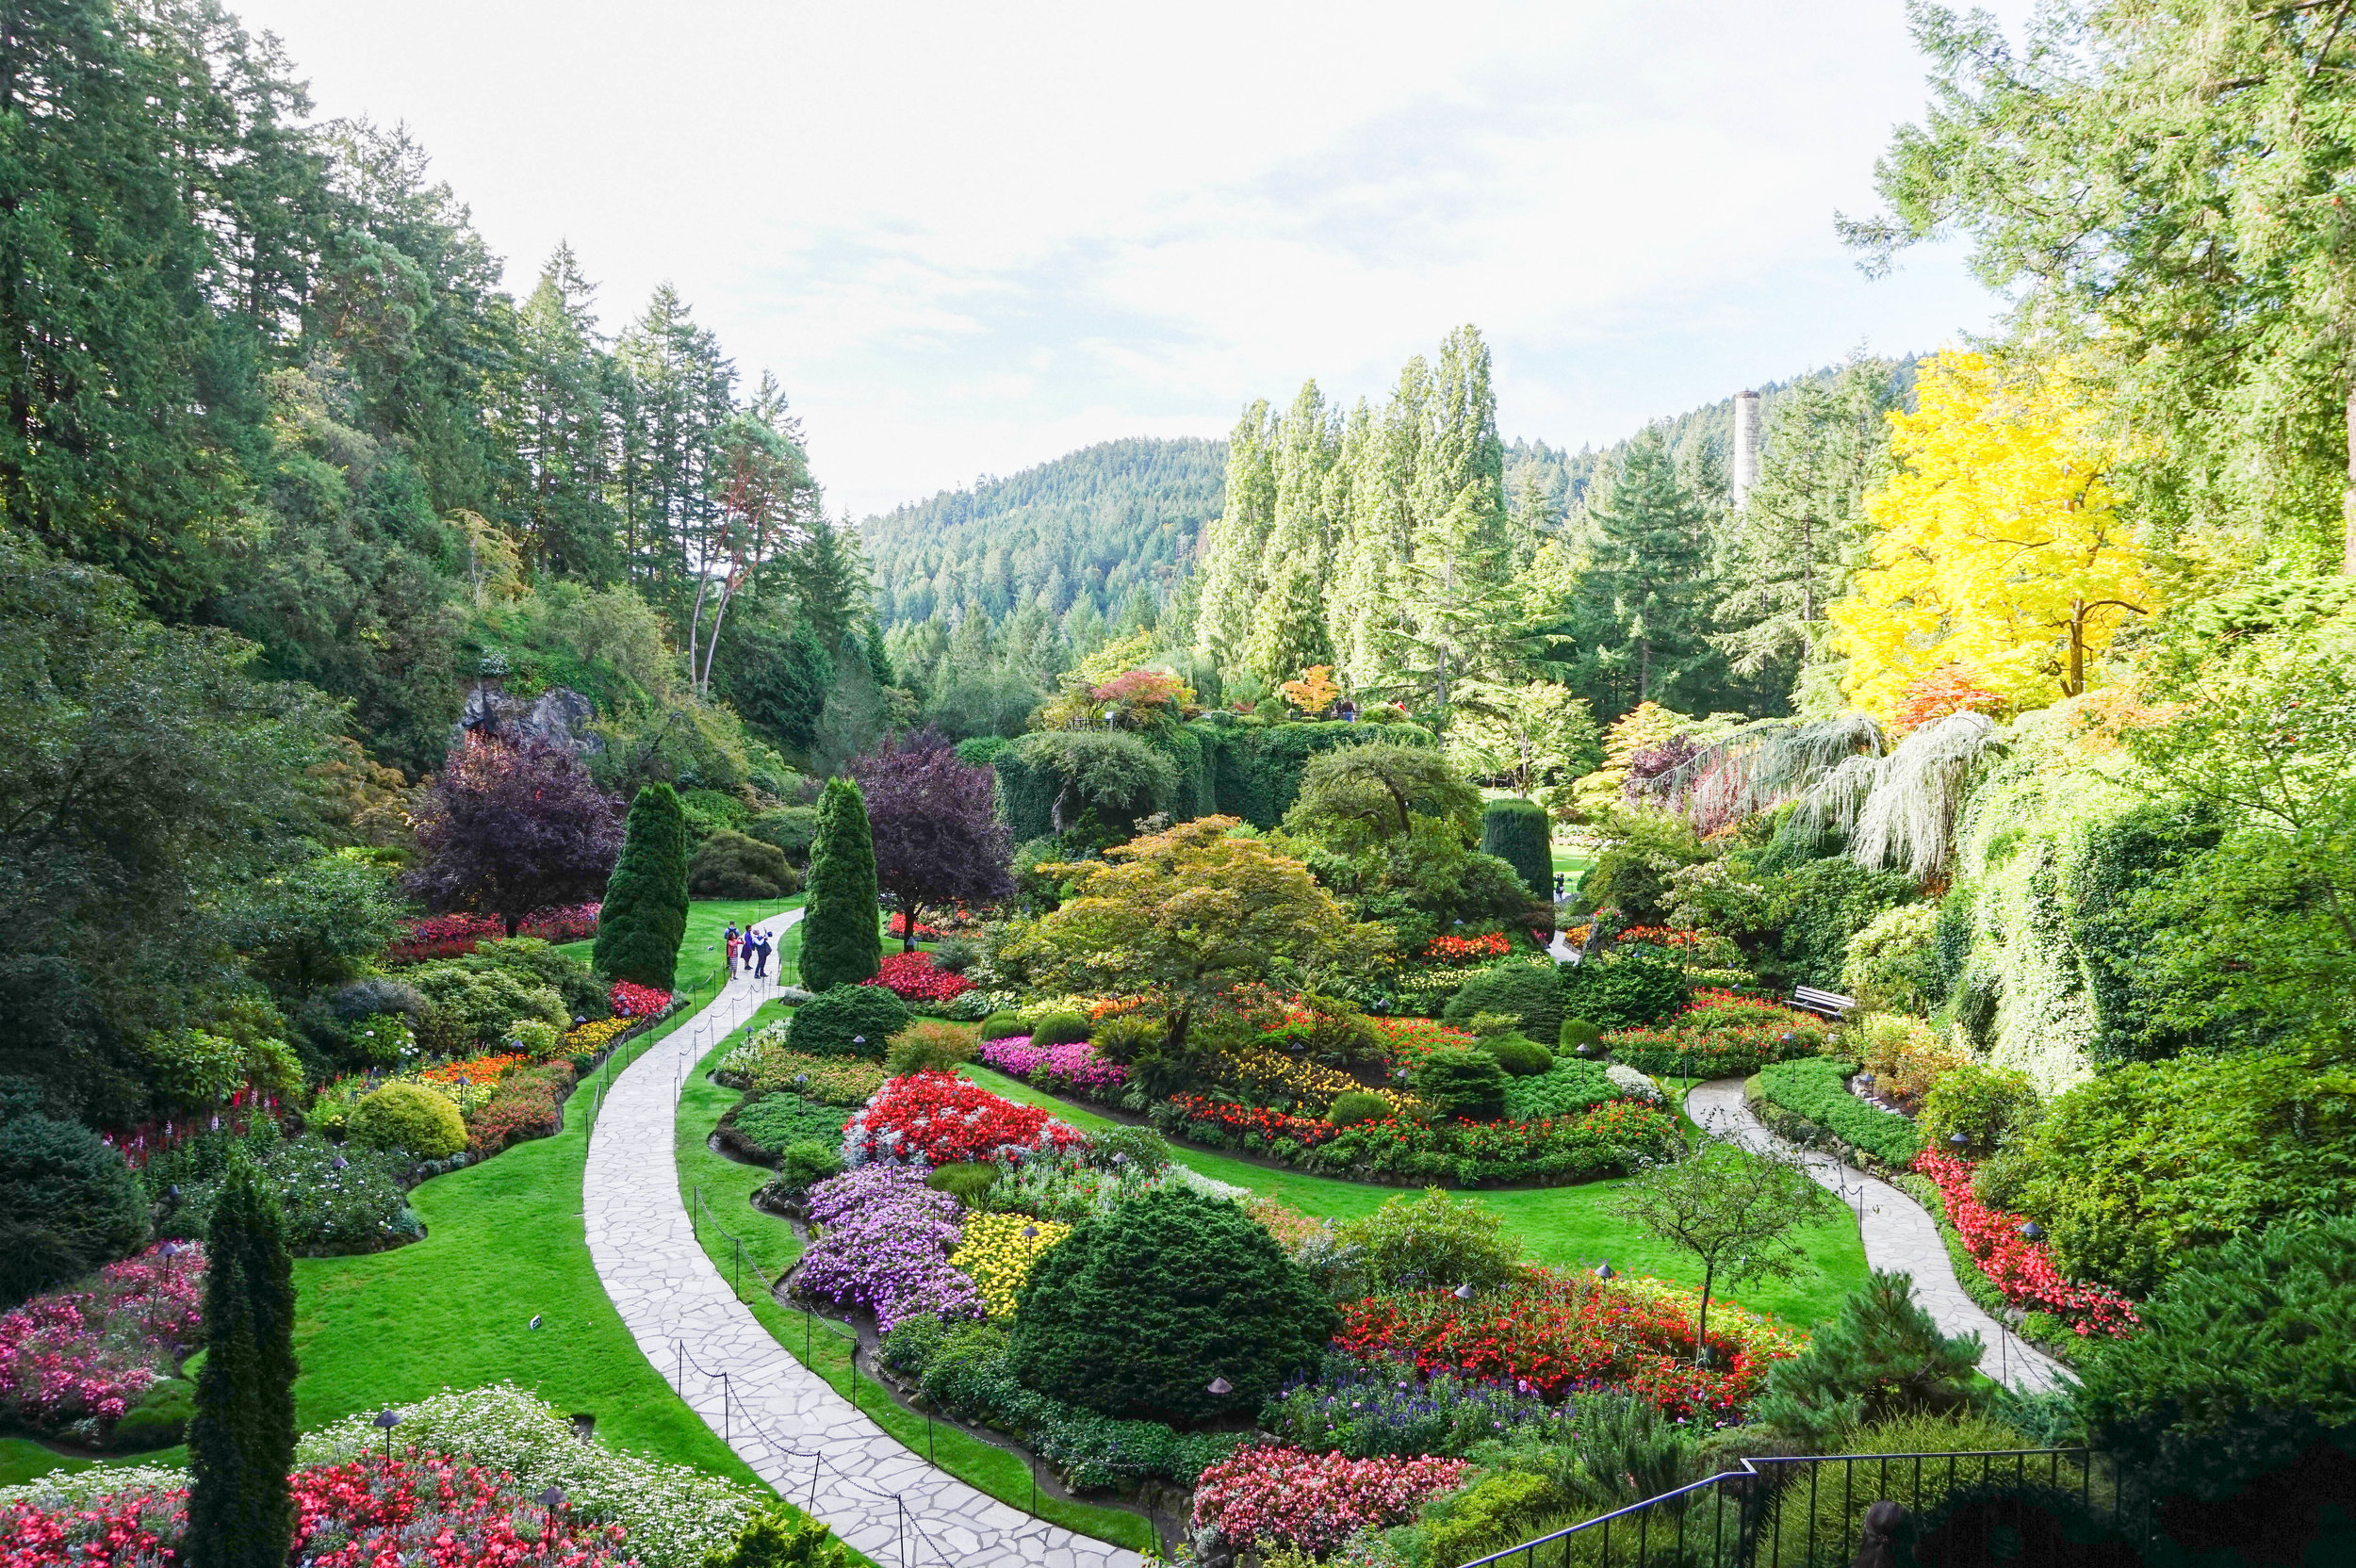
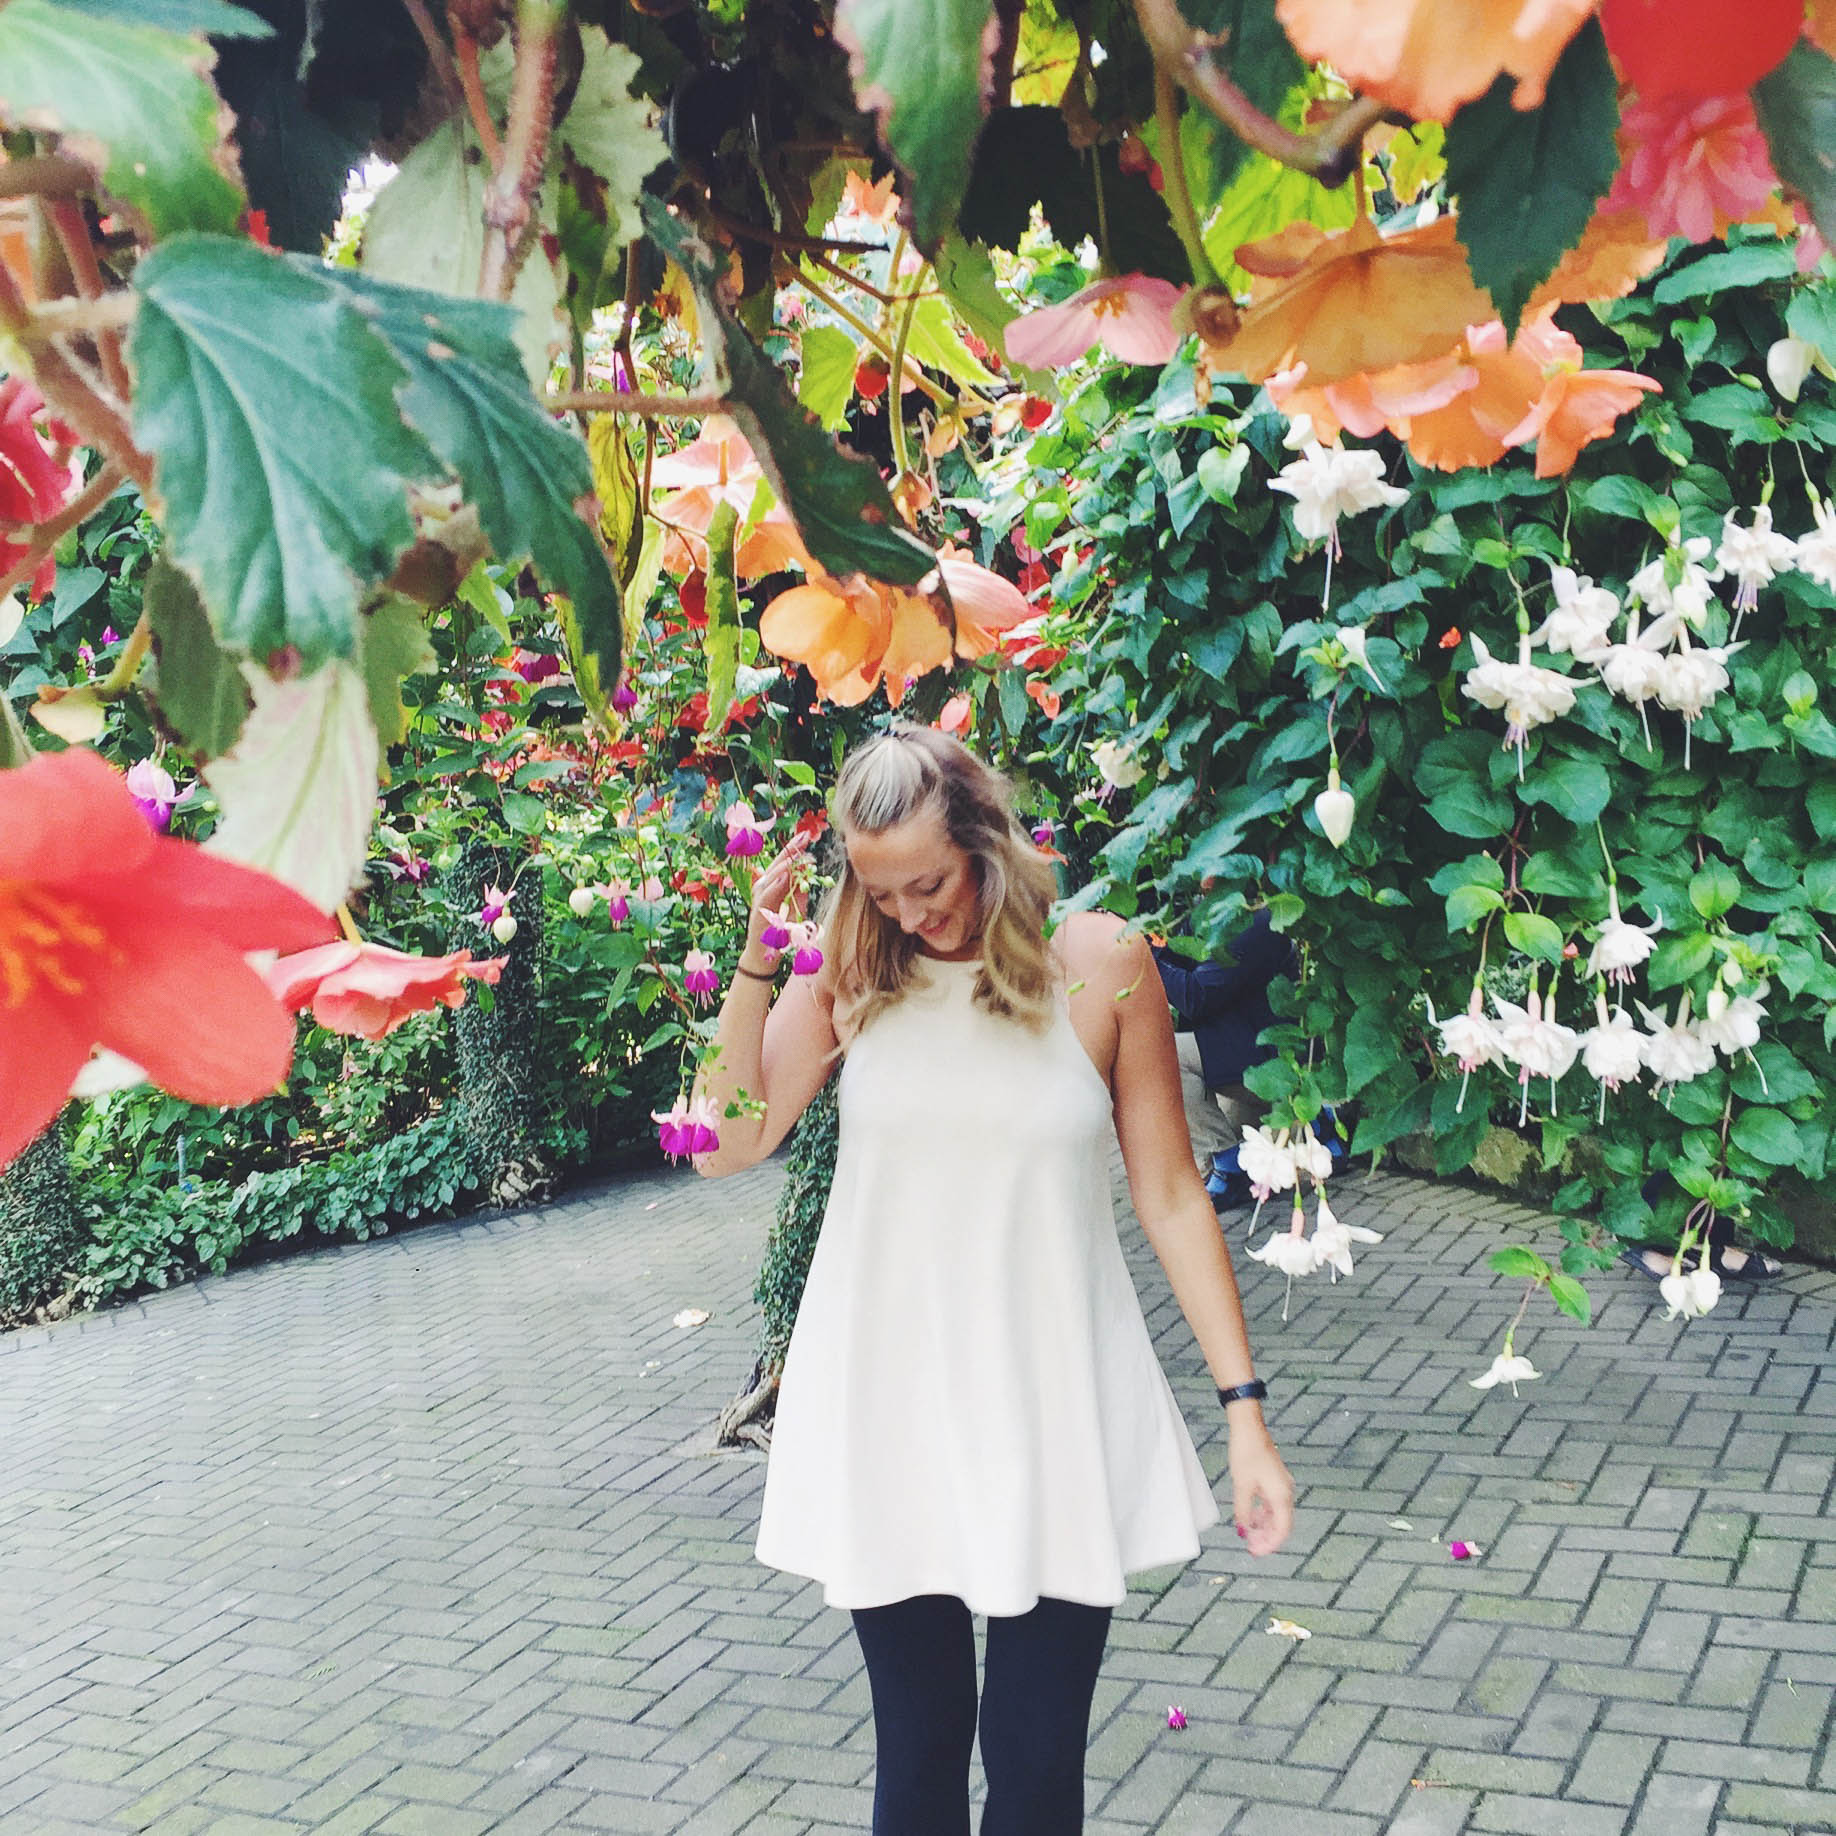
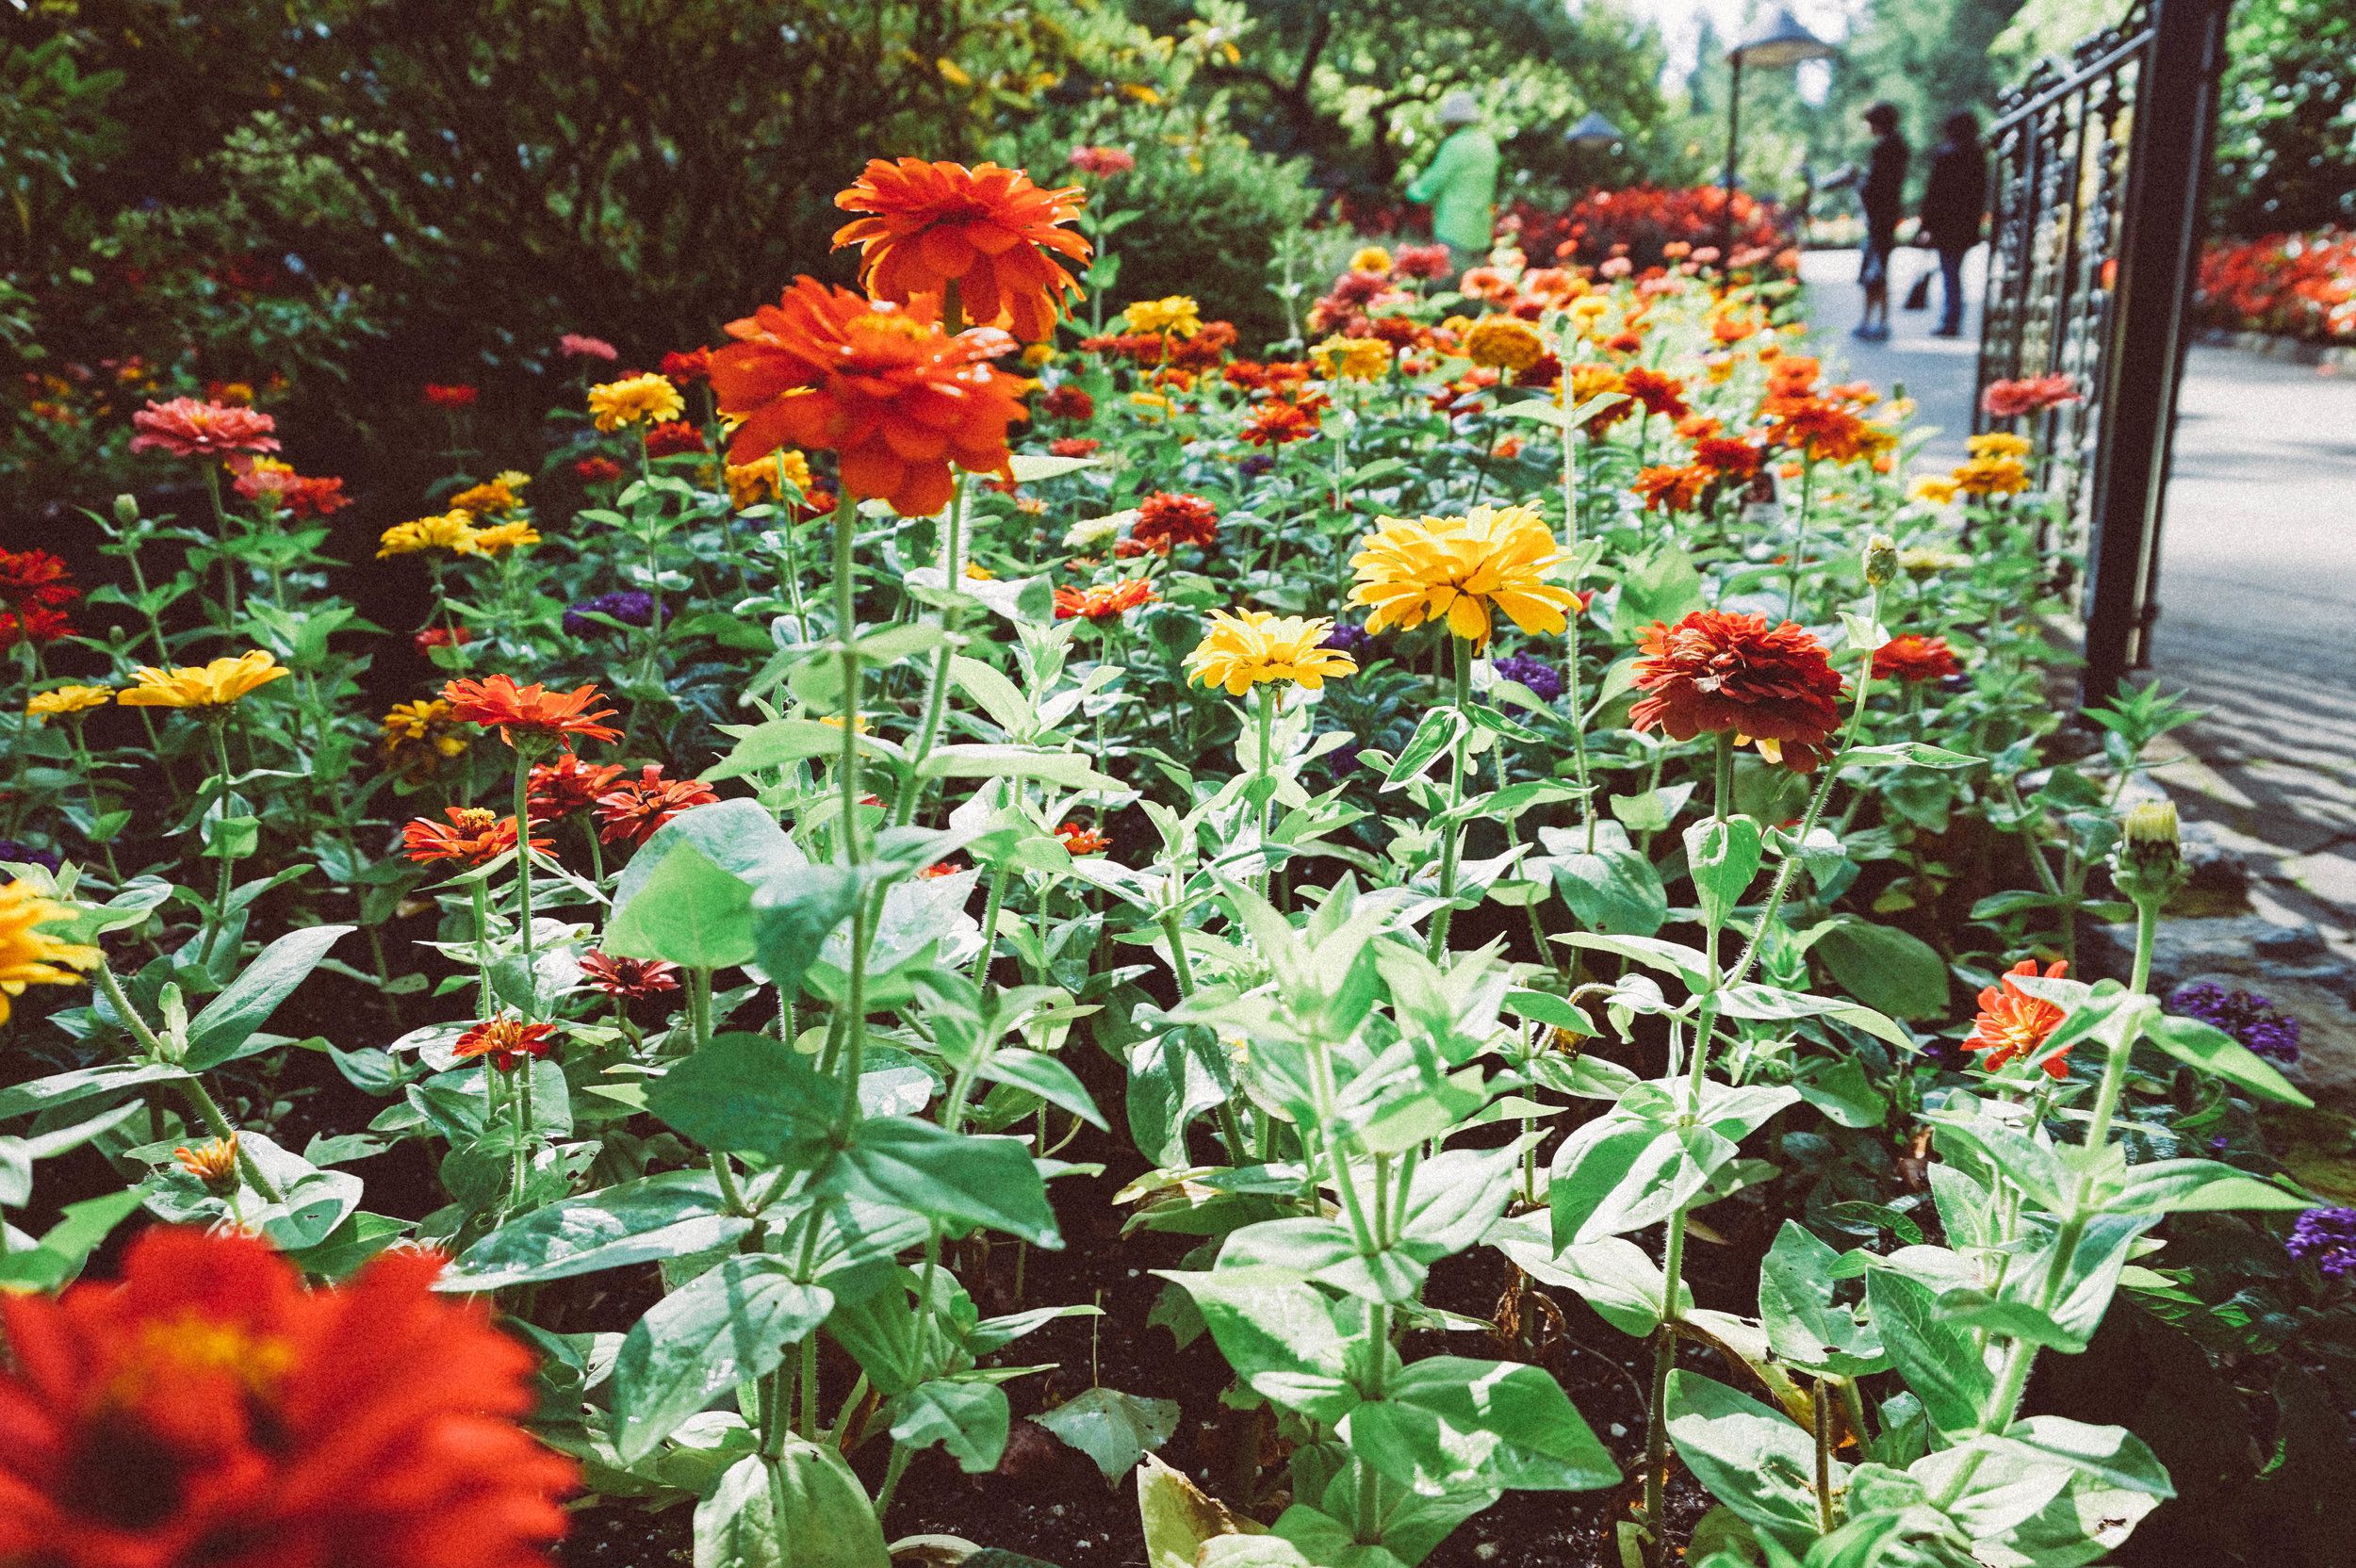
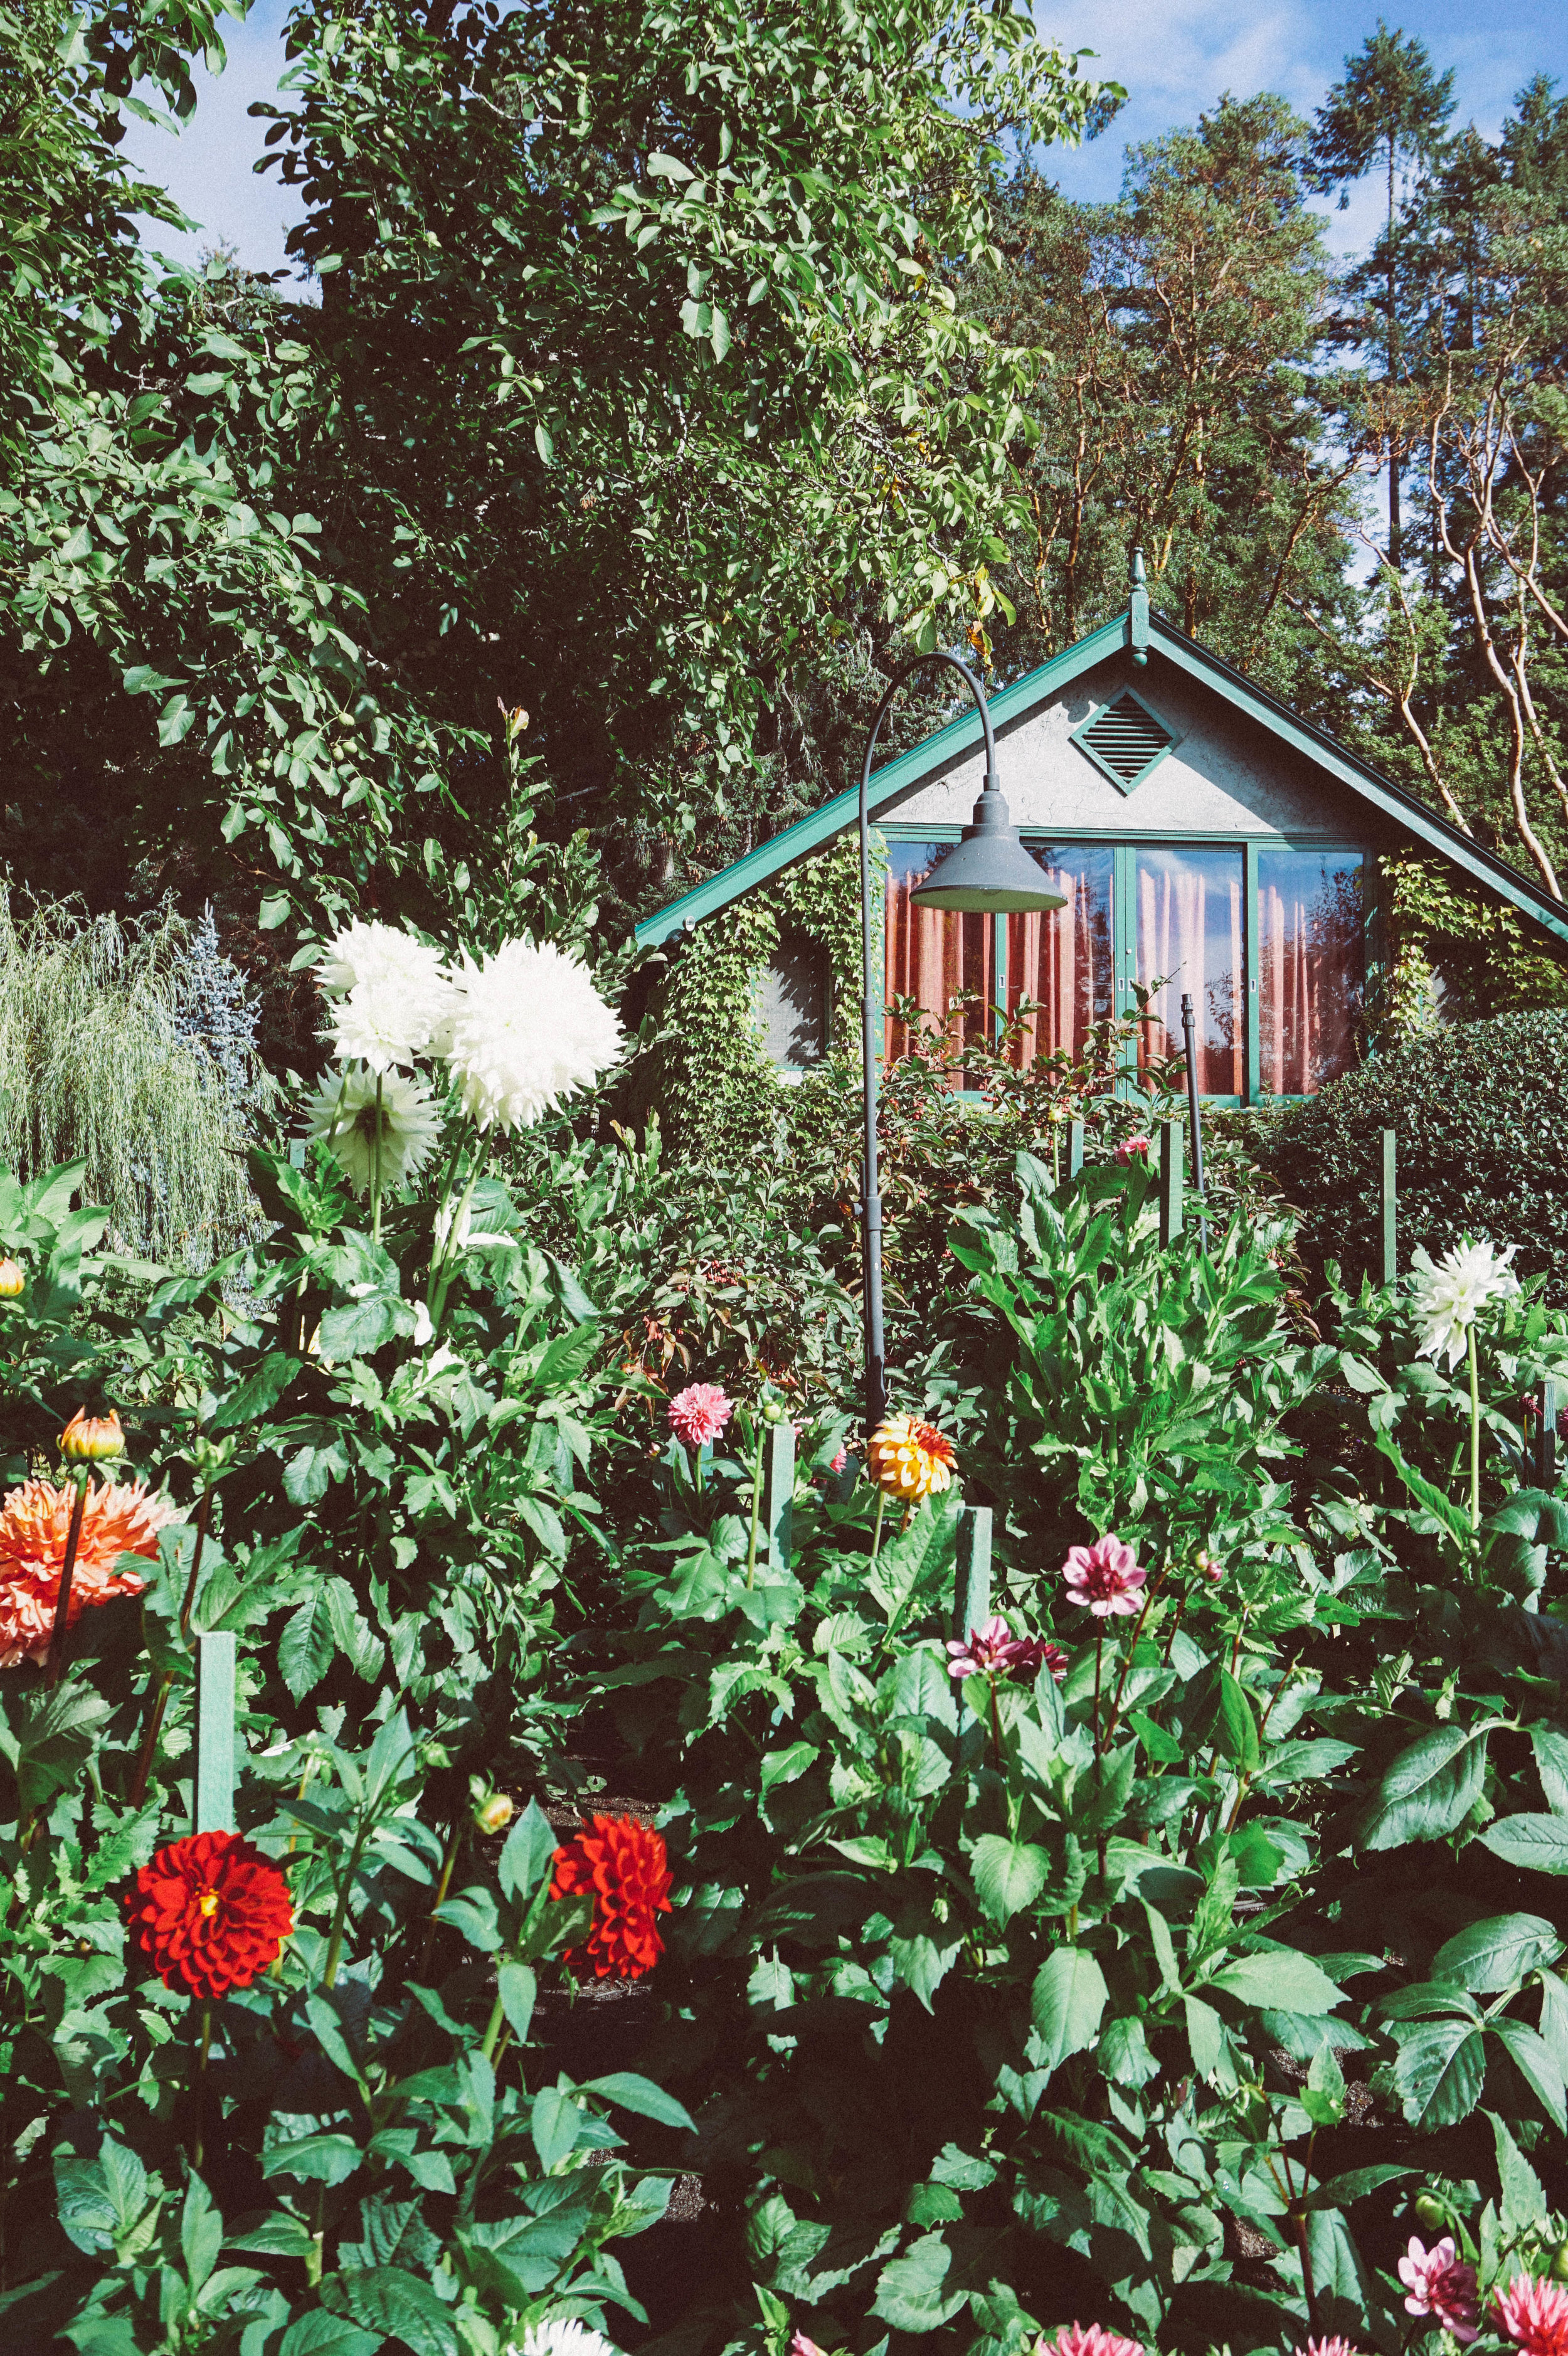
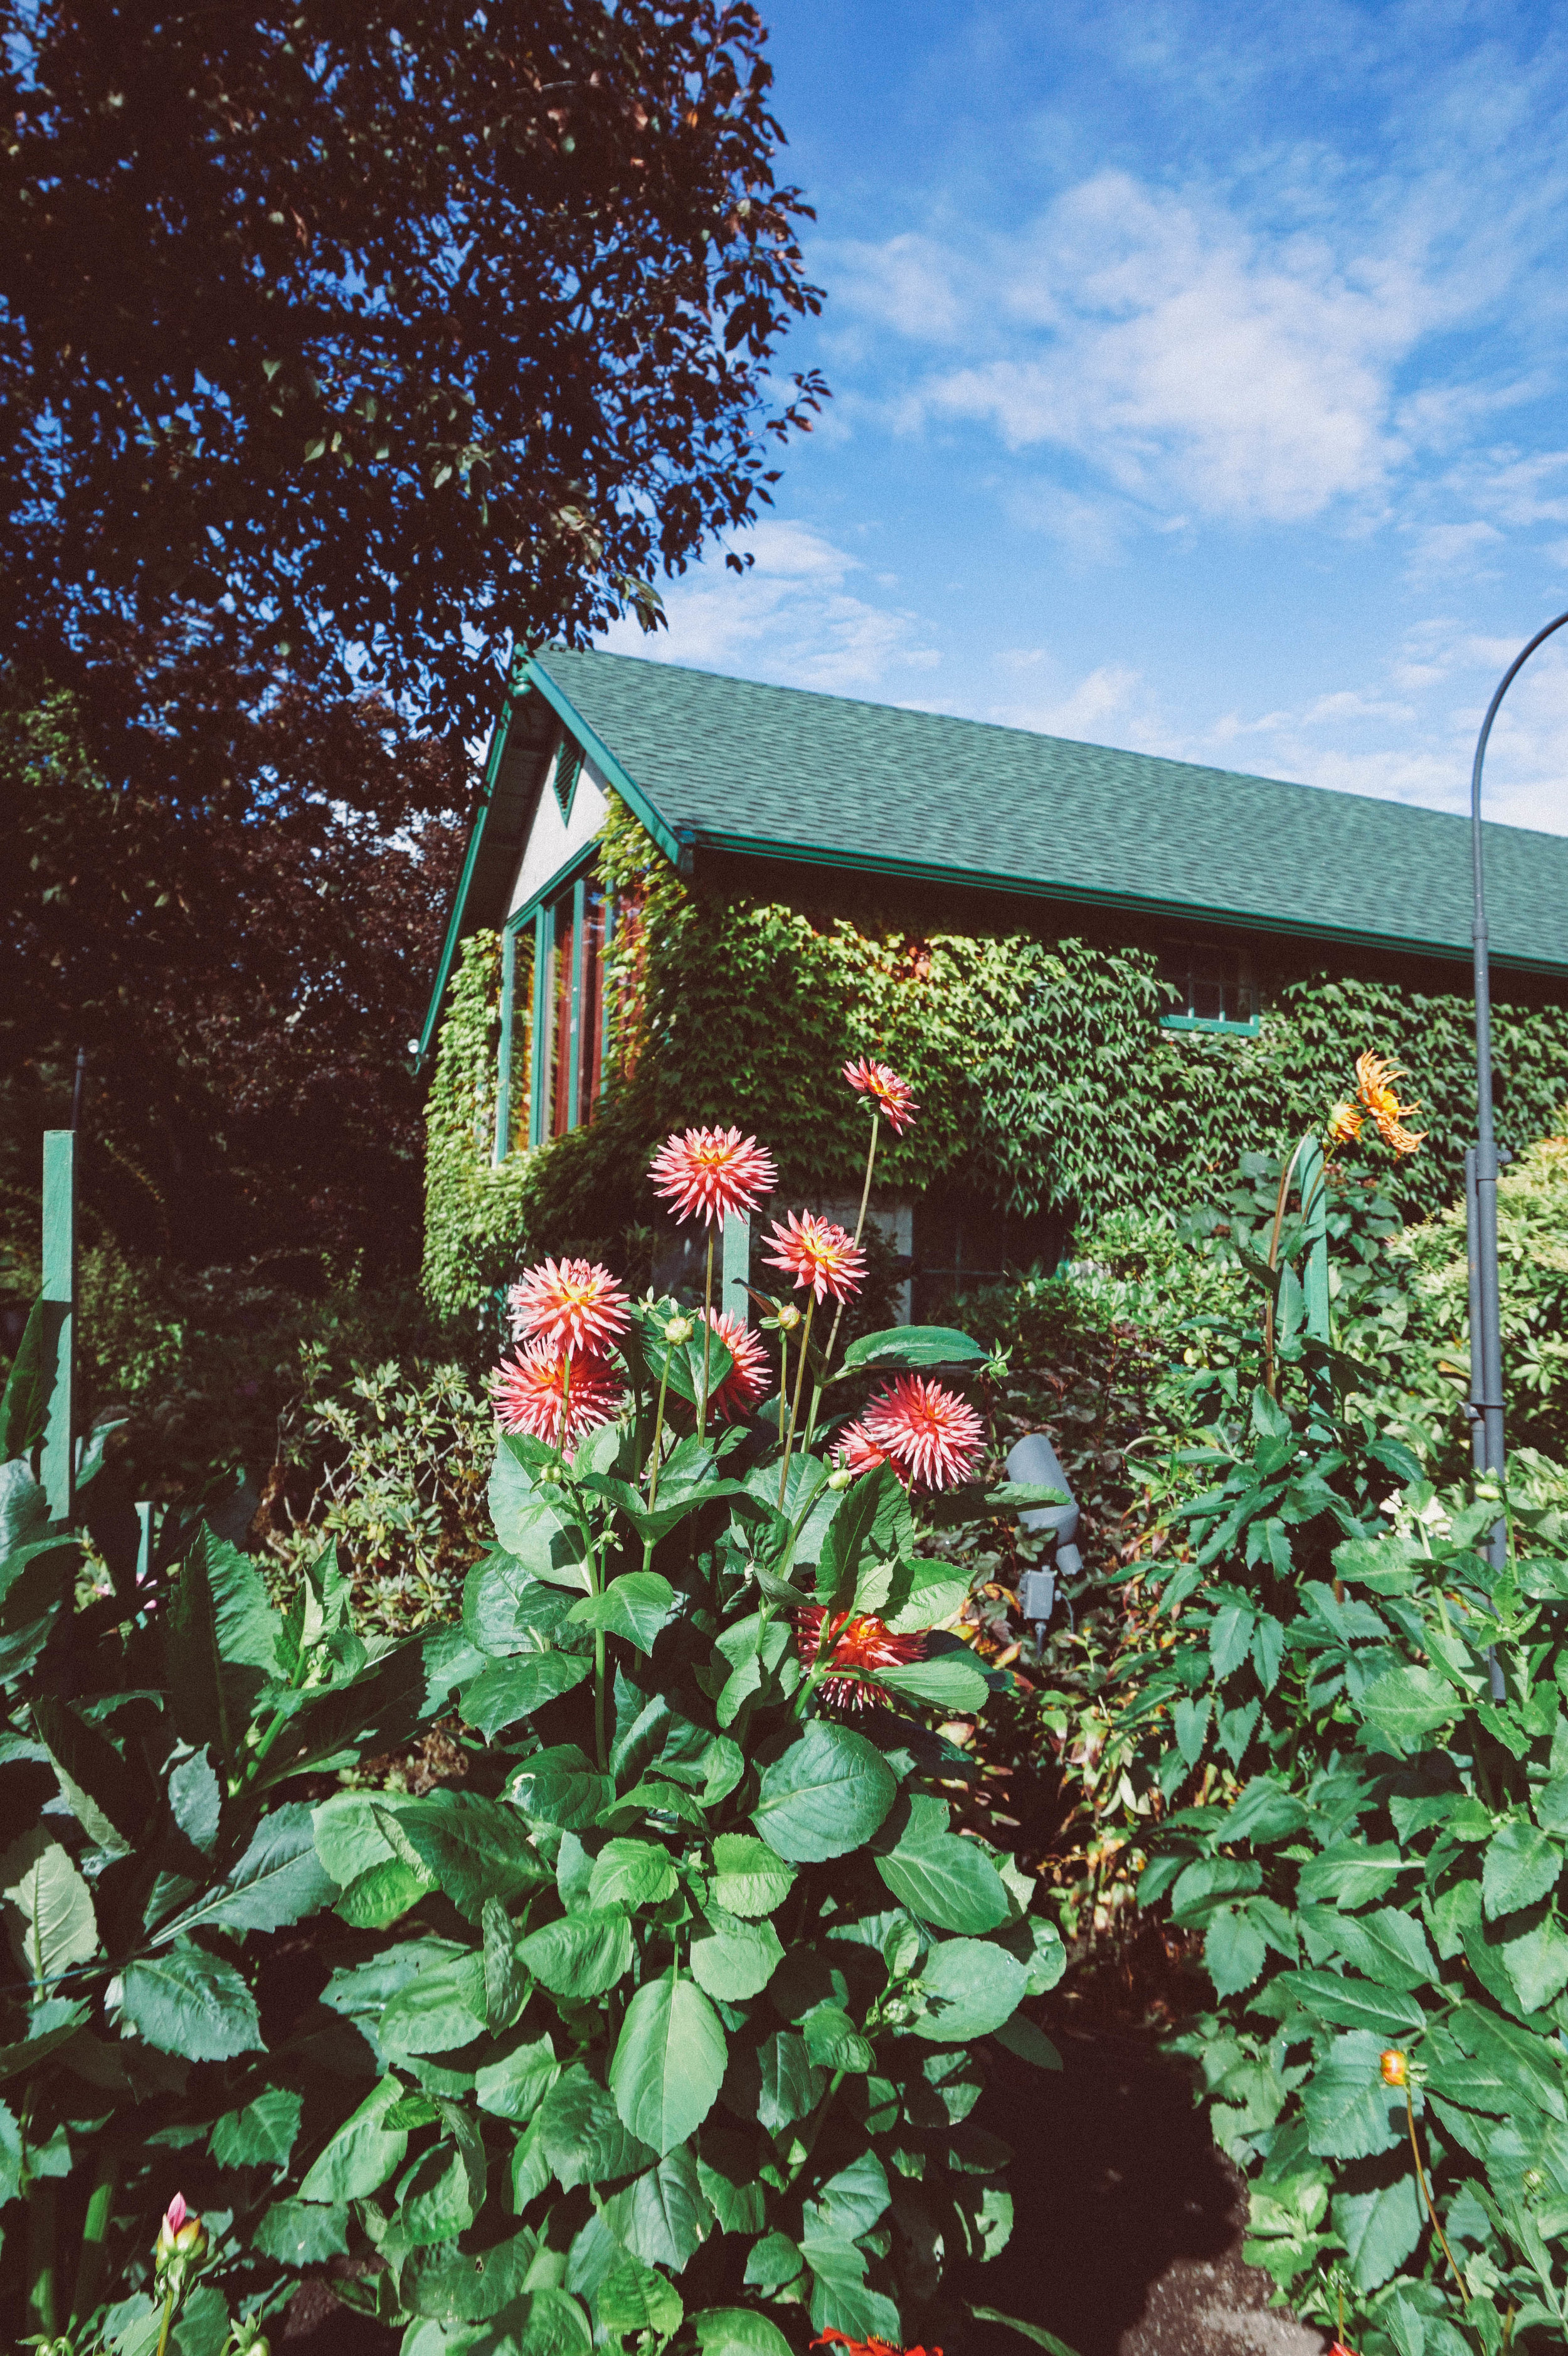
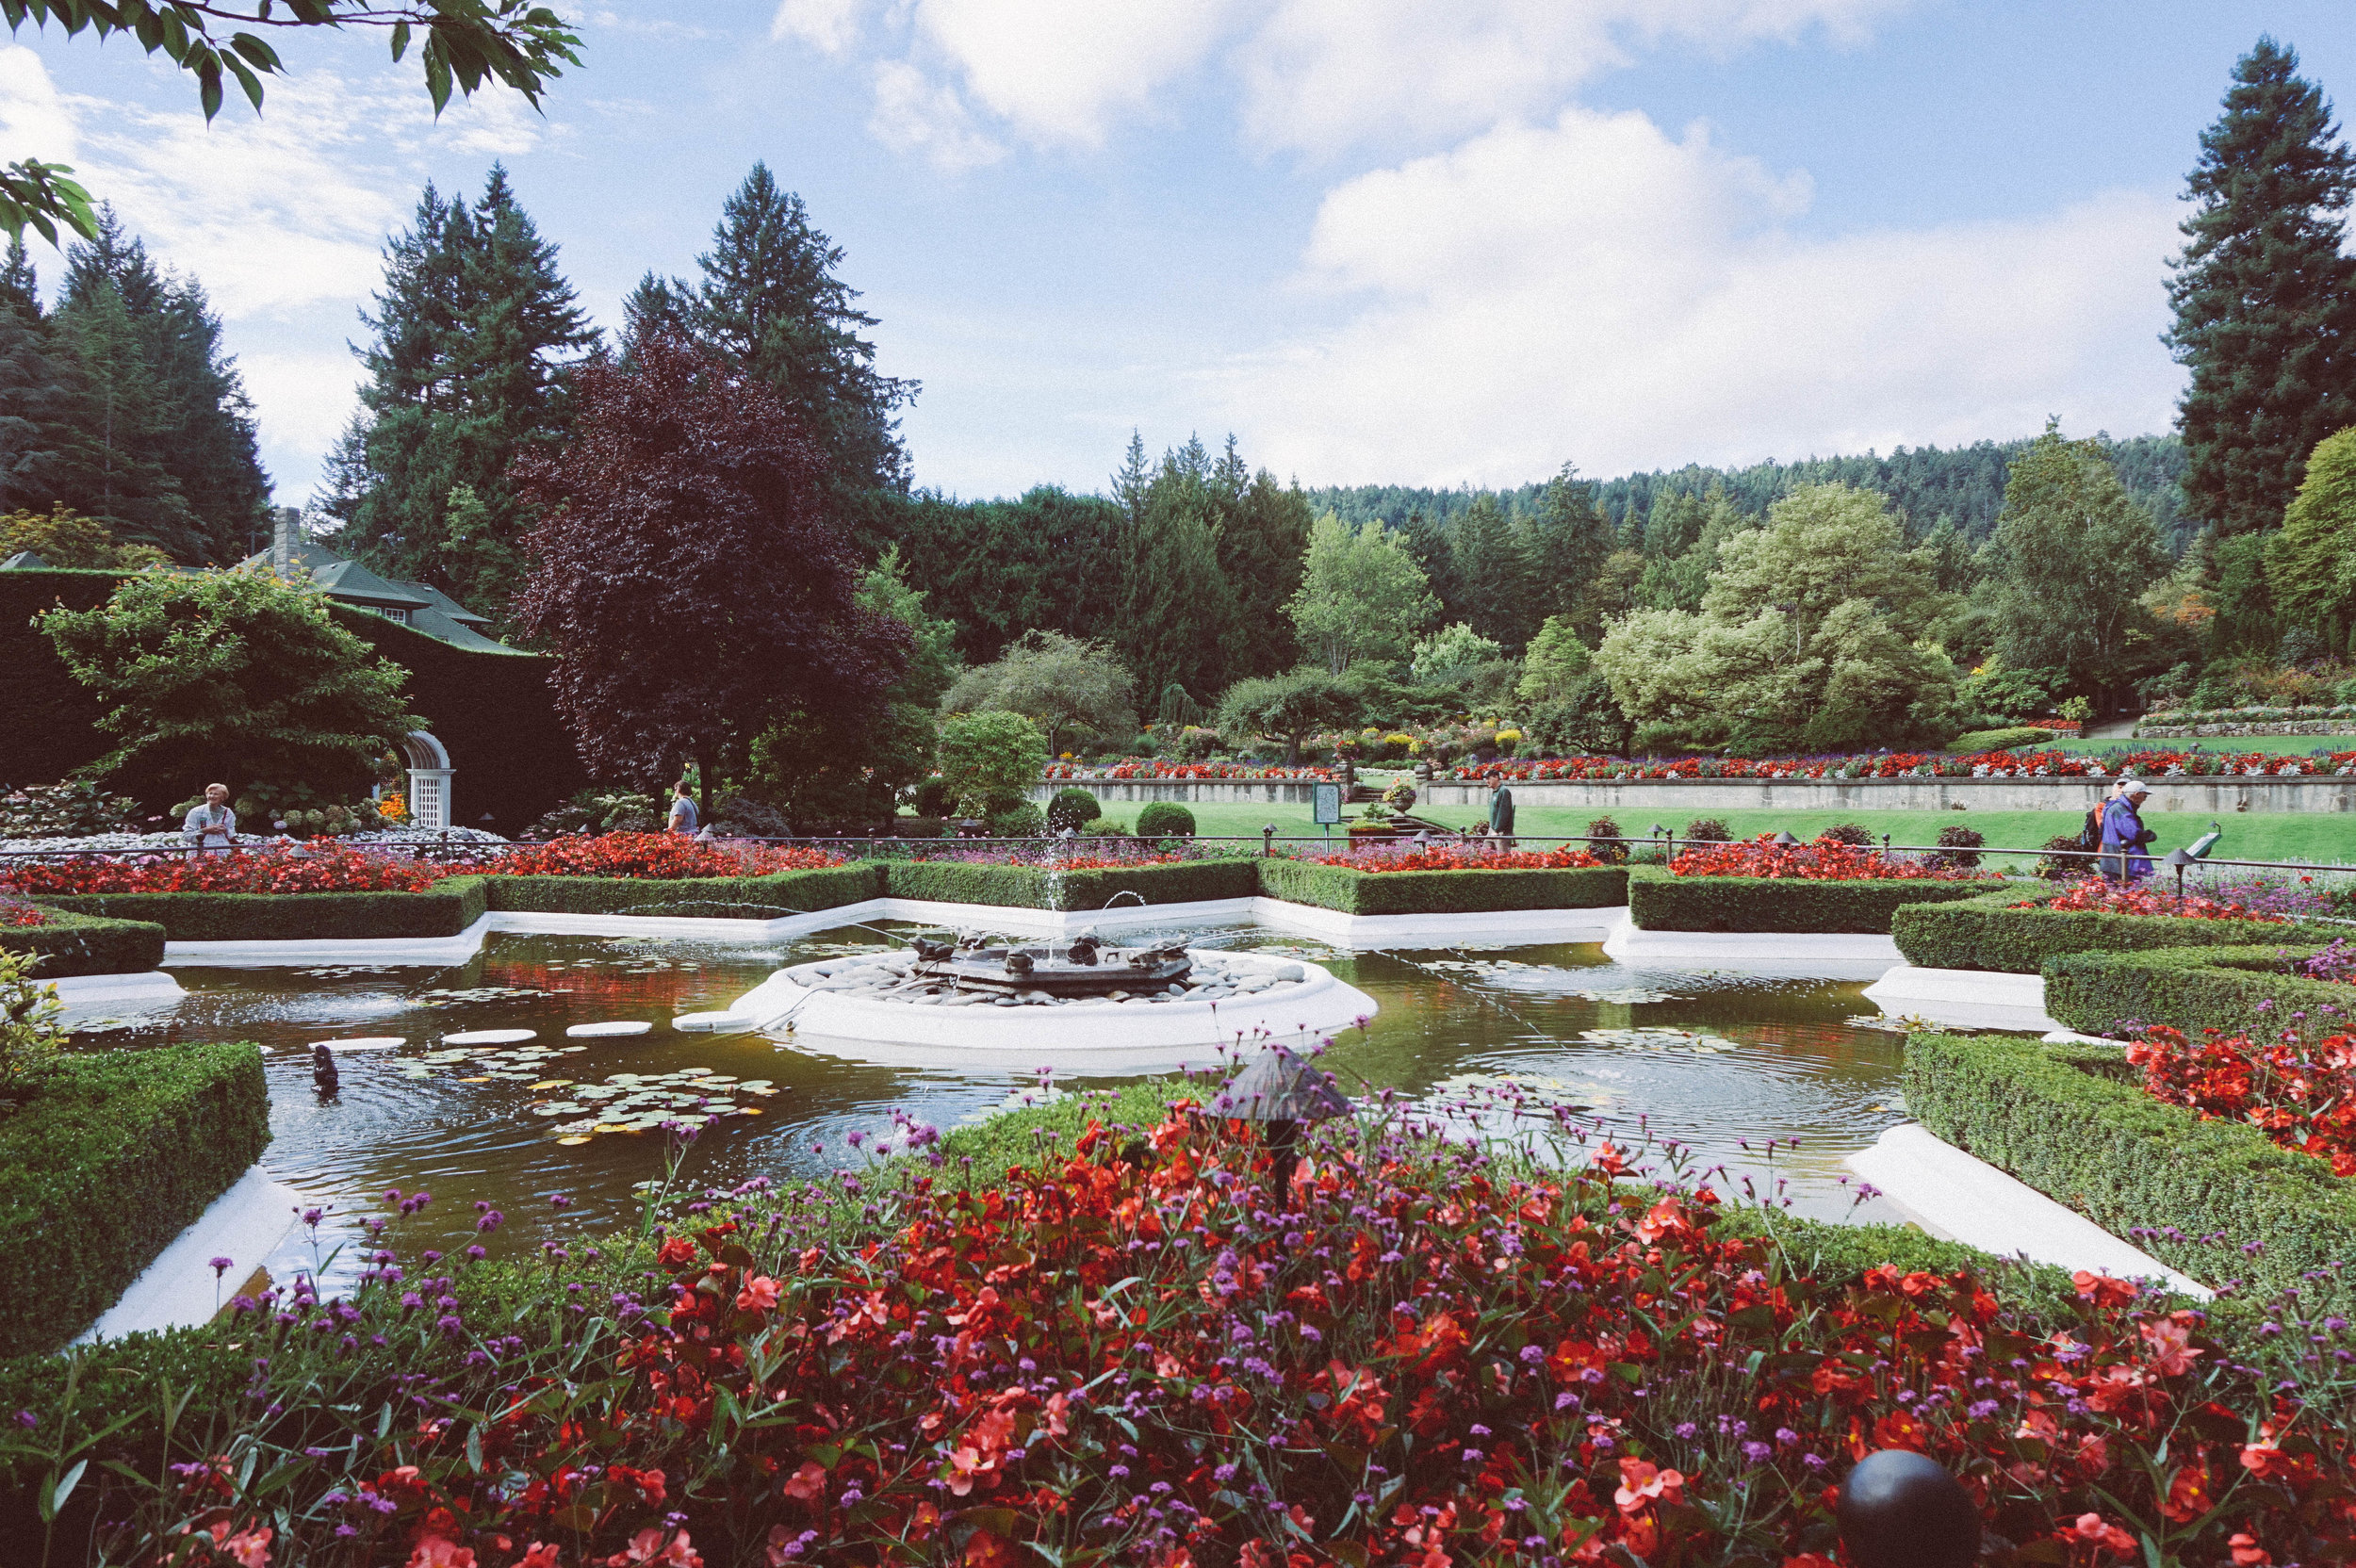
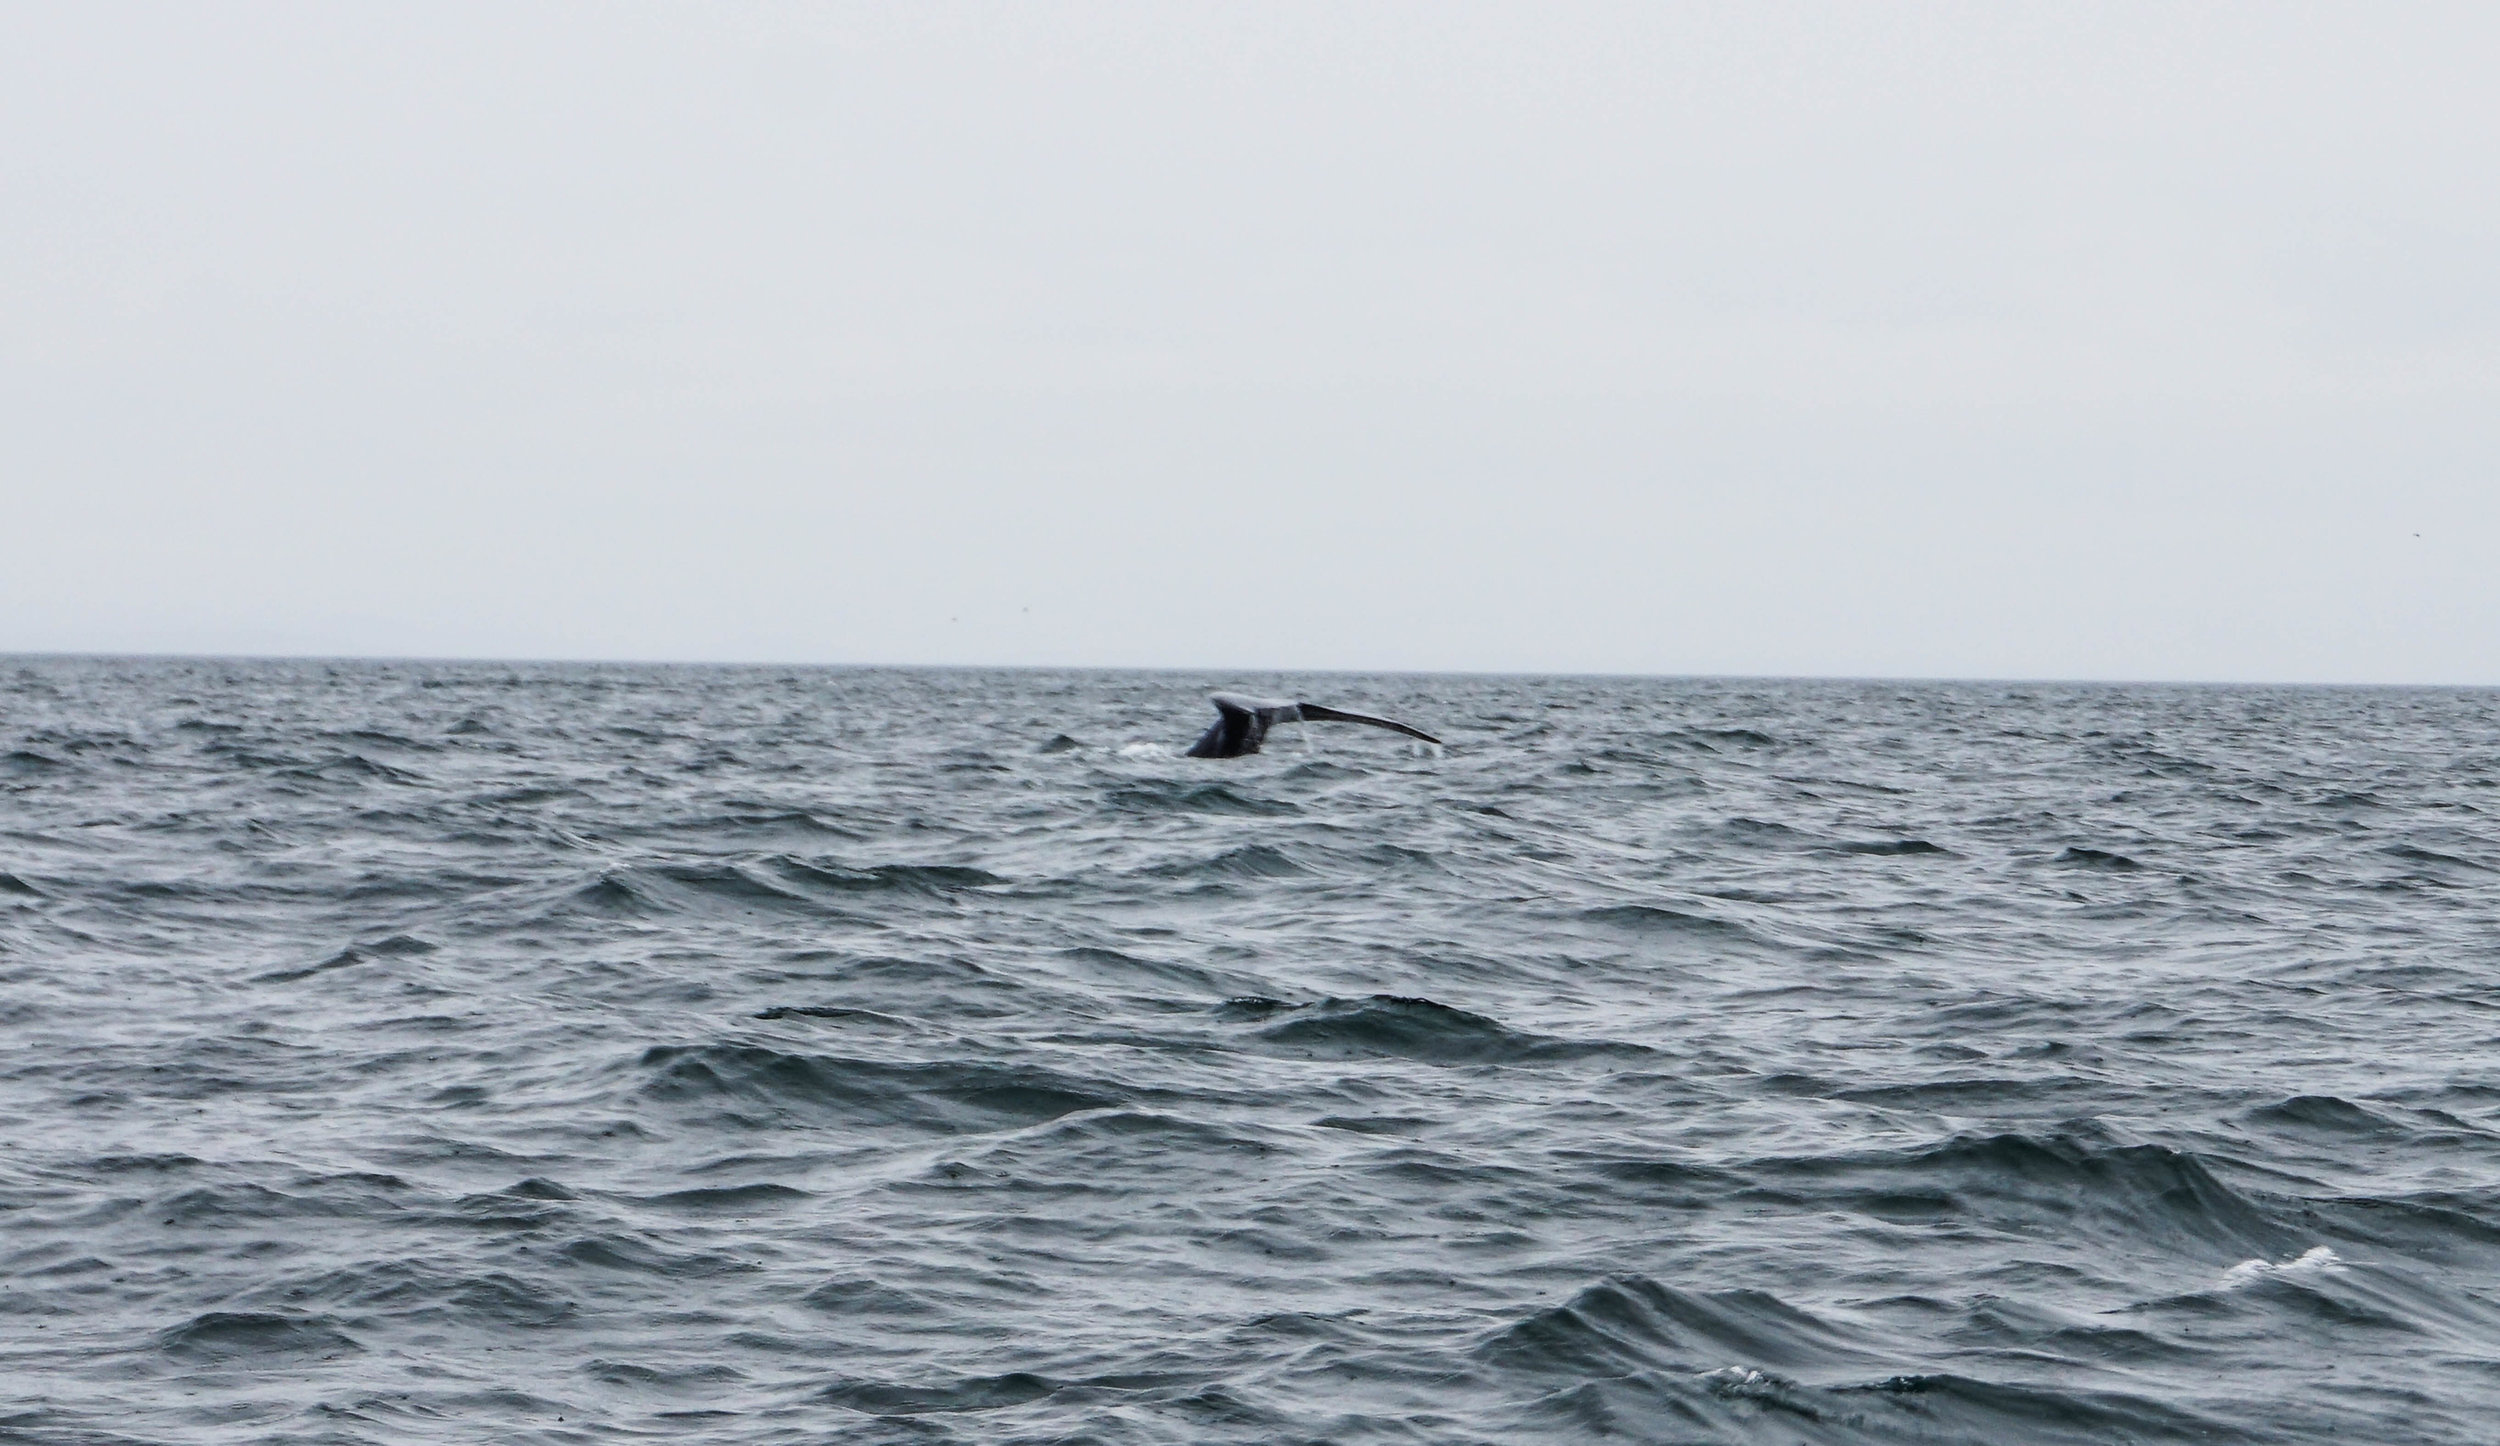
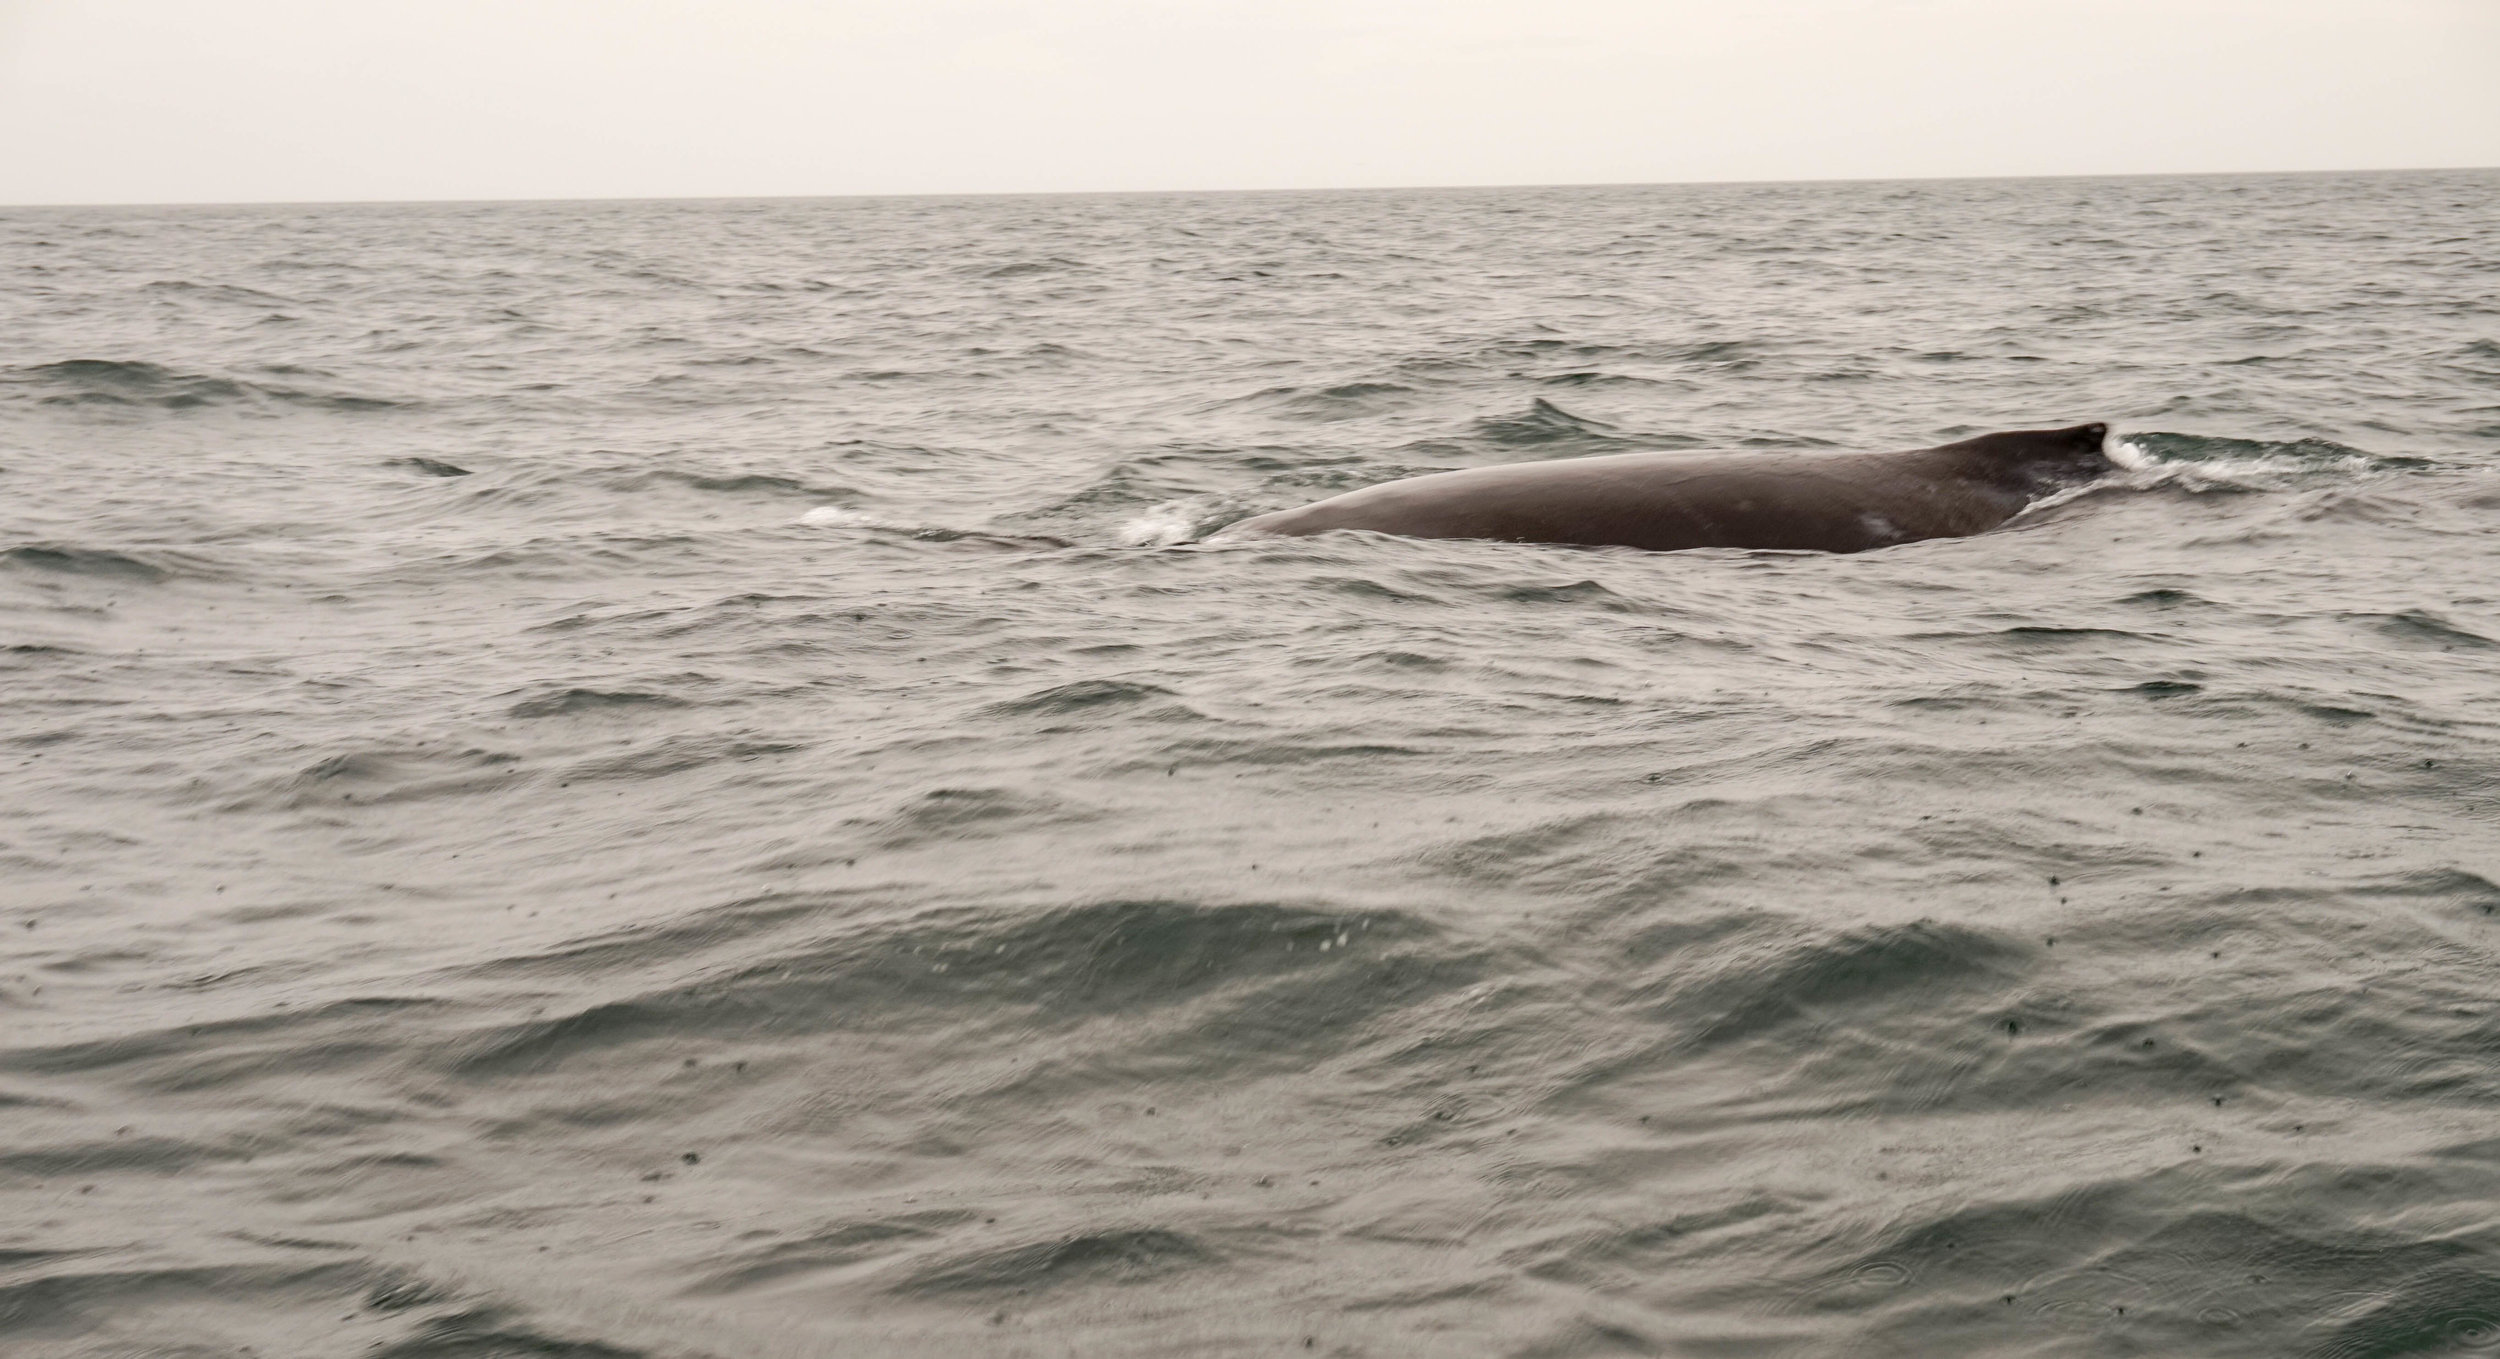
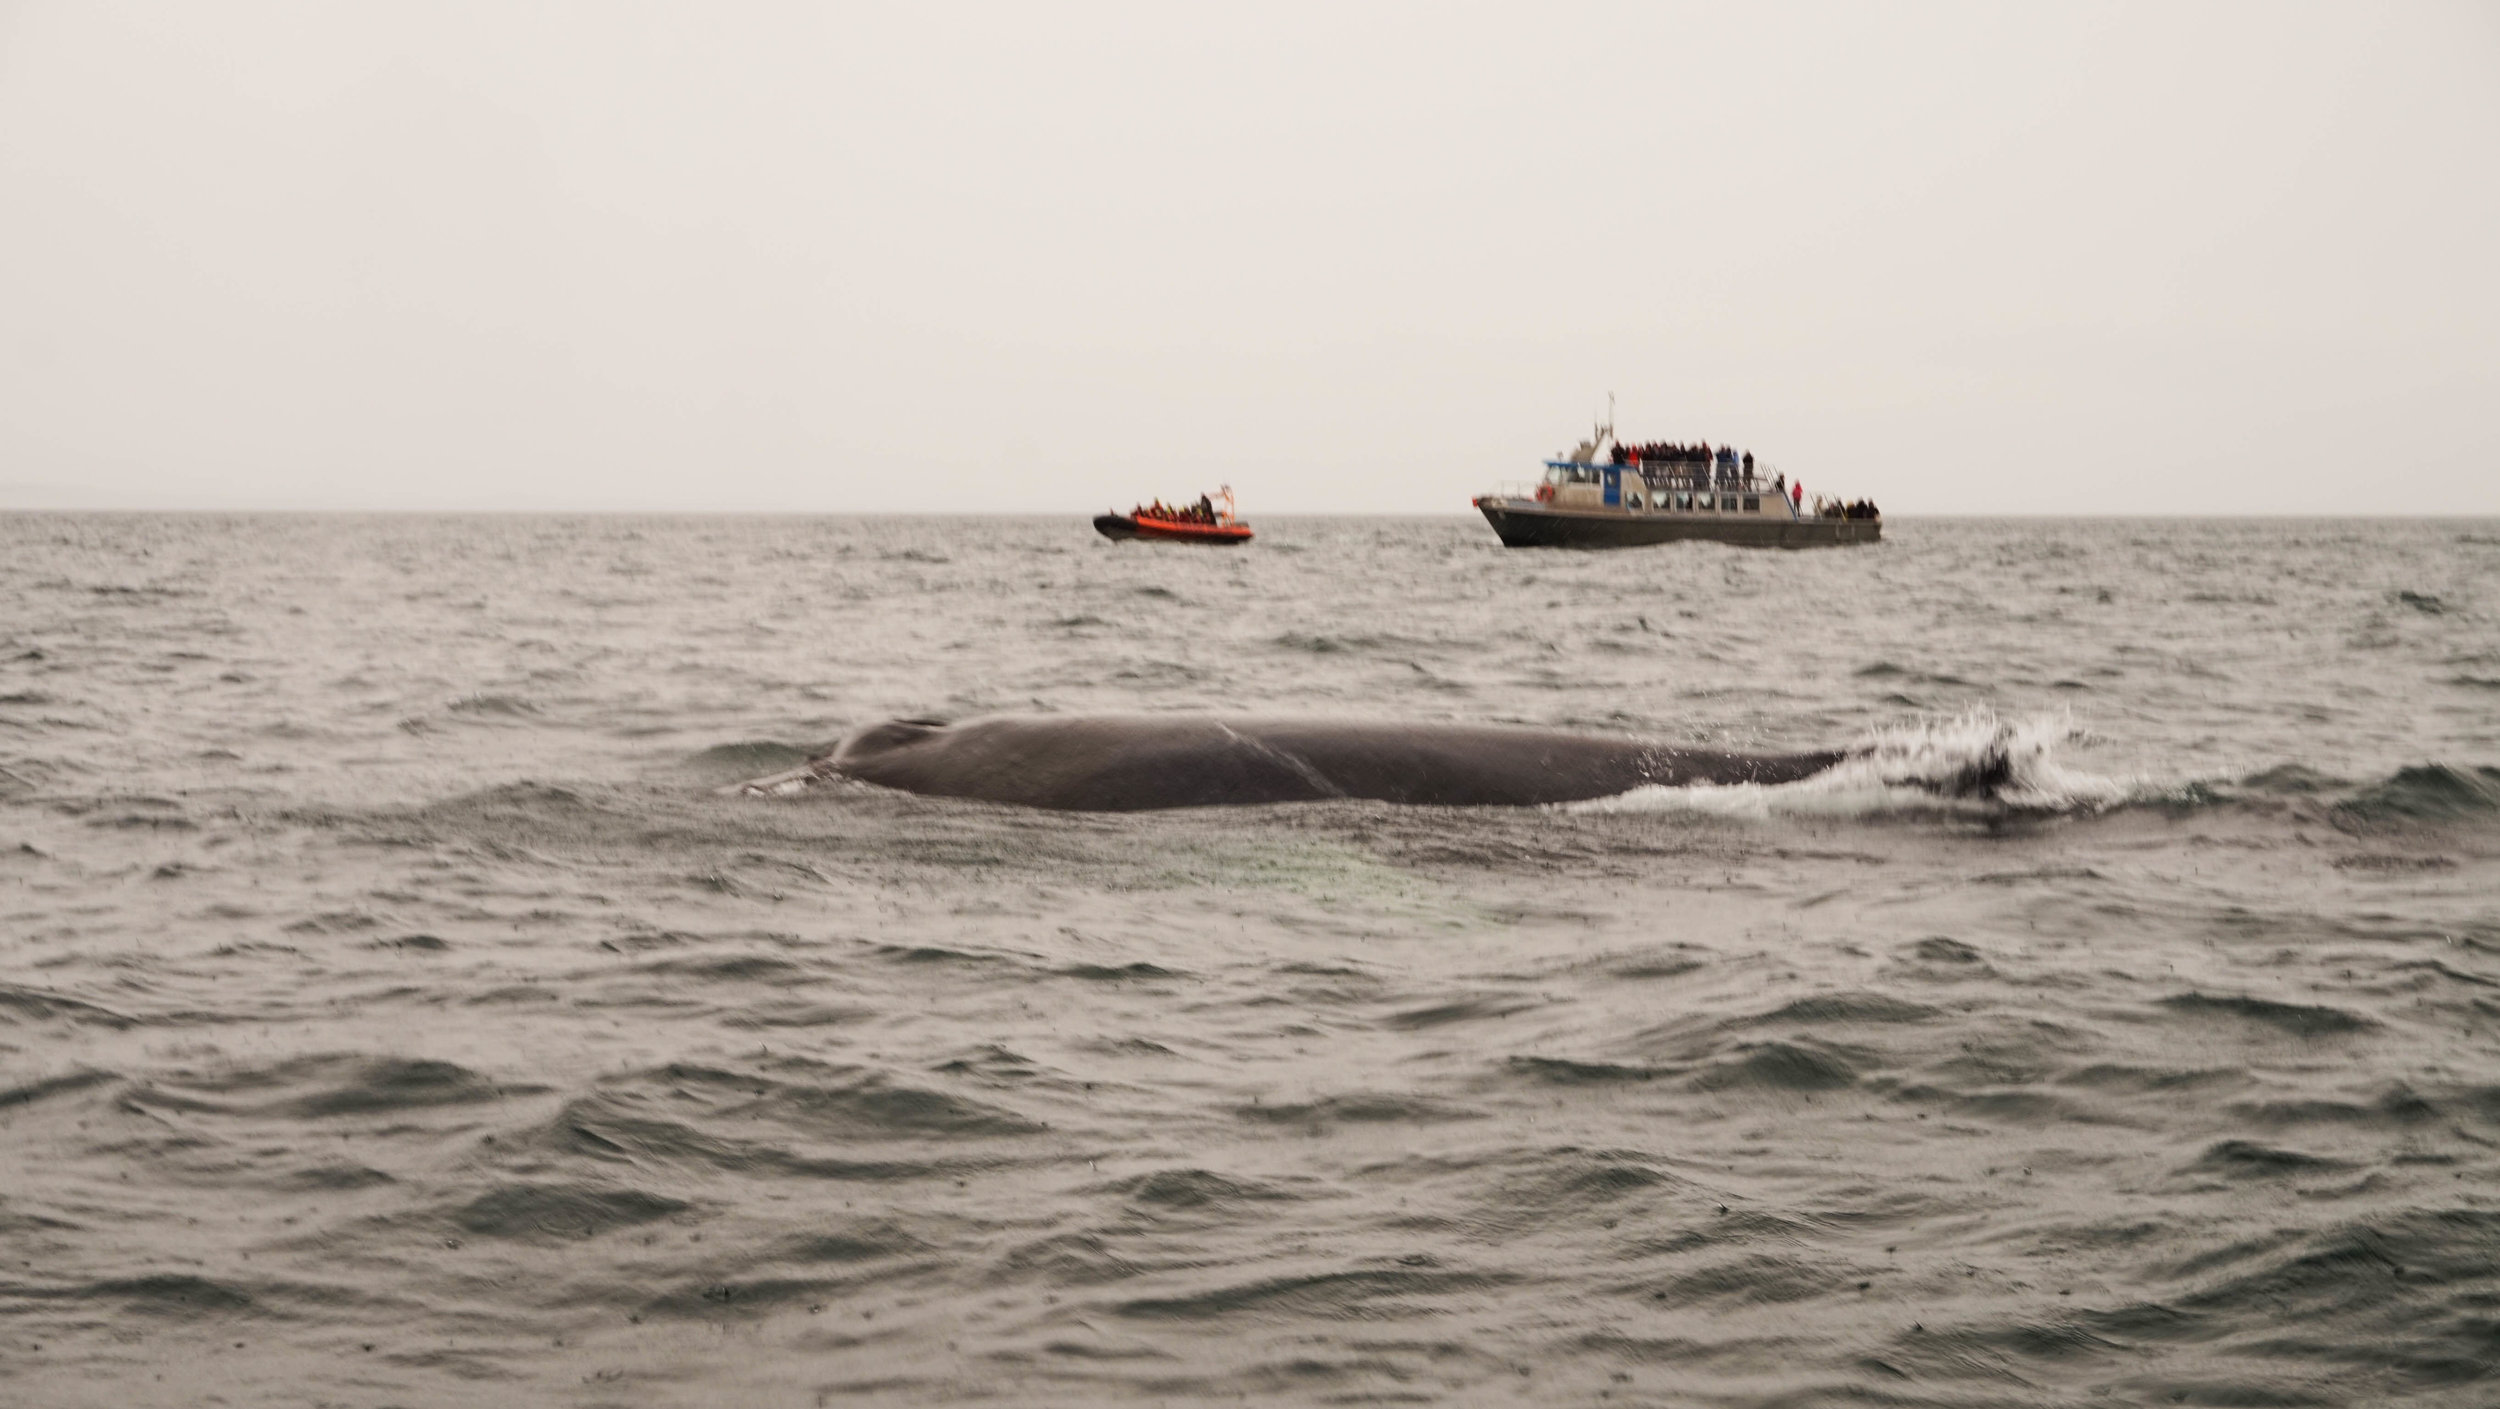
    Also, of course, you can't go to Victoria without visiting the Butchart Gardens. This was one of the most magnificent display of flowers I've ever seen. Flowers of all colors, bursting out of their gardens, hanging above you, beside you, topiaries, Japanese gardens, fountains, and beautiful smells all around, it felt as though I was in a dream. It took a minimum of two hours just to get around the whole area, but worthwhile and a must do when coming to Victoria. In addition to this, we spent another portion of our day whale watching. I highly recommend coming to visit during the end of Summer or start of Fall as the whale sightings will be more likely and prevalent. It was an incredible life experience that words can't describe. These animals are so smart, curious and majestic, it was thrilling to see them up close and in person. 

    Must visit place- Victoria: Empress Hotel
    Must visit place- Victoria: Butchart Gardens
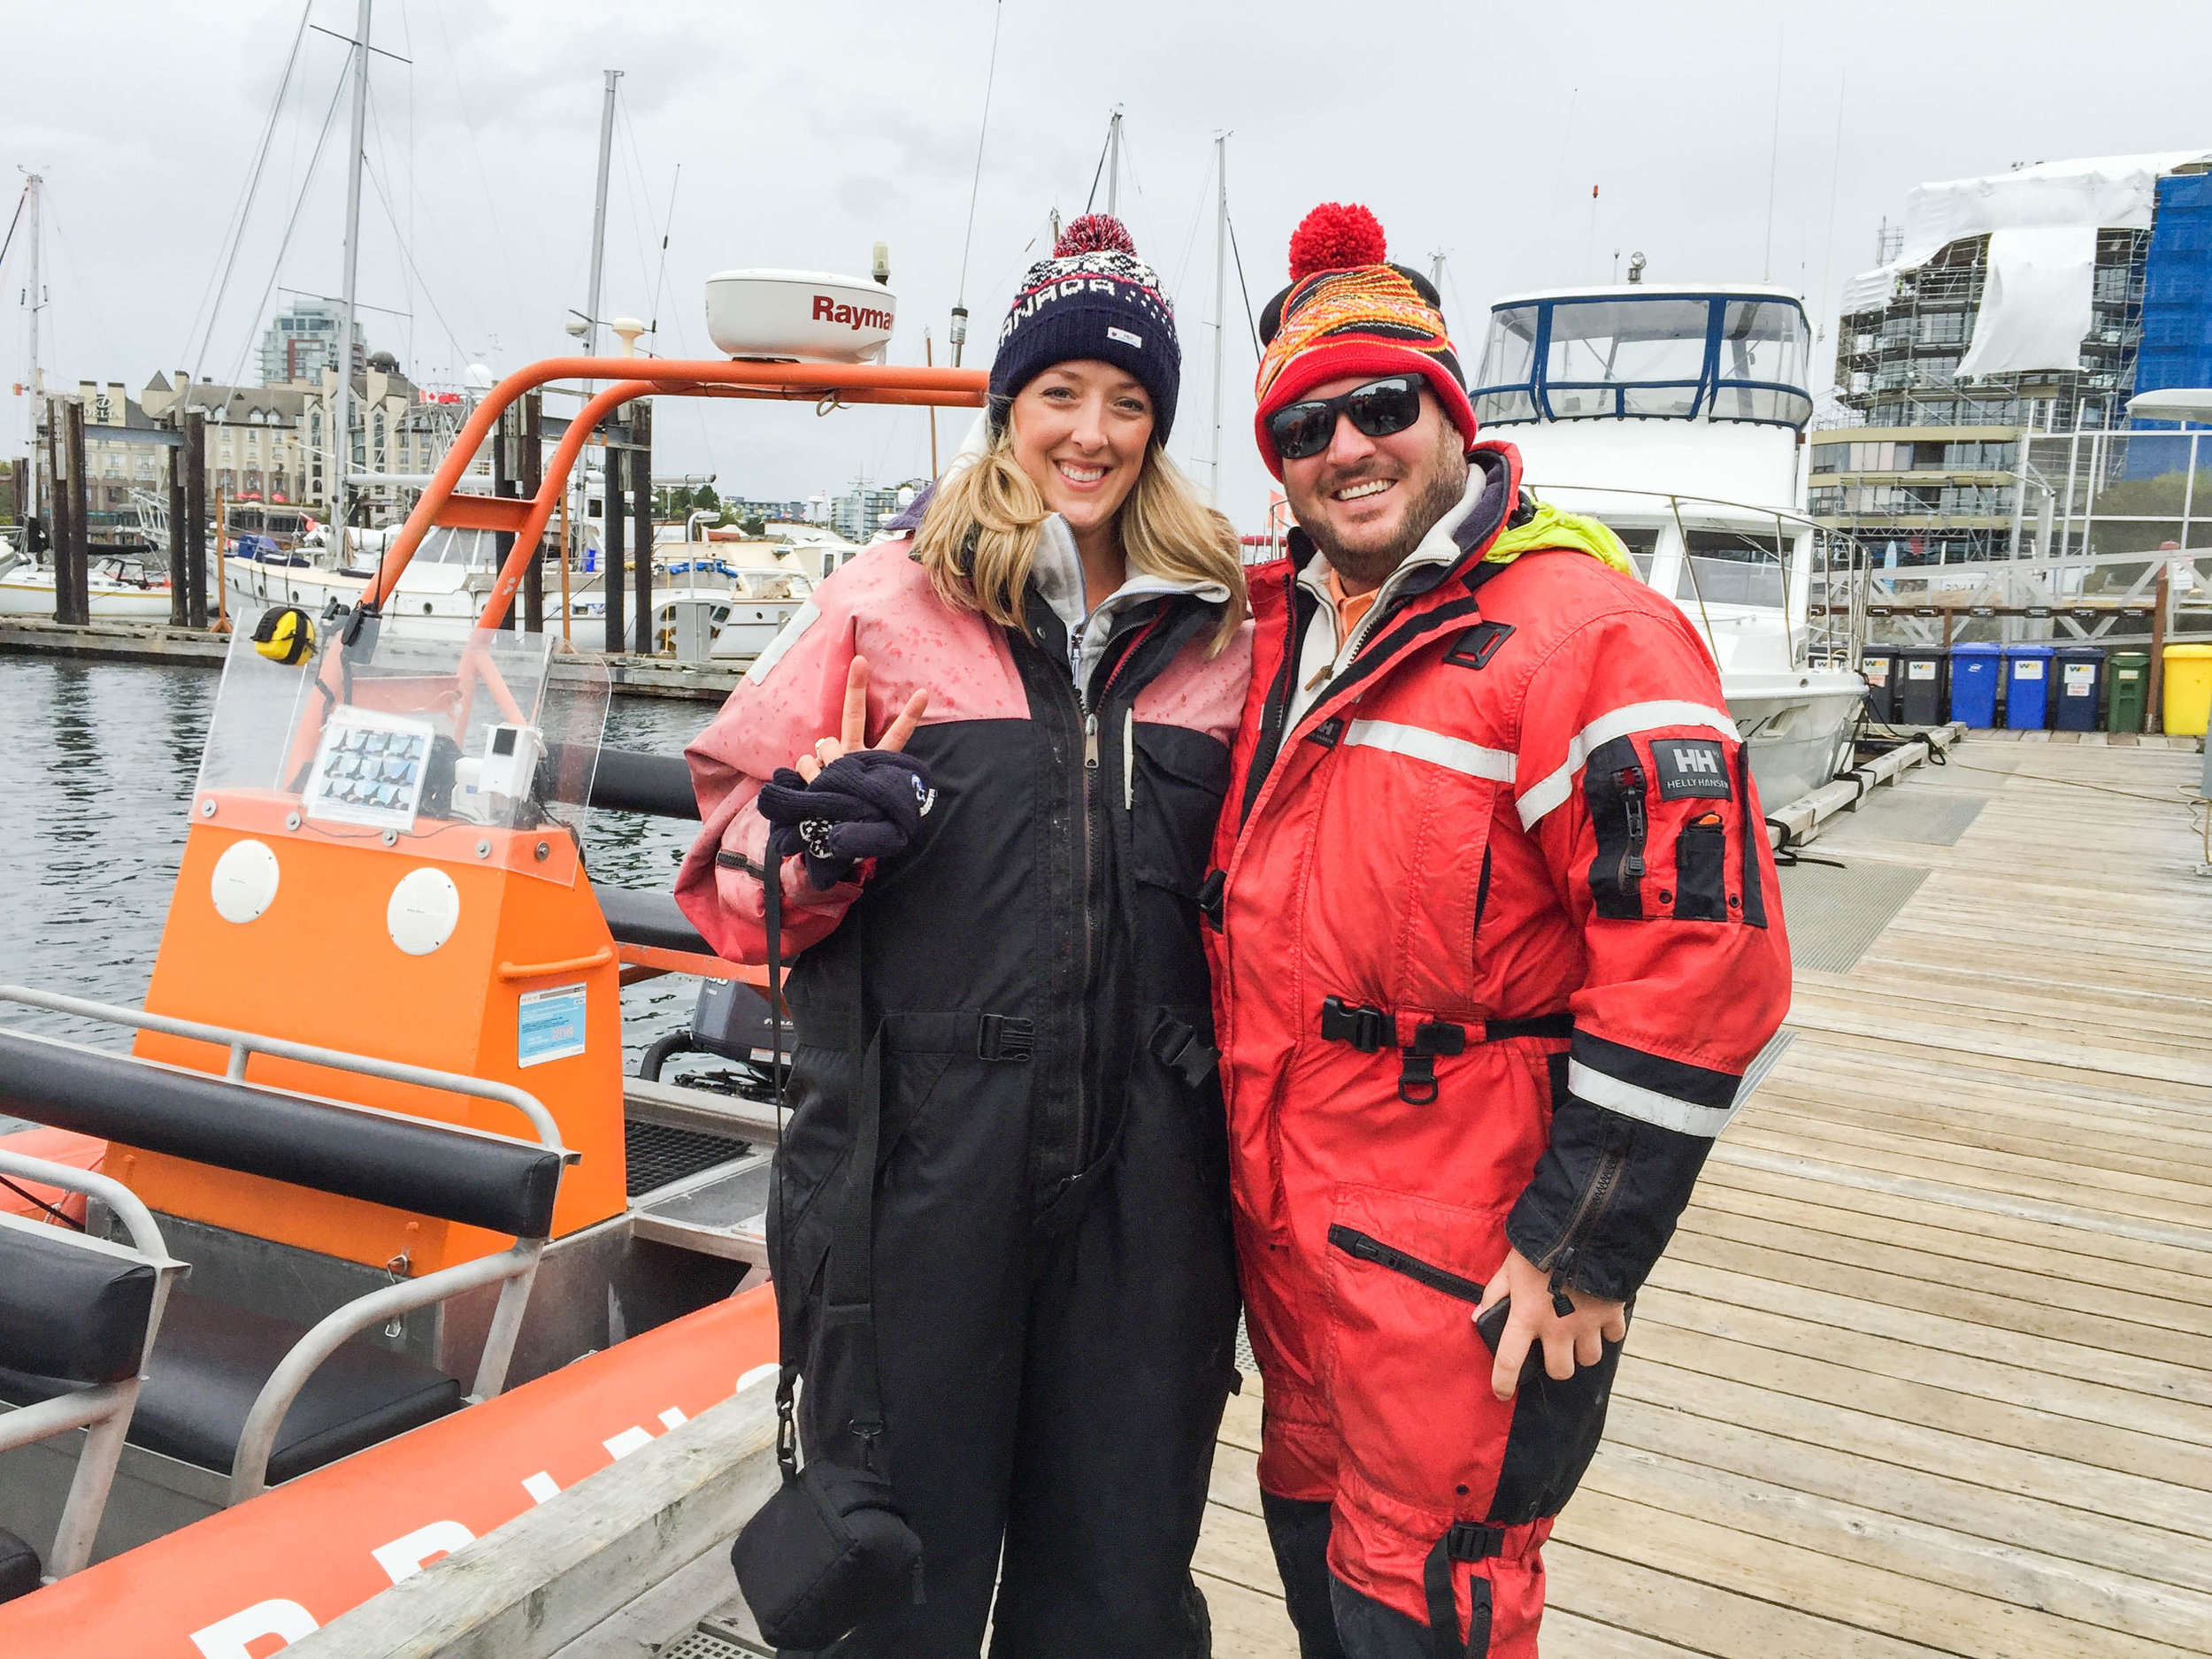
    Must do adventure- Victoria: Whale Watching

    This adventure was a perfect way to kick off the Fall and spend time out in nature, exploring and appreciating all of the beauty that is around us. Don't have every day planned out, take time to wander, get lost and run into new adventures and places you wouldn't normally go. I hope you enjoy the pictures below of my travels out West and recommendations. Make sure to comment or write below. I love hearing from you and love sharing. 

    One Pot Mac & Cheese Chili

    Its finally Fall, which means hearty bowls of warm soup are in order and this week for Motivation Monday we are creating a spin on mac & cheese and chili, two of everyone's favorite comfort foods combined together in this incredibly easy One Pot Mac & Cheese Chili from Damn Delicious. 

    Also, with it being football season, this will be the hit of the party for game days. This super easy chili recipe combined with noodles and shredded cheese uses staple ingredients most commonly found in your pantry and will surely be a hit with everyone, young and old. With the variety of legumes added, this chili is a great source of folate and nearly has a full daily serving for adults in it. In addition to its nutritional benefits, it is also creamy, flavorful, hearty and filling. My mouth is watering just thinking about it and since its made it one pot, clean up is a breeze. 

    What a great way to start your Monday and week! And when its done cooking, make sure to serve yourself while its still warm and portion the rest off into tupperware to reheat and eat throughout the rest of the week! 

    I hope you all enjoy this recipe with your friends, family or just snuggled up on the couch alone & thank you to Damn Delicious for making this incredible meal. Make sure to share your pictures with me on Instagram when you make it!! 

    Easy On-The-Go Salsa Chicken Bowls

    I've finally returned home from my road trip around the Pacific North West & Canada and its time to get back into the swing of things. Its also the start of fall and that means school is back in session and my schedule is going to be jam-packed. Therefore, to get back on track with my healthy eating and to save on time, so I don't have to spend every day in the kitchen, I've decide to make these incredibly awesome and easy Salsa Chicken Bowls, for every day of the week! The best thing about this recipe is that you can make, bake and go! Cut up the ingredients, stick them into the oven for 20-25 minutes and add them to your tupperware to eat throughout the week. 

    Meal prepping at the beginning of each week is one of the best things to do when you want to stay on track and eat healthy. When you meal prep, you won't have as much temptation to stray away and eat an unhealthy meal or go out to eat and with these Salsa Chicken Bowls, you'll be set for either all of your lunches and dinners for the week. All you need to do is place  3-4 chicken breasts onto a sheet pan along with sliced up bell peppers and one red onion. Season with extra virgin olive oil and salt and pepper and throw into the oven! 

    While you are waiting for the chicken and veggies to cook, add some corn, either off the cob or canned corn, some drained and washed black beans, chopped up tomatoes and a wedge of lime to your tupperware. Lastly, pull the chicken and veggies out of the oven and add them equally to the tupperware and you are set for your meals throughout the week. 

    These are so easy and incredibly flavorful, you won't want to wait to try them out! If you do, as always, I love to hear what you think and make sure to tag me on Instagram or Facebook! 

    Ingredients: 

    3-4 Chicken breasts
    1 jar of salsa (depending on the size, maybe 2) 
    1 can black beans
    2-3 bell peppers
    1 red onion

    Handful of small heroism tomatoes
    1 can of corn or 2 cobs
    1 lime
    Salt & pepper
    Olive Oil

    Directions: 

    1. Preheat the oven to 400 degrees and bake for 20-25 minutes 
    2. Add chicken breasts to sheet pan. 
    3. Evenly distribute the jar of salsa on top of the chicken breasts 
    4. Slice up the bell peppers and red onion and season with s&p and EVOO
    5. Cut up the tomatoes and lime 
    6.  While the chicken and veggies are cooking, distribute the corn and black beans to each of the tupperware, along with the wedge of lime and tomatoes. 
    7. Remove the chicken and veggies, let rest for 5 minutes and add the rest of the ingredients to the tupperware. 
    8. Let cool before placing in the fridge. Will last for the next 4 days. 
       

    Peach + Heirloom Tomato Panzanella

    If you haven't already heard of panzanella, you won't ever want to forget about it once you do! It is one of those staple side dishes for all meals and its perfect to use with any ingredients. It is a beautiful mixture of fresh produce and made with homemade seasoned croutons, which makes it impossible to stop eating. Panzanellas, or at least this one, is filled with beautiful, bright colors, which is what we all should want in our lives when we eat and this Peach + Heirloom Tomato Panzanella makes me happy! 

    If you are getting tired of the same old salad, this is the perfect way to spruce things up and it pairs perfectly with any meal. Whether you are making chicken, fish, tacos or burgers on the grill, it works perfectly! 

    Lets talk about this panzanella though. Ripe peaches and plums pair perfectly with in season heirloom tomatoes with create a burst of flavor in your mouth. Topped off with creamy burrata cheese and seasoned homemade croutons this salad is so easy and can be thrown together within a matter of minutes! Chop up some fresh veggies or fruit, throw it together with whatever you have laying around and voila! Don't forget to go out and immediately buy the orange champagne vinaigrette to drizzle over the whole thing! You will be in love!! 

    Prep Time: 10 minutes
    Cook Time: 15 minutes
    Total Time: 25 minutes

    Ingredients: 

    2-3 peaches/nectarines
    2-3 plums
    2-3 large heirloom tomatoes
    Small Heirloom tomatoes
    Bread
    4-8 oz. burrata
    Olive Oil
    Orange Champagne Vinaigrette
    Salt & pepper

    Directions: 

    • Preheat oven to 350 degrees 
    • Pull pieces apart from the bread, season with olive oil and garlic seasoning and salt and pepper
    • Put bread pieces into the oven for 15-20 minutes 
    • Cut into large pieces the stone fruit and tomatoes and layer them into a large serving platter
    • Pull apart pieces of the burrata cheese and spread over tomatoes and fruit 
    • Add toasted croutons on top
    • Drizzle orange champagne vinaigrette and salt & pepper to taste 

    Double Chocolate Chip Banana Muffins

    Natural sweetness, bananas and double chocolate all in one treat, how could these muffins get any better? Instead of making the traditional banana bread with those brown bananas which are waiting to be used, lets spice up the week a bit more and add them to some muffins instead! 

    So let's talk about these muffins, look at how gorgeous these are! 

    First off, these ripe, brown bananas are the best to use with this recipe. When bananas are at their ripest, this is when they are the most sweet, so keep this in mind when you are making this next time to take in consideration on how sweet you want the muffins. Also, these muffins are some of the most delicious muffins I've made and since they are made with coconut oil, honey and greek yogurt, they stay exceptionally moist inside are perfect eaten both warm and cold. 

    Next, for the chocolate, I have used three different kinds in these muffins. First, there is the natural coco powder which is mixed into the dry ingredients as well as two different types of chocolate chips. I have chosen to use dairy free dark chocolate chip by Vita Cost as well as some medium sized chocolate chips to use on top of the muffins! I also like to use these specific chocolate chips, because you can always sub the greek yogurt or remove it from the recipe and these would be diary free. 

    Lastly, make sure to stir the batter as little as possible, to ensure that it stays light and fluffy. The more you mix, the denser it becomes. Also, I used a 1" ice cream scoop to evenly distribute them into the muffin pan and make sure they don't over flow when baking. I can't wait for you all to enjoy these as much as I did! Oh and they make for the perfect treat to give to others as well! Happy baking! 


    Ingredients

    • 3 bananas
    • ¼ cup of honey
    • 1 teaspoon of vanilla extract
    • ⅓ cup of greek yogurt
    • ⅓ cup of coconut oil, melted
    • 1 egg
    • 2 tablespoons of cocoa powder
    • 1⅔ cup of white whole wheat flour
    • ½ teaspoon of sea salt
    • 1 teaspoon of baking soda
    • ⅓ cup of mini chocolate chips

    INSTRUCTIONS

    • Preheat the oven to 350 degrees .
    • Coat a muffin tin with cooking spray.
    • In a small bowl, toss together the flour, baking soda, salt, cocoa powder, and both types of chocolate chips. Mix.
    • Make sure your bananas are at their very ripest (black skins are best). Remove the skins and mash the bananas extremely well.
    • In another bowl, whisk together the egg and Greek yogurt. Stir in the melted coconut oil, vanilla extract, and the ripe mashed bananas.
    • Combine wet and dry ingredients and mix until JUST combined. Don't over-mix as this will result in the muffins becoming denser
    • Separate the batter evenly among the 12 cups.
    • Bake for 18-23 minutes or until a toothpick comes out clean when inserted into the center of a muffin.
    • Allow to cool and then remove from the muffin tin. 

    Local MN Food & Catering Obsessions

    I can't believe my blog launch party already came and went! It was such an incredible evening and it could not have gone any better. With twinkle lights hanging, mason jars with candles glowing and the beautiful food and drink displays from our partnering companies CRAVE Catering, North Mallow & BĒT Vodka, set up, it made for the perfect feel of a whimsical and fun evening. The atmosphere of being outside, with a clear view of the Minneapolis skyline, perfect for taking photos of course, and the sun setting over the cities, made it one of the best nights and made me the happiest girl ever! 

    With three fabulous local Minnesota companies partnering with me to celebrate the launch of my blog, it was bound to be a success. The incredible display of food was provided by one of my favorite local companies in town, Crave Catering. With superbly talented and creative chefs, Crave Catering was able to fit the look at feel of my blog and event spot on with a summery, light and whimsical feeling with the food. Provided, was the beautiful display and take on the classic dish, "Peas and Carrots," which included a pea puree served with colorful heirloom carrots, charcuterie skewers loaded with wild rice sausage, cheese and pickles, potato salad, where the red potatoes were hallowed out and filled with potato salad inside and lastly a take on the classic "Bacon and Eggs," which included maple glazed bacon on a deviled egg. I am sad to say that if you didn't attend earlier on in the night, you may have missed the food, because everyone couldn't stop eating it! Everything was incredible and beautifully prepared. 

    After all of that amazing food, BĒT Vodka had the perfect signature cocktails shaken and prepared to try. BET Vodka is another local Minnesota company that I am obsessed with. They produce and process their vodka locally from sugar beets. I am absolutely obsessed with this vodka, it is incredibly smooth, light and is naturally a bit sweet. The signature drink had a bit of everything, it was sweet, sour, light and refreshing, and I couldn't stop myself from having more than one cocktail! BET Vodka made the most adorable shaken martinis made with Vodka, fresh lime juice, simple syrup and cherry bark vanilla bitters. I highly recommend you go out and get a bottle for any event or party you go to next! 

    Lastly, when you think of Minnesota summer nights, what do you think of? Because I immediately think of sitting around the bonfire eating everyone's favorite treat...S'mores. Local Minnesota company, North Mallow, has perfected the S'more game and has everyone wanting more. With their handcrafted and creatively homemade flavored marshmallows, you will never want to go back to the way they were made before. Theres a flavor for everyone, from the traditional vanilla bean to caramel, mocha and mint chocolate chip marshmallow flavors, on top of your choice of Hershey's chocolate or ghirardelli chocolate. Your mouth will be in for an explosion of incredible flavors. The best part about North Mallow is that they bring the "bonfire" to you. You are able to roast, over the fire, your own marshmallow on a stick and craft your own s'mores creation on top of a gram cracker. Make sure to check them out as they are the perfect thing for any event or wedding...s'mores dessert bar? Yes, please!

    The launch party event had such a fabulous turnout, with over 60 people coming and going. I feel so incredibly lucky to continue writing and blogging about things, people and places that I enjoy and I feel the love from all of you. Thank you to everyone who made it out and to all of my followers! Make sure to follow me on Instagram @oliviasobjectsofobsession and on snapchat (OliviaJoan21).

    Here's just a few photos from the night! 

    Cheers! xx

    Fruit & Granola Yogurt Parfait

    Fruit, nuts, oats and greek yogurt, does anything get any better or healthier? These fruit & granola yogurt parfaits are really the only thing you'll ever want to eat in the morning after trying. They are not only the easiest option for a healthy breakfast but the perfect go to for a midday snack as well. 

    I made these fruit and granola parfaits for another one of my Motivation Monday recipes, because recently I have been busier than usual. With my summer semester of school coming to an end, I need something that will be satisfying, easy to throw together and transportable. Also, yogurt parfaits are so versatile, you can pretty much use any fruit you prefer or whatever is laying around the house! 

    Since summer is the perfect time for figs, I decided add them into my parfaits in addition to choosing a variety of berries and keeping with that theme, as I also used a blueberry preserve to provide a bit of sweetness. If anyone knows me, I have huge sweet tooth, so that was the perfect addition to the creamy and crunchy aspects of the parfaits! 

    Now lets talk about these mason jars, aren't they the cutest? They are the perfect serving size and make this parfait incredibly easy to transport to wherever you are going, with a lid that clasps and seals tight! Of course, you can use any glass you have around the house, but I liked these so I could take them to school with me and not worrying about them spilling! 

    Ingredients: 

    Per Jar: 

    1/2 jar of Bonne Maman Blueberry Preserves (jam optional) 
    2 1/2 Tbsp of Granola
    1/4 c. blueberries (fruit optional) 
    1/2 c. plain greek yogurt
    1/4 c. blackberries (fruit optional) 
     

    Directions: 

    1. Layer greek yogurt on bottom of the mason jar
    2. Add 1 1/4 tbsp of granola on top
    3. Add 1/8 c. of blueberries on top of the granola or enough to fill the surface area
    4. Layer the blueberry preserves on top of the granola
    5. Continue layering ingredients until the jar is filled
    6. Top off with blackberries

    Kale Greek Salad (V + GF)

    Happy Motivation Monday week 13!! 

    It seems that summer is the busiest months for everyone, including myself and its so hard to find the time to eat healthy and prepare meals for the upcoming week. Recently I feel as though my body has been craving something extra healthy and that is why this week for Motivation Monday I have decided on a vegan + gluten free kale greek salad. This salad has the combination of creamy and crunchy and hint of citrus and packed with super foods. I know traditional greek salads have feta within them, but I have chosen to leave that off because I am trying to limit my dairy intake. Diary tends to be a inflammatory food for most people and dishes can easily taste just as great without cheese!  

    This week's Motivation Monday recipe is the perfect thing to take with you during the week for lunches at work or to carry with you if you don't have time to stop home, because unlike typical salads, kale is a much more of a thicker leaf and doesn't wilt as easily or get soggy.. For me, this salad is the perfect thing, because I work all day and have classes during the evening, so its easy to take with me for dinner during night class. 

    Ingredients: 

    1/2 red onion
    Cherry tomatoes
    Cucumber (optional) 
    1/2 c. chick peas
    Kalamata olives
    Red bell pepper
    Lemon
    Olive Oil

    Dressing: 
    Hummus
    1/2 lemon juiced
    Garlic - minced
    1 or 2 tbsp of water

    Directions: 

    1. Sauté in a skillet over medium heat the red bell pepper in 1 Tbsp of olive oil until slightly softened. 
    2. Add the kale to a large bowl and add lemon juice and olive oil. Use hands to massage the kale to break down its texture and bitterness. 
    3. Add the chick peas, cucumbers, olives, cherry tomatoes, and onions to the salad. 
    4. For the dressing, combine the hummus, minced garlic, lemon juice and water together. Add salt and pepper for taste.